Tag Archives: The Raincatcher’s Garden

Monarchs Tagged in Butterfly Garden at Raincatcher’s

October is peak migration month for millions of Monarchs flying through the “Texas funnel” to overwinter in their ancestral roosts in Michoacan, Mexico. As the Monarchs flutter through the Raincatcher’s Garden, we have also had another visitor— one with a butterfly net.

monarch-tagging-ellen

Master Naturalist Ellen Guiling frequently visits the butterfly garden to capture and tag Monarchs. Ellen hovers by the Greg’s Mistflower, then her butterfly net swooshes and snaps to flip the net sock around the circle of the rim to prevent the butterfly’s escape. She gently folds the Monarch’s wings closed in the net then reaches in to hold the butterfly’s body and remove it.  It takes seconds to press a Monarch Watch tag on the discal cell, a spot on the middle of the lower wing.

monarch-tagging

She quickly checks the sex of the captured Monarch. Two small black dots on the veins of the lower wings signal that this male with his pheromone sacks is probably quite the favorite with the lady Monarchs.  Released into the intense October skies, the Monarch flutters back to the Greg’s Mistflower, ready for his trip south.

Male Monarch-see the spots!

Male Monarch-see the spots!

Ellen has tagged about 40 Monarchs this fall at Raincatcher’s.  After recording the date, location and complete tag numbers with other information, Ellen will send her data sheet to Monarch Watch at monarchwatch.org, the organization that helps create, conserve and protect Monarch habitats.   Tagging data by volunteers has been critical in mapping Monarch migration patterns. Scientists study the tagging results to answer unanswered questions about Monarch migration, such as whether migration is influenced by the weather and if there are differences in migration from year to year.

Elizabeth

Pictures by Starla

More about Monarchs:

A Monarch Pit Stop

Butterfly Migration

Butterflies at the Raincatcher’s Garden

Dallas Butterflies


Pomegranates at The Raincatcher’s Garden

The orchard was one of the first things planned when we started up at Raincatcher’s garden of Midway Hills.   Six different trees were chosen and then planted in  January 2015.  Most of these were purchased, but the pomegranate was brought over from our previous location. One of the things about planning and planting an orchard is to realize that it usually takes 3 years for the trees to bear fruit.  So we planted, pruned, and then waited.   The first season was as expected – we could see the growth pattern of the different trees, but there was no fruit.

Our Very Own Pom Transplant

Our Very Own Pom Transplant

The winter came, and the trees lost their leaves and once again we waited till early February – and we pruned according to the type of tree – pears wrap around and grow vertically, while plums and peaches are pruned to a bowl type shape.

The last 2, persimmon and pomegranate, are more shrub-like and were not touched by the pruners.   They were about 2-3 feet tall at this time.

By March new growth was appearing and the effects of pruning was taking shape — a few blossoms appeared on the plums and peaches, but fruit did not follow. The pomegranate, however, was a different story – it began to grow, — and then blossoms appeared in March and April with this beautiful orange bud which then became a flower – the bees came to pollinate ,  and then fruit started to form.  The shrub is now over 5 feet tall and is laden with beautiful orangey pomegranates  -Yes  it’s only the second year, but we will have pomegranates in the late Fall.

Pomegranate Flowers Followed by Fruit

Pomegranate Flowers Followed by Fruit

Pomegranates are ready to harvest about 6 months after the flowers appear, so come later October or November our pomegranates will be ready. They should be the size of an orange and the color will vary from yellow to bright red.     We are looking forward to  celebrating this harvest by making some pomegranate jelly !

Pomegranates Ripening!

Pomegranates Ripening!

Starla

Orchard beginnings here.

Gardening By The Yard

2016 FALL GARDENING SERIES

9:00 AM – NOON

  Raincatcher’s Garden Midway Hills Christian Church

 11001 Midway Road, Dallas, TX 75229

Cost: $15.00/session or $60/for all 5 sessions


July 23        Fall Into Gardening

Stephen Hudkins, County Extension Agent/Horticulture Texas A&M AgriLife Extension, Dallas County

  • Establishing the raised bed garden- construction, soil, irrigation
  • Square foot garden design
  • Selecting the vegetable varieties
  • Planting dates for successful fall harvest

August 6     Water Conservation in the Home Landscape

Dr. Dotty Woodson, Extension Program Specialist – Water Resources Texas A&M AgriLife Extension Service

  • Rain Water Harvesting – Rain barrels and cisterns
  • Drip irrigation for landscape beds
  • Calculating needs and programming your lawn sprinkler system


August 20            The Earth-Kind® WaterWise Landscape

  • Dr. Steve George, Extension Horticultural Specialist Texas A&M AgriLife Extension Service
  • Fall is the best time to plant shrubs and trees in your landscape. Come and learn what are the best proven Earth-Kind® plants to have in your landscape that will stand up to the tough soil and weather conditions that we have in the Dallas Metro area.

September 3                   Establishing a Backyard Vineyard

Michael Cook, Viticulture Specialist, Texas A&M AgriLife Extension Service

Come and learn the art of backyard viticulture production

  • When do I plant
  • What varieties are best for our area
  • What soil conditions do I need
  • What about frost
  • What do I need to have for support
  • When do I get to have my first glass of wine from my grapes

September 17       Healthy Home Lawns

                   Stephen Hudkins, County Extension Agent/Horticulture Texas A&M AgriLife Extension Service, Dallas County

    • Fall maintenance- fertilization, aireation, weed, insect and disease control
    • Maintaining the lawn during the winter
    • The pros and cons of over-seeding
  • You will also have the opportunity to see five turf grass types which are growing in the demonstration plots as well as view the drip irrigation system that has been installed under each plot.

Reservations not required, pay at the door. Master Gardeners can receive CEU credit. Public is welcome!

Revised Onion Harvesting at The Raincatcher’s Garden 2016

Onions have been harvested at the garden during the last two weeks.

They are now drying in our storage shed.

Fantastic Haul of Onions!

Fantastic Haul of Onions!

Harvest Onions when the tops begin to naturally fall over and turn brown. Dig the onions from the ground up with tops intact and to keep the bulb from being damaged. We used a garden knife or trowel to get them out of the ground carefully.  Onions that have bolted are past their prime and can be left to reseed.

As a reminder, here’s how to braid onions:

and here are notes on storing, eating, and lots of other onion thoughts in these articles: The Lowly Onion and Beginnings

Ann


A Bright Spot in the Early Spring Garden

copper canyon daisy As with many plants, Tagetes lemmonii is known by so many common names (Copper Canyon Daisy, Mexican Bush Marigold, Mountain Marigold, Mount Lemmon Marigold, tangerine-scented marigold, and Perennial Marigold) that it is almost easier to refer to it by its Latin nomenclature.  Yet even its Latin name has a fascinating story behind it.

Tagetes lemmonii is native to the high mountain canyons of northwestern Mexico and southern Arizona.  A finely leafed plant with a very distinctive aroma often described as minty and fruity, lemon and tarragon, or (for some people) just plain “Yuck,” it can grow to a size of four to six feet tall and can spread to six to ten feet.  It can be sheared back however.  It grows best in full sun in well drained soil. It can be grown in part shade, though it may get leggy and have fewer blooms.  Once established it needs little to no supplemental watering.  If grown in an area where deer are a problem, deer will definitely avoid it.  However pollinators, including yellow sulpher butterflies and beneficial insects, are drawn to it.

T, lemmonii is considered to be photosensitive and blooms with bright yellow daisy-like flowers in the fall, winter and early spring when the daylight hours are shorter.  In mild winters, it provides a welcome bright spot in the garden since the flowers can last for quite a while.  However in colder winters, it will sometimes die back to the ground but return in the spring.

Though I always thought that its Latin name lemmonii came from its strong citrus/lemon aroma, a Google search from San Marcos Growers (smgrowers.com) reveals otherwise:  “This plant was discovered in southeastern Arizona, by the early plant collectors, self taught field botanists, and husband and wife, John (1832-1908) and Sara (1836 – 1923) Lemmon. These two incredible people met in Santa Barbara, California, where Sara Allen Plummer lived, in 1876 when she attended a lecture given by John, who at the time was the California State Board of Forestry Botanist. They married in 1880 and botanized throughout the southwest and in the process discovered over 150 new plants including an unknown species of Tagetes, from which they sent seed to Asa Gray at Harvard University, who then named the plant to honor them. Sara and John also climbed the highest mountain in the Catalina Mountains near Tucson, which is now called Mount Lemmon reportedly because Sara Lemmon was the first woman to climb it. Both authored books and articles which Sara often illustrated and she was instrumental in the efforts to name Eschscholzia californica as the official California State Flower, as it was done officially by Governor George Pardee in 1903. The Lemmons established plants of Tagetes lemmonii in their garden in Oakland, California and progeny of these plants were introduced to the nursery trade in southern California, and England by the early 1900’s.”

copper canyon daisy top downThere is one word of caution when pruning or working with Tagetes lemmonii. Some people are extremely sensitive to the oils in the leaves and can develop a painful, itchy rash when their skin is exposed to sunlight. Sometimes this rash can continue for several days. Therefore it might be best not to plant Tagetes lemmonii where it can be brushed against, be sure and wear gloves and long sleeves when working with it, or at least wash your skin well with soap and water after handling.

Carolyn

Picture by Roseann from Texas Discovery Garden.

My Garden Journey

In my first five years as a Dallas County Master Gardener (class of 2011), I have learned and experienced so much from working at our demonstration gardens; however, I had never attempted growing vegetables at home except in pots until this past fall when I saw sunlight streaming in a section of the backyard after a tree had been removed.

So this new adventure began – raised beds were found, plants were purchased and the garden grew – well some of it grew…

Brocolli by Starla
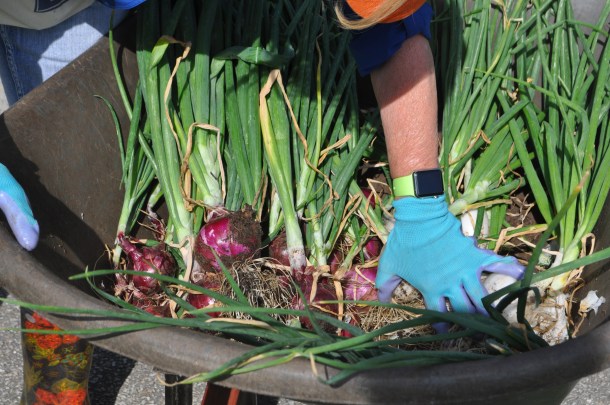
Broccoli and cabbage went in first along with a few herbs, followed by lettuce and arugula in October. I had some success with broccoli, but not so much with the cabbage, lettuce or arugula ( they bolted). Radishes and carrots were planted from seeds. After the first of the year onions were added and then potatoes came and went (I had the wrong soil, so they never sprouted).  There was minimal success with the radishes (not properly thinned), but the carrots – I waited, looking for a glimpse of the carrots(roots)? under the leafy tops — until right before Mother’s day, and then I pulled them. Once again the results were mixed;  I had a range of carrots from 1/4 inch to over 6-7 inches long  and counted 26 of the prettiest multicolored carrots I have ever grown.

Homegrown Carrots

Homegrown Carrots

This summer I’m trying things that we will eat as a family – tomatoes, peas, green beans , peppers. I have a space for cucumbers with hopes to make pickles like my family put up years ago.  My beds are few in number but just right for my learning curve. You can take this journey. it takes some planning, a little time and patience, but is well worth the effort.

Here are a few of the things I’ve gleaned from my raised beds:

  • Gardening with a group of people brings a broader depth of expertise
  • Information—ask questions, listen and apply–repeat.
  • Realize early on that everything won’t go according to plans. Don’t dwell on failures, but learn from them  — water properly, use the correct soil, compost, mulch, weed…
  • Celebrate success, no matter how small–they are victories!
  • Try new things, take notes (my garden journal currently has one entry, several months back, but there is value in the process)
  • Trial and error is another way of learning
  • Share your story, your experience, and the fruit of your labor —
  • Enjoy the adventure!

Starla


Redbud Trees Planted by Dallas County Master Gardener Eric!


Artichokes, Aphids, and Groceries At Raincatcher’s Garden

Root around our garden this spring and you will find groceries growing like crazy.

Here’s what is planted in some of our beds.

Raised Beds:

Bed 2-Sungold, Purple Cherokee, Sugary Hybrid, Celebrity, Marianna’s Peace Tomatoes and Carmen Sweet Peppers

Bed 3-Red and Green Lettuces and Onions

Bed 8-Potatoes and Clemson Spineless Okra

Bed-9 Artichokes, Gourmet Blend Beets, and  Sugar Snap Peas

Other Beds-variety of vegetables planted by and grown for our visiting school kids

In Ground Veggie Bed-Celebrity Tomatoes, Giant Jalapeño, Habanero Pepper, Ichiban Eggplant, and Black Beauty

May I recommend the Sugar Snap Peas for munching straight off the vine!

Sugar Snap Peas at The Raincatcher's Garden

Sugar Snap Peas at The Raincatcher’s Garden

Aphids and Ladybugs are also eating their way through our garden. Ladybugs  seem to be winning as explained in this video:

Ann

Video by Starla

Artichokes by Dorothy

Oh, and if you have an answer to Dorothy’s question about stink bugs, please leave your answer in the comments section below.

Orphaned No More – Our Incredible Edible Landscape Project

Here at Raincatcher’s, we have a wide variety of demonstration gardens spread all around: we have an orchard, raised vegetable beds, ornamental trees, five types of turf, butterfly gardens, compost demonstrations and even a mixed ornamental bed in the courtyard. But there is one, last, orphaned space; it’s known as the old playground, and in some ways, it’s the church’s secondary entrance.  Which means it’s a very visible space that most people walk past and all cars drive by.  Wrapped in cyclone fencing, the playground was deemed ‘unsafe’ by regulatory agencies, and had been sitting unused when we moved to the church from Joe Field, the location of our previous garden.  We initially used the old playground as storage for all the plants, soil, and other large objects we brought over during our move. Then we disassembled the playground equipment and put it aside, in case we might be able to use it for another purpose.

Playground "Before" Transformation

Playground “Before” Transformation

A year has gone by. The gardens have been installed.  The plants, soil, and other large objects have been moved into their new homes, and it became clear that the playground parts were not going to be needed.  We removed them, and what was left inside the cyclone fence was a greenhouse, the air conditioning mechanism for the church, a couple of compost bins, a chicken coop, mature trees, and the frame for the old swing set.  When you step back from that, you realize that the space is reminiscent of what most homeowners have in their own yards:  some nice things, some not so nice things, a fair amount of shade, some sun.

What it’s inspired us to do is play. (The space was a playground, after all!)  We’re going to be experimenting in this, last, garden, but we’ll be experimenting with a purpose.  Over the next year(s?), we’ll be installing an edible landscape in this space, this crowded, pre-owned space with some sun and a fair amount of shade.  We’ll be designing around our obstacles, turning them into features, and we’ll make the shade our ally instead of our adversary.  We’ll be showing off all sorts of different techniques from hugelkultur to vertical gardening to straw bales to edible flower beds.  Some will be raised, some will be inground; everything will be edible.  There will be some new crops, variations on common crops, and some old crops with new parts to eat.  And so in addition to growing these foods, we’ll also show you how to prepare and eat them.

Why are we going to do this? Because this space has so many similarities to the average homeowner’s yard, it’s a perfect teaching and demonstration tool, and teaching is our mission.  Why do it as an all-edible landscape?  Because there are many examples of ornamental landscaping, and plenty of examples of edible gardening, but there are not as many of edible landscaping.  We’re doing this because people are becoming interested in growing at least some of their food, but are often concerned that it won’t look good, or they can’t because they have too much shade.  This old playground gives us the opportunity to show everyone how they can create a beautiful landscape with edibles.

How are we going to do this? We’re going to do this in stages.  First, we’re going to start with the hardscape.  One of the biggest concerns people have about landscaping with edibles is the aesthetics – whether it’s an overgrown tomato plant, or the fallow season (too hot, too cold to grow edibles) for their climate.  To have a beautiful edible landscape, the first thing you need to do is make sure the landscape looks good before any plants are planted.  Plants (crops) are the ornamentation on top of a good looking base structure, your hardscape.  After all, there will be times when you may not have plants in your landscape; you might have had a crop failure, or have just harvested dinner!

In our next post, we’ll talk about hardscape ‘rules’, and show you how we’ll be incorporating them into our landscape.

Come along and follow our adventures – celebrate with our successes, and learn from our failures!

The Incredible Edible Landscape Team

Lila Rose

Picture by Starla

Note: Lila Rose will be speaking at the Whole Foods at Preston Forest soon about Edible Landscaping. Will add date to this post, so check back with us.

Bletilla striata, Chinese Ground Orchid

Bletilla striata, the easy to grow, terrestial orchid belongs in your garden.

Plant these bulbs in dappled shade and moist, but well drained soil. Add mulch. Although Chinese Ground Orchids are easily cared for and somewhat drought tolerant, they will not flourish in dry conditions so try to water before they become dry.

bletillastriata

The blooms come in several shades of lavender, hot pink, yellow, and white. Each stem can have as many as 10 blooms!

After the flowers collapse, Dr. Dotty Woodson suggests cutting the seed pods off  because they don’t naturally germinate in our climate but will germinate in a laboratory situation. Remember our trip to Dotty’s orchid greenhouse?

If you are curious, throw the seeds in one of your pots to see if you can get them to grow and if they do, let us know.

The good news is they will multiply vegetatively,  so expect ever increasing clumps.

Have I mentioned the pleasing foliage?  It is longitudinally pleated  or striated; growing  upright about 1 1/2 feet high.  A variegated form can be found, that Dotty says is awfully pretty. In our climate, the foliage is deciduous.

The lavender Bletilla striata blooming in our spring garden and pictured a few days ago came from Jim.

And on a serendipitous note;  while some of our gardeners were on a scavenger dig, they potted up several mystery bulbs. Now that the bulbs are at our garden, some think it could be another stash of Chinese Ground Orchids!

Ann