Category Archives: Vegetable Gardening in Dallas

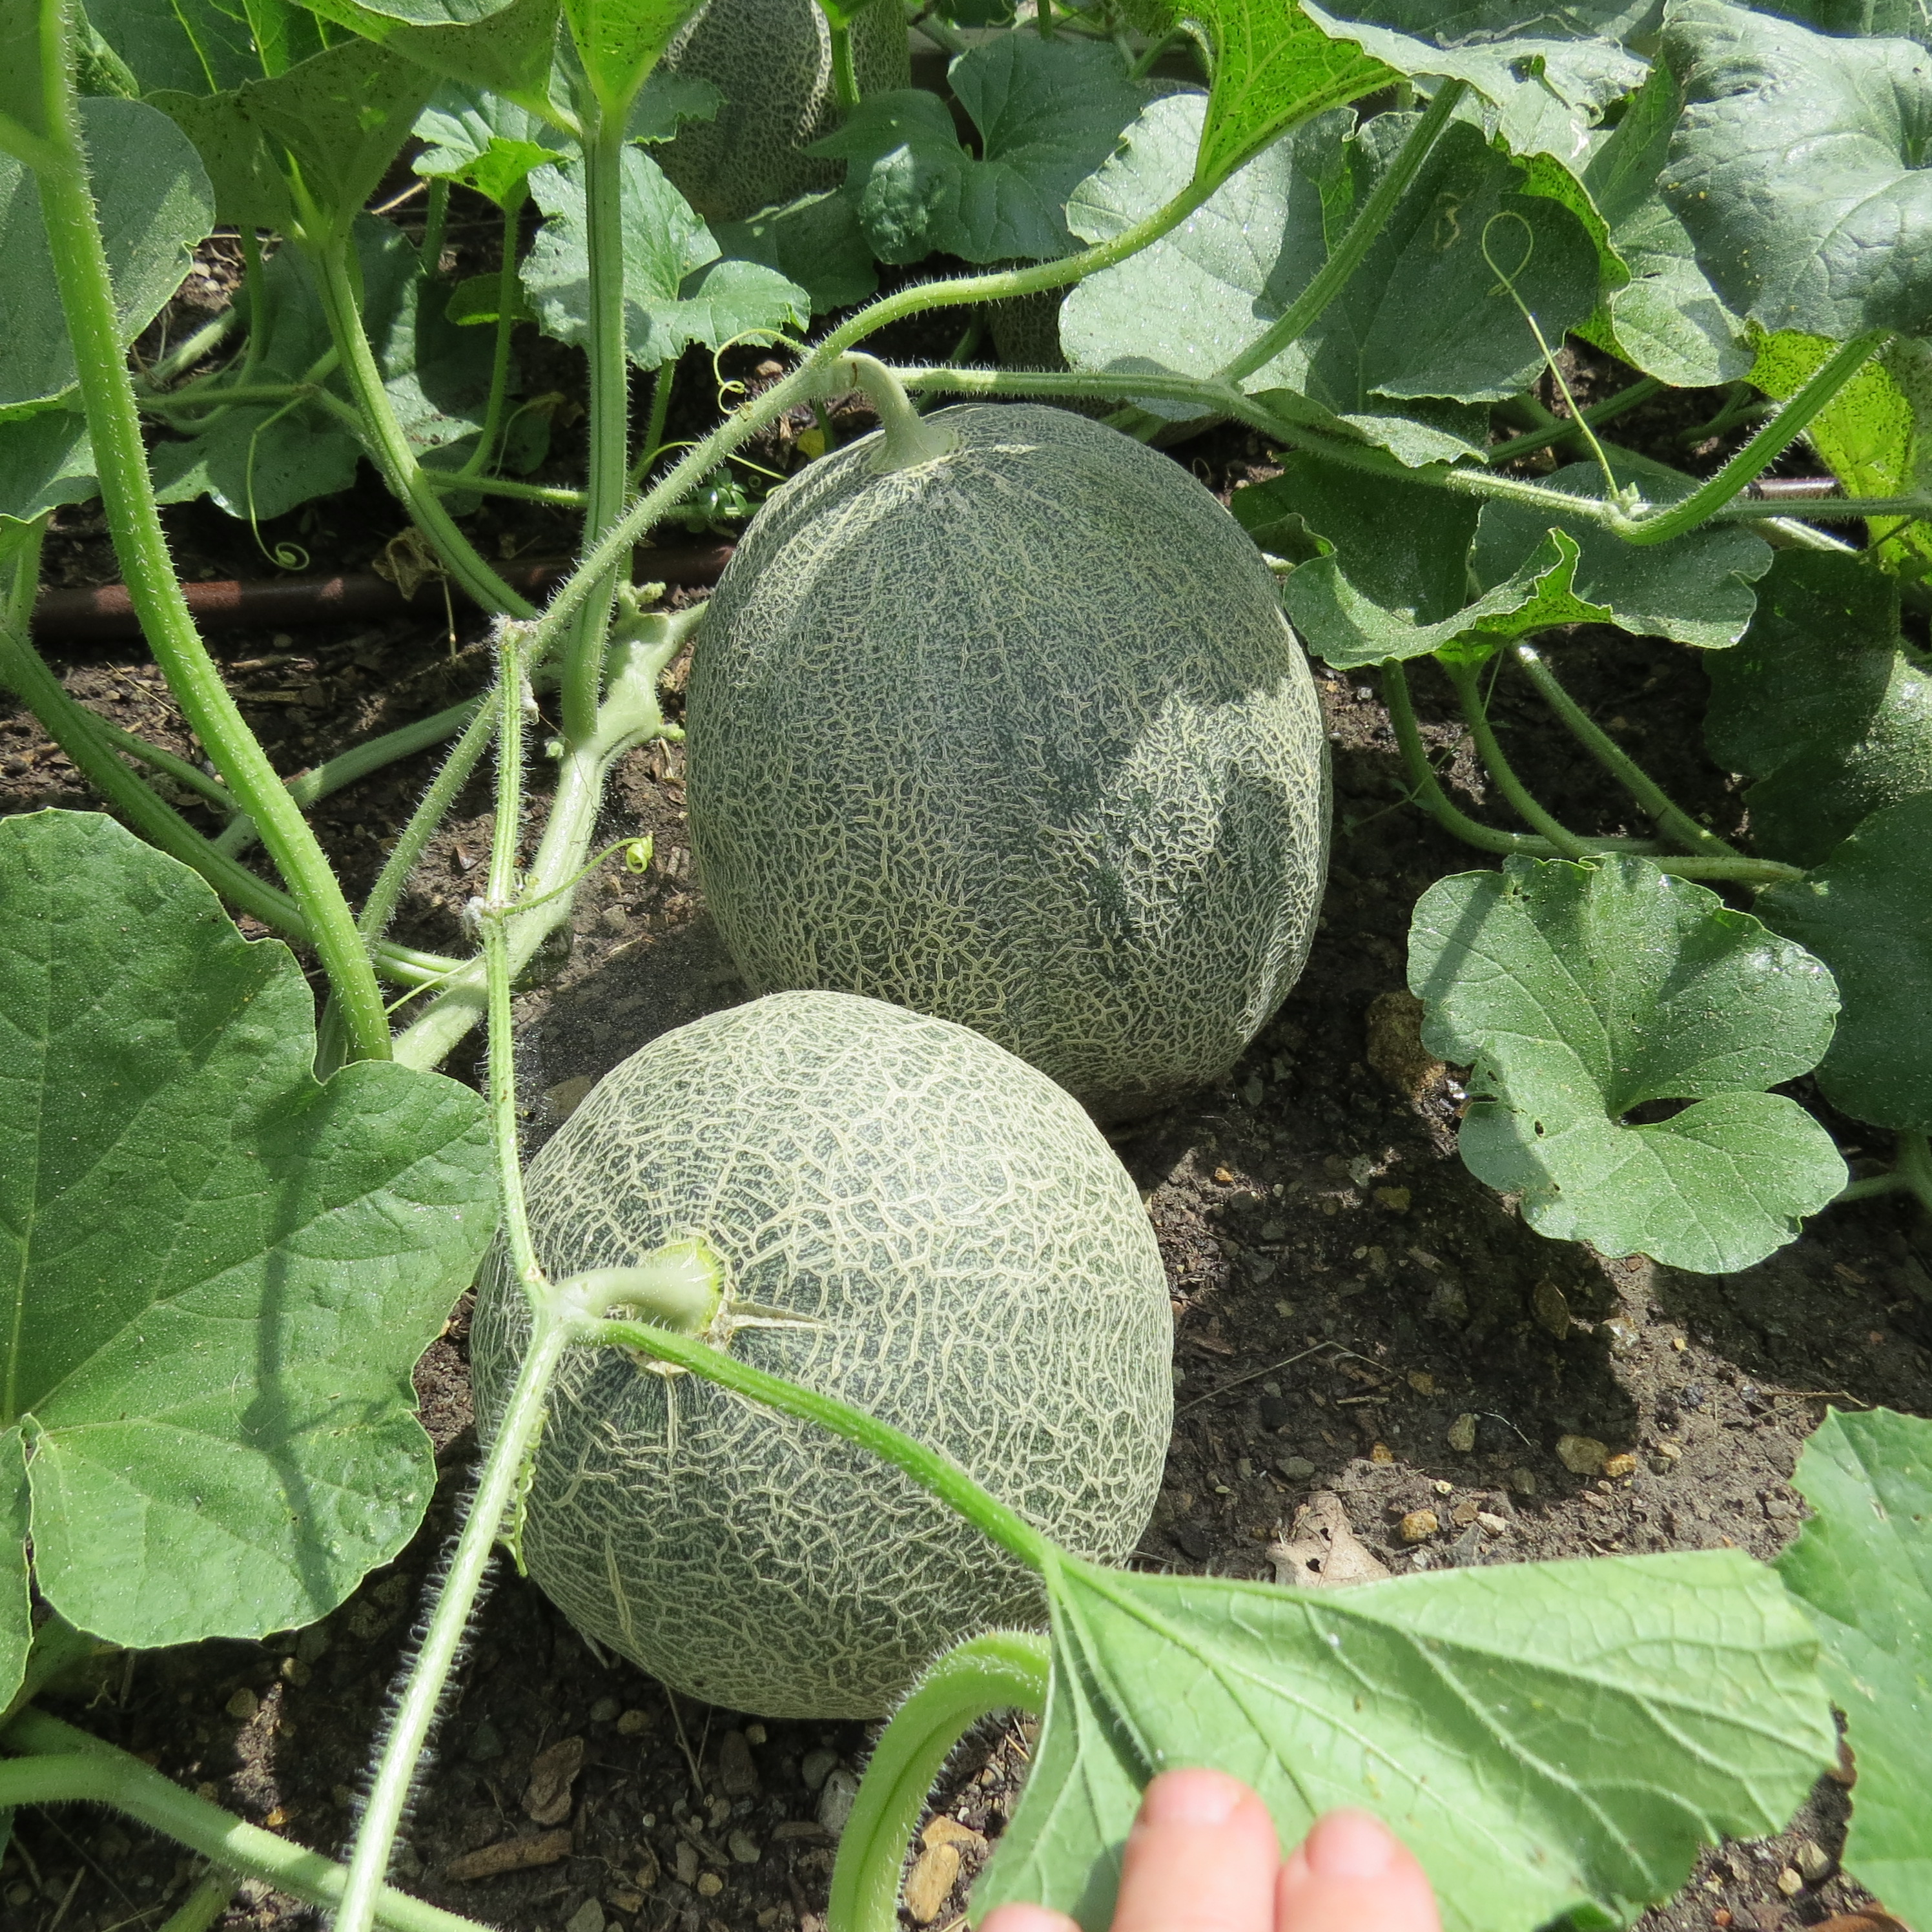
Cantaloupe Harvest

Most of us  believe you reap what you sow. We diligently follow  gardening advice and planting dates, prepare the soil, pray for rain, and then we hope!   This year we are enjoying a bounty of cantaloupes; 17 have been counted in one of our  raised beds.  Last year we had what Jim refers to as “insect activity” and not many cantaloupes.

Cantaloupe in the Garden

The variety we planted is Ambrosia.  If you will look on the right hand side of our blog, you will find our Garden Journal with all the details of our veggie gardening.

The Joys and sorrows of our garden experiment are recorded there.

The Cantaloupe was planted May 26th and will be eaten all through August.  When all the Cantaloupe is gone, Jim says we will be planting bush beans.

As summer wanes and we look forward to a drop in temperature, the gardeners at our Demonstration Garden are happy to  indulge in the sweetness of homegrown cantaloupe. More Fall gardening info right here.

Cantaloupe ripe and ready to eat

Ann

Pictures by Starla

For Aggie Horticulture Cantaloupe advice: click  here.

A Better Mouse Trap?

     Ralph Waldo Emerson wrote: “Build a better mouse trap and the world will beat a path to your door.”  However, if the Garden’s potato experiments are any indication, maybe those tried and true methods for growing potatoes really do work the best.  Perhaps sometimes there really isn’t a better mouse trap, but it’s still fun to experiment.

The Garden’s January 25, 2013 blog “One Potato, Two Potato, Hopefully More”  described several different methods of growing potatoes, including the old time “trench” method, last year’s “trash can” method, and this year’s “potato bin” method.  Guess which method produced the most and largest potatoes?  Yes, it was the trench method used by generations of farmers to grow potatoes.

As you can see by the pictures, the potatoes grown in trenches in the Garden’s raised bed were larger and many more were harvested.

Our Potatoes Grown Trench Style

The potatoes grown in this year’s newly constructive bin where slats could be added to the side of the bin and filled with soil as the potato plants grew, did well, but produced smaller and fewer potatoes than those grown in trenches.

Smaller and Fewer Potatoes

One reason for this, DCMG Jim Dempsey hypothesized, might have been that the potatoes grown in the raised beds in trenches were on a drip system, while those in the slatted bin received water only once a week.

Never one to give up easily (and who knows, someone may really invent a better mouse trap), Jim said that next year the slatted bin will be moved to a place where it too can be on the drip system and receive more water. The experiment continues………

Do you have your own methods for growing potatoes?  And how did your potatoes do this year?  Let us know.  We would love to hear from you.

Carolyn

Pictures by Starla

Tomato Grafting Part II

Purpose:  To improve tomato production, some say as much as 30% by grafting a tasty tomato onto a hybrid which is disease resistant

Materials Needed:

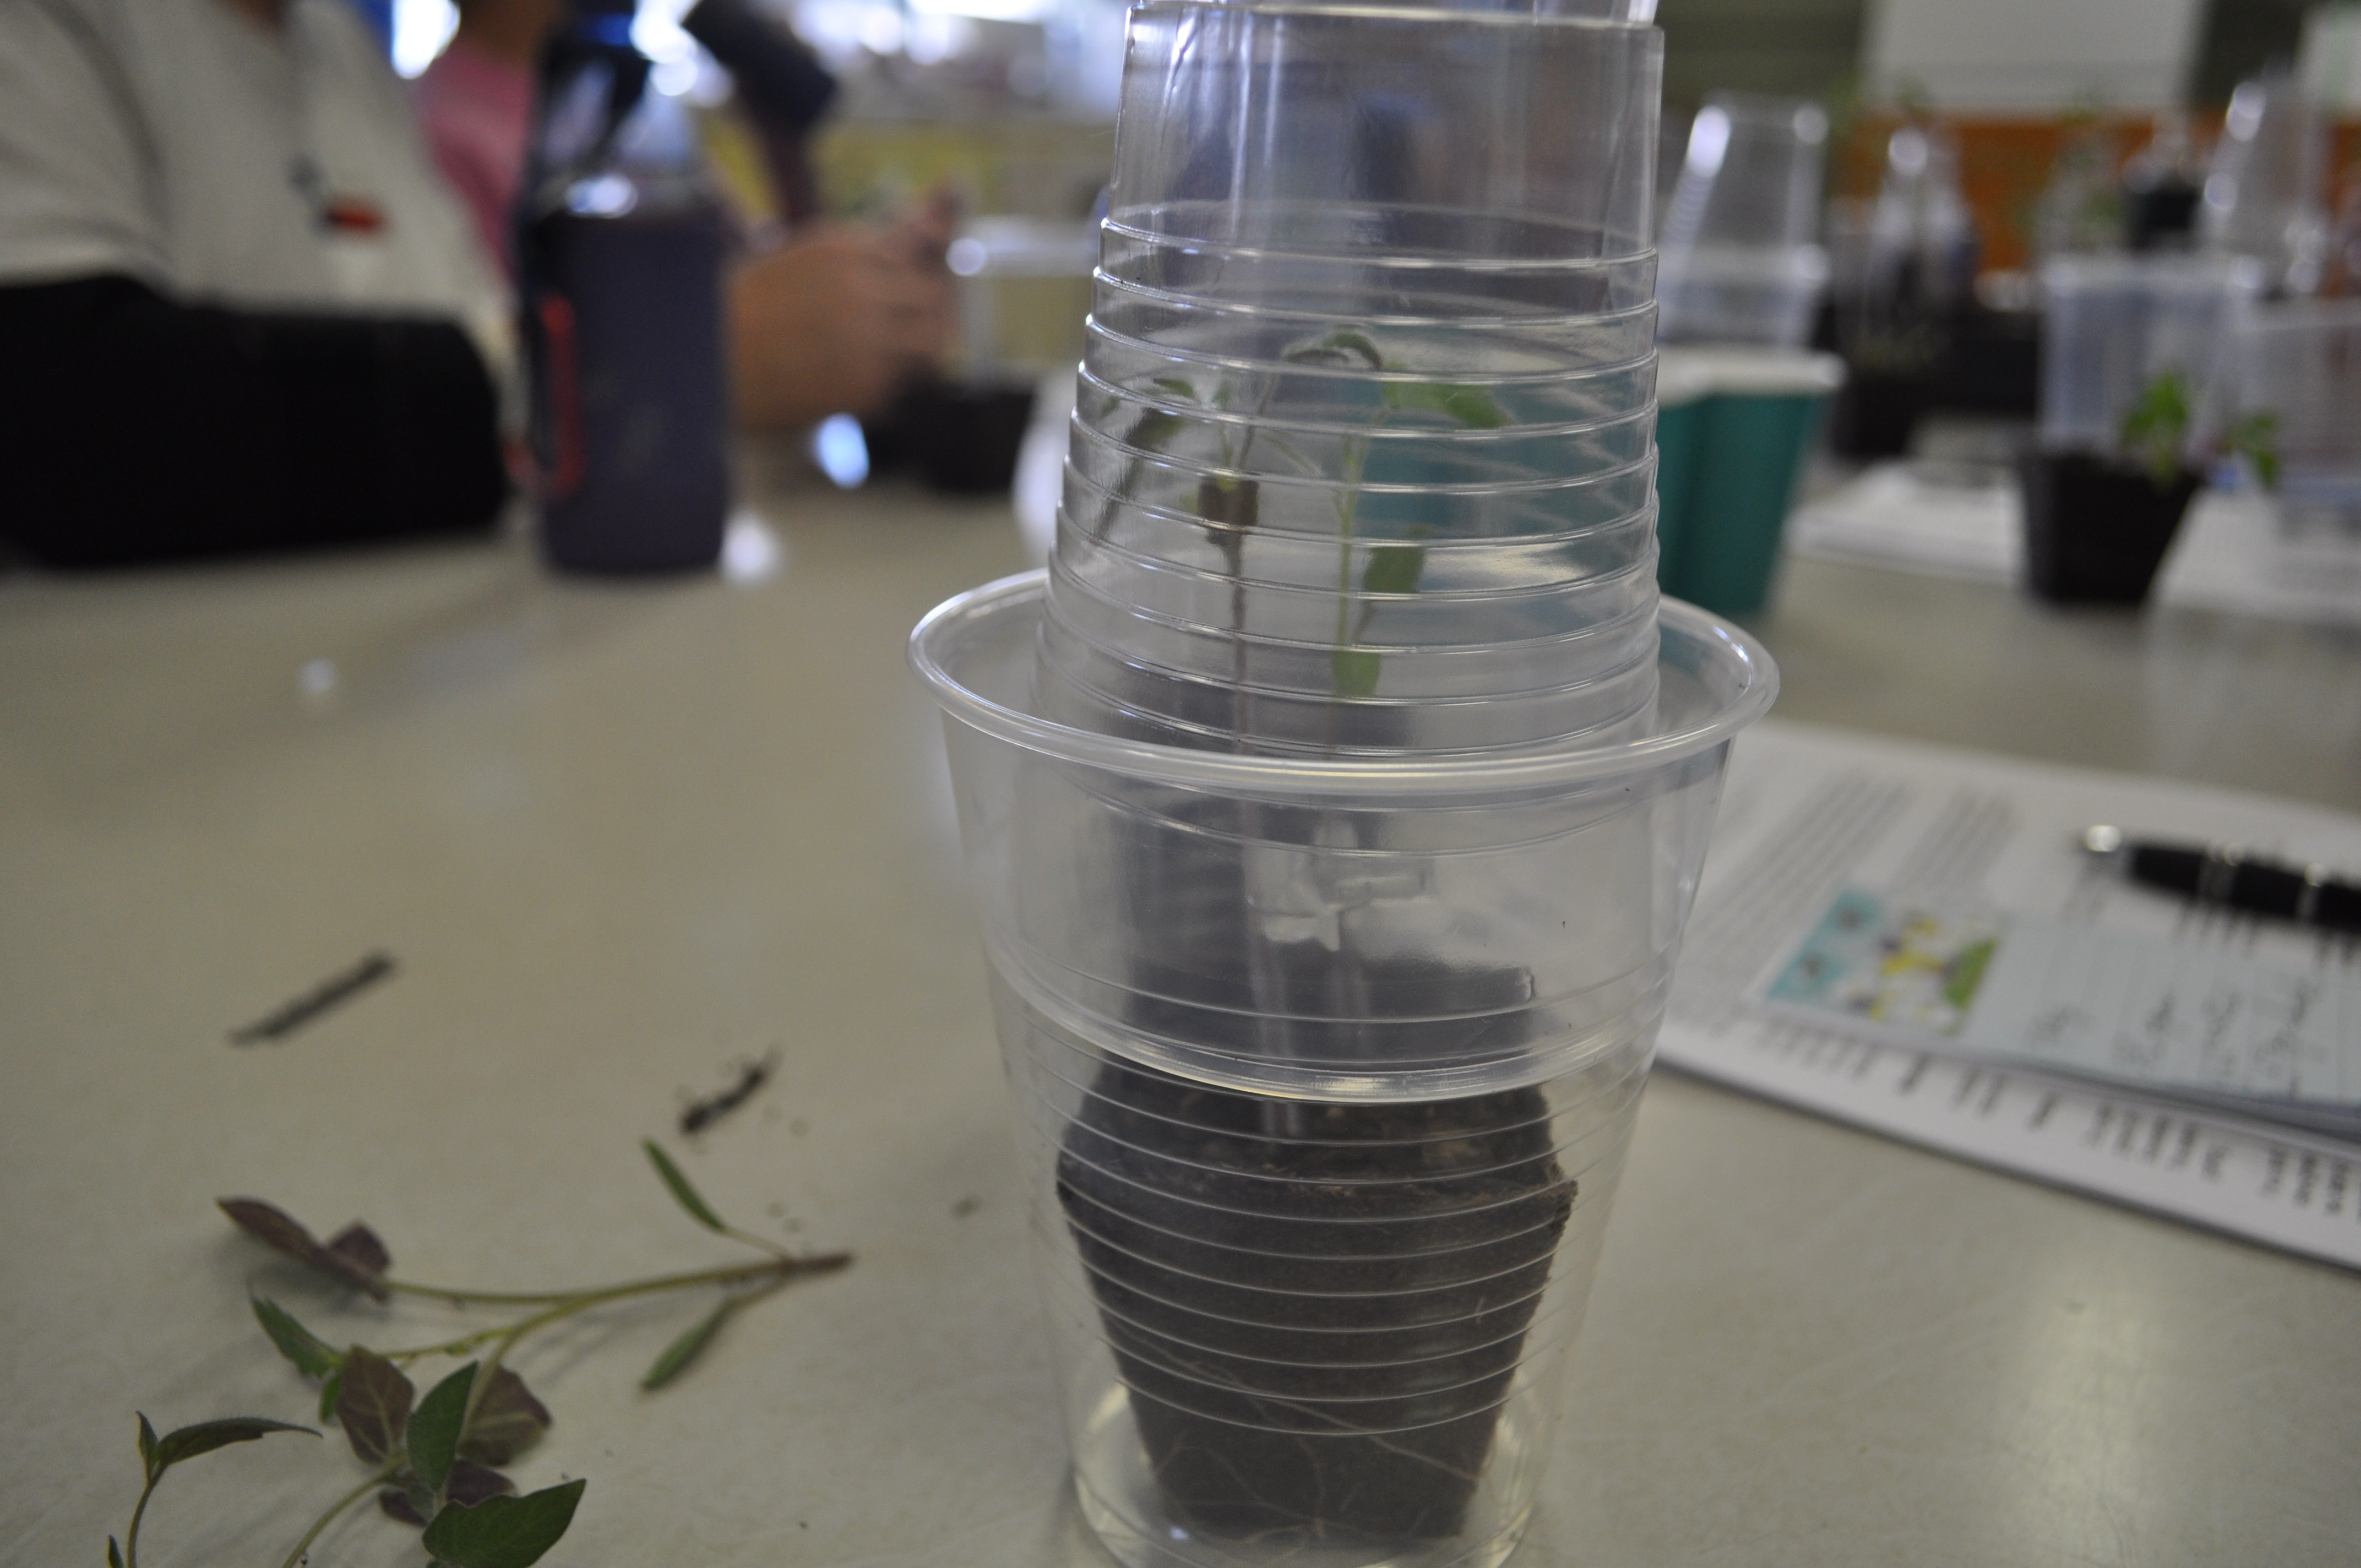
  • 2 clear plastic cups, one to fit inside the other to form the healing chamber
  • New Double edge razor blade-clean and sharp, snapped in half lengthwise while in paper cover
  • New Grafting clips-match the size of the clip to the size of your tomato stalk (Jim bought clips here)
  • Rootstock and scion seedlings of matching stem size(we used Celebrity as the rootstock and Brandywine as the scion or top)

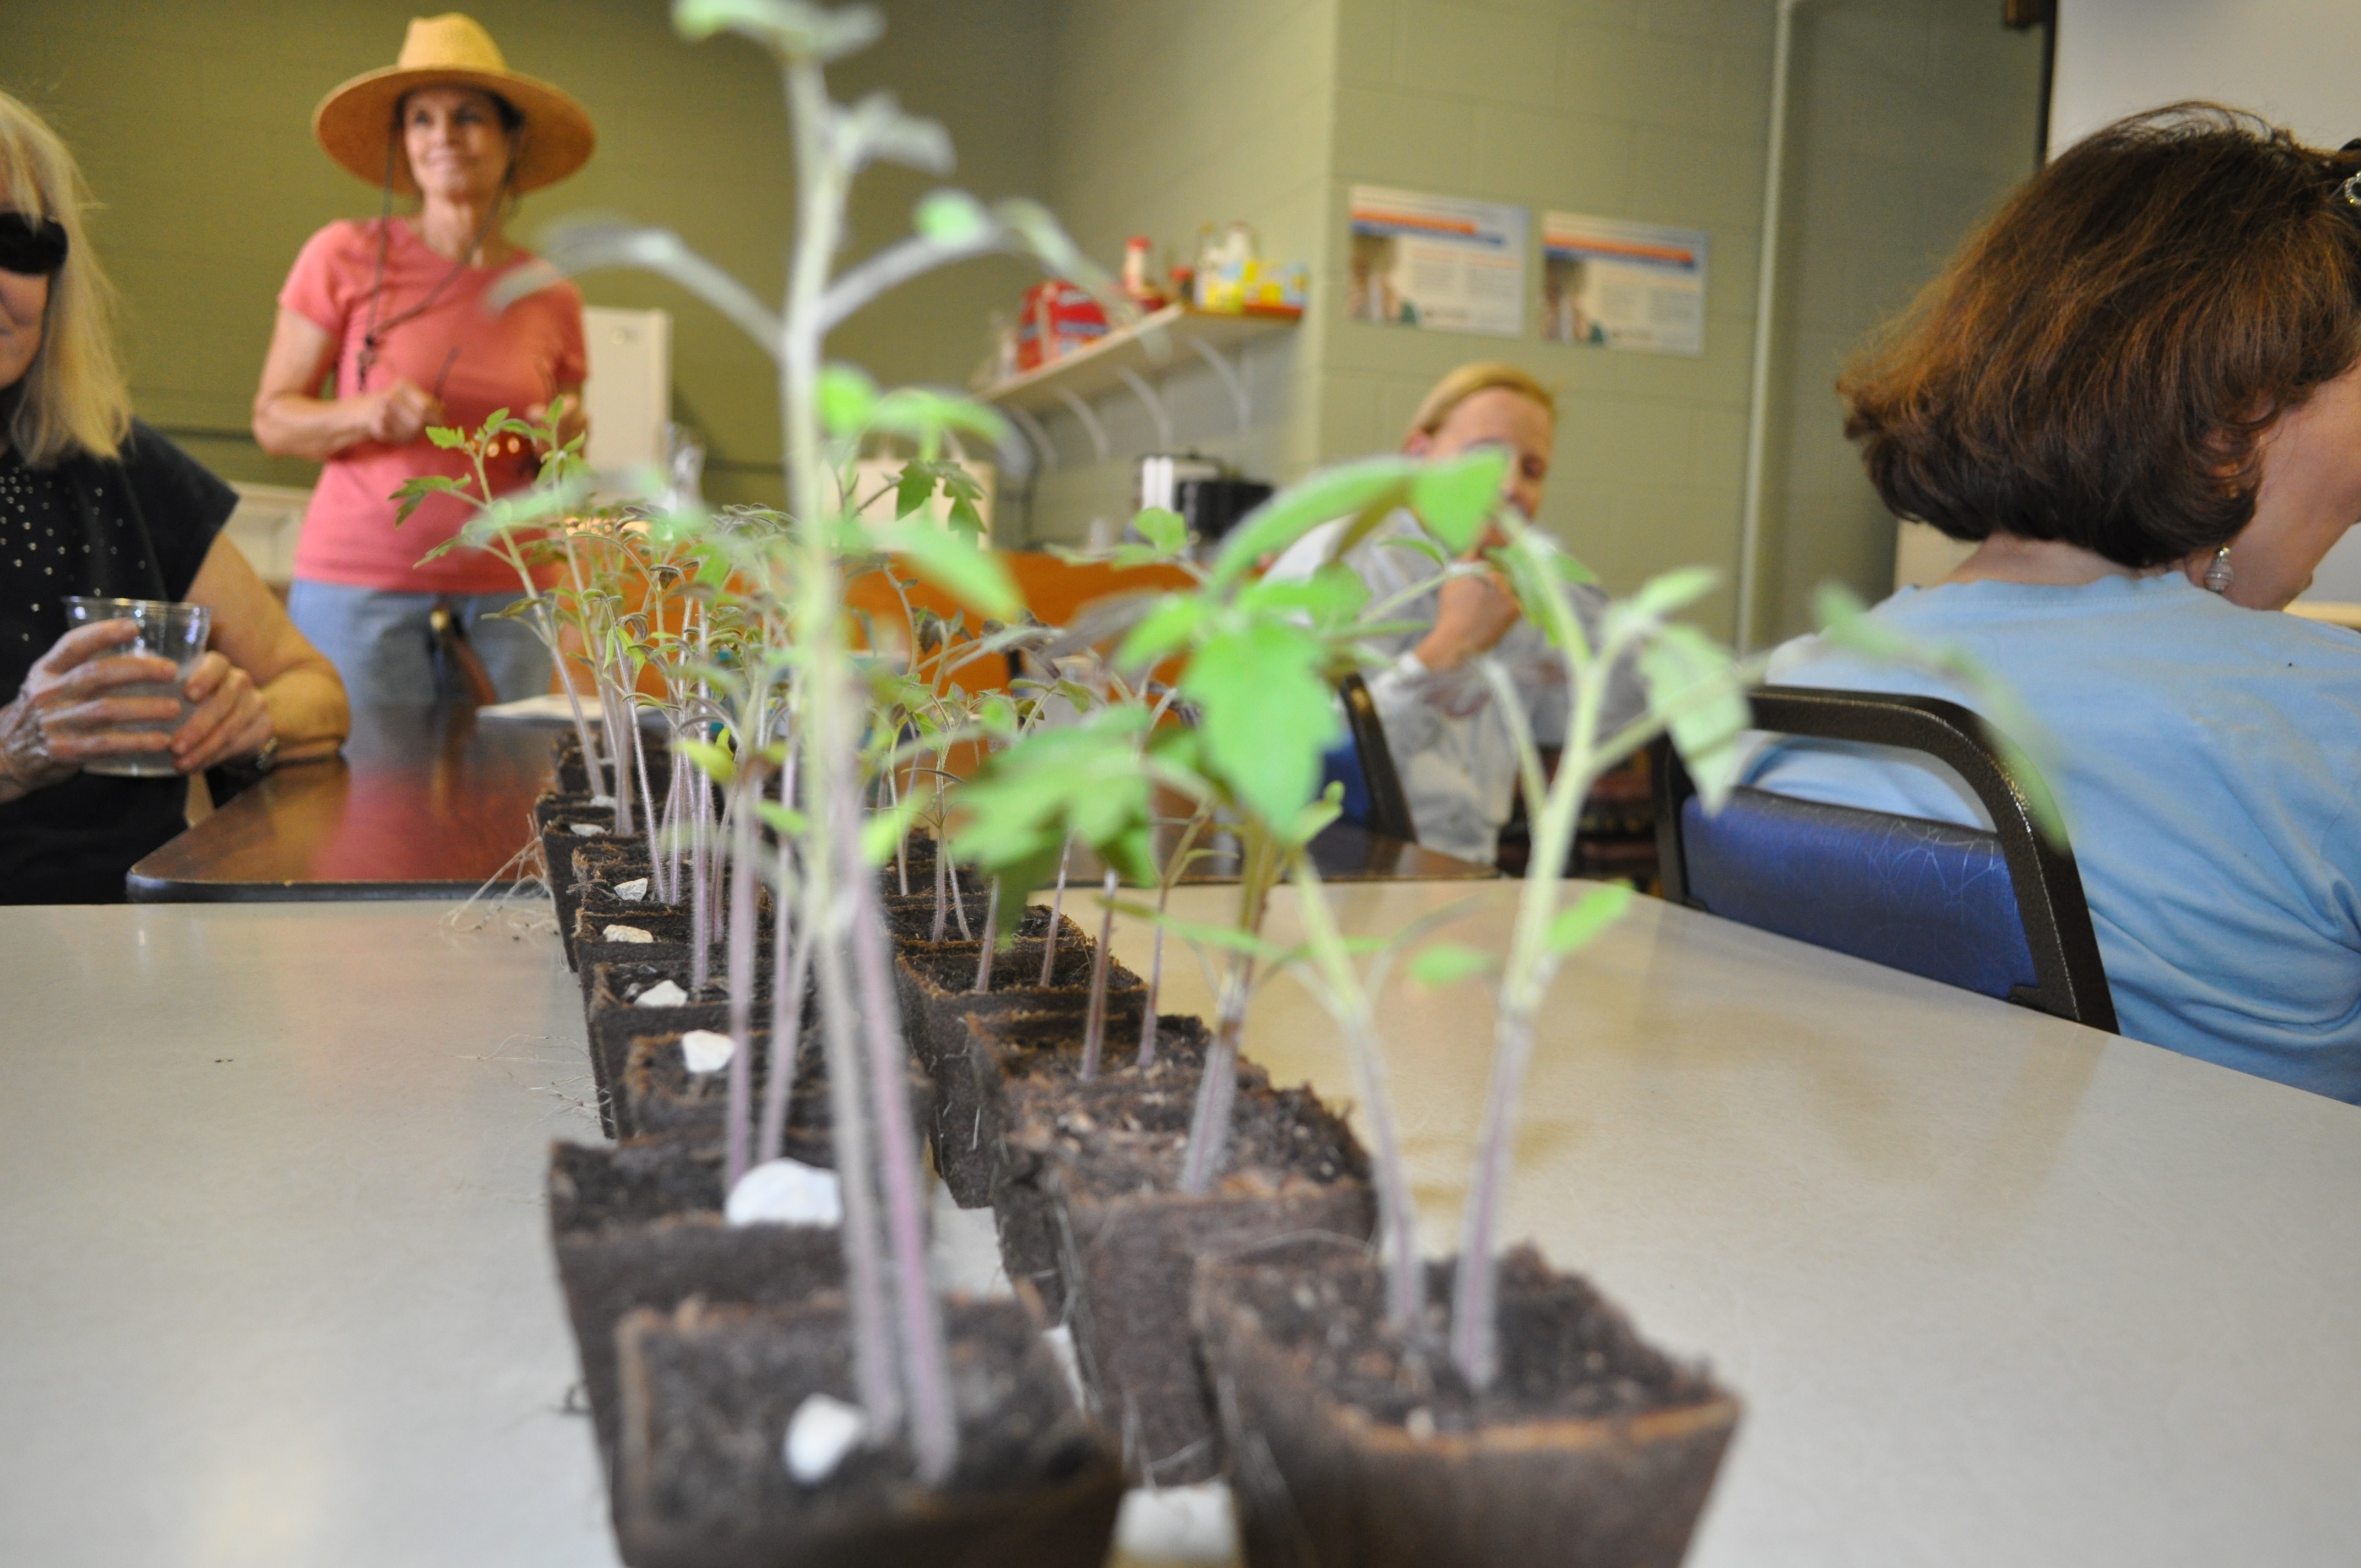
Water your plants the night before and pick a clean area indoors without direct sunlight and no fan or draft.  Tomato Seedlings Lined up for Grafting Select your seedlings. We grafted Brandywine tomatoes onto Celebrity.

Jim had 100% germination rate so we had to pick one seedling from each pot to use.  Look at the healthy roots coming out of the pot!

Tomato Seedling Ready to GraftJim suggested cutting the scion and rootstock straight across.  Remember you want matching stem size.Tomato GraftingPlace the grafting clip on the scion halfway over the cut stem, then join to the other stem so the cuts match up.

Silicon Clip on Cut Tomato Stalk

You will be able to see through the silicon clip to make sure the cut surfaces match up. Place your new grafted tomato plant in the bottom of a plastic cup, this will become the healing chamber.  Slide the smaller cup on top making sure it does not touch the leaves.

image

The plant should stay closed in the healing chamber for 3 days with no direct sunlight. Check the grafted tomato from outside.  If it wilts, open the chamber and mist or water the plant to raise the humidity level. Reclose the chamber.

4th Day-Open the healing chamber to see if the plant is moist.  Add water if needed and close.

5th Day-Make a small opening in the tunnel so some of the humidity can begin to escape.  Check frequently.  If plant wilts, close the tunnel back up, increase humidity by watering or misting and try ventilating the next day.

Don’t remove the clip. The  silicone clip will expand with the growth of the plant and eventually fall of by itself.

Let the plant grow indoors.  It will take 1-2 weeks longer to be ready to go outdoors to the tomato patch because it will have stopped growing during the healing process.

When transplanting, make the sure the graft union is above the soil line.

Thank you, Jim, for growing the plants and guiding us through the tomato grafting process!

Ann

Tomato Grafting Part 1

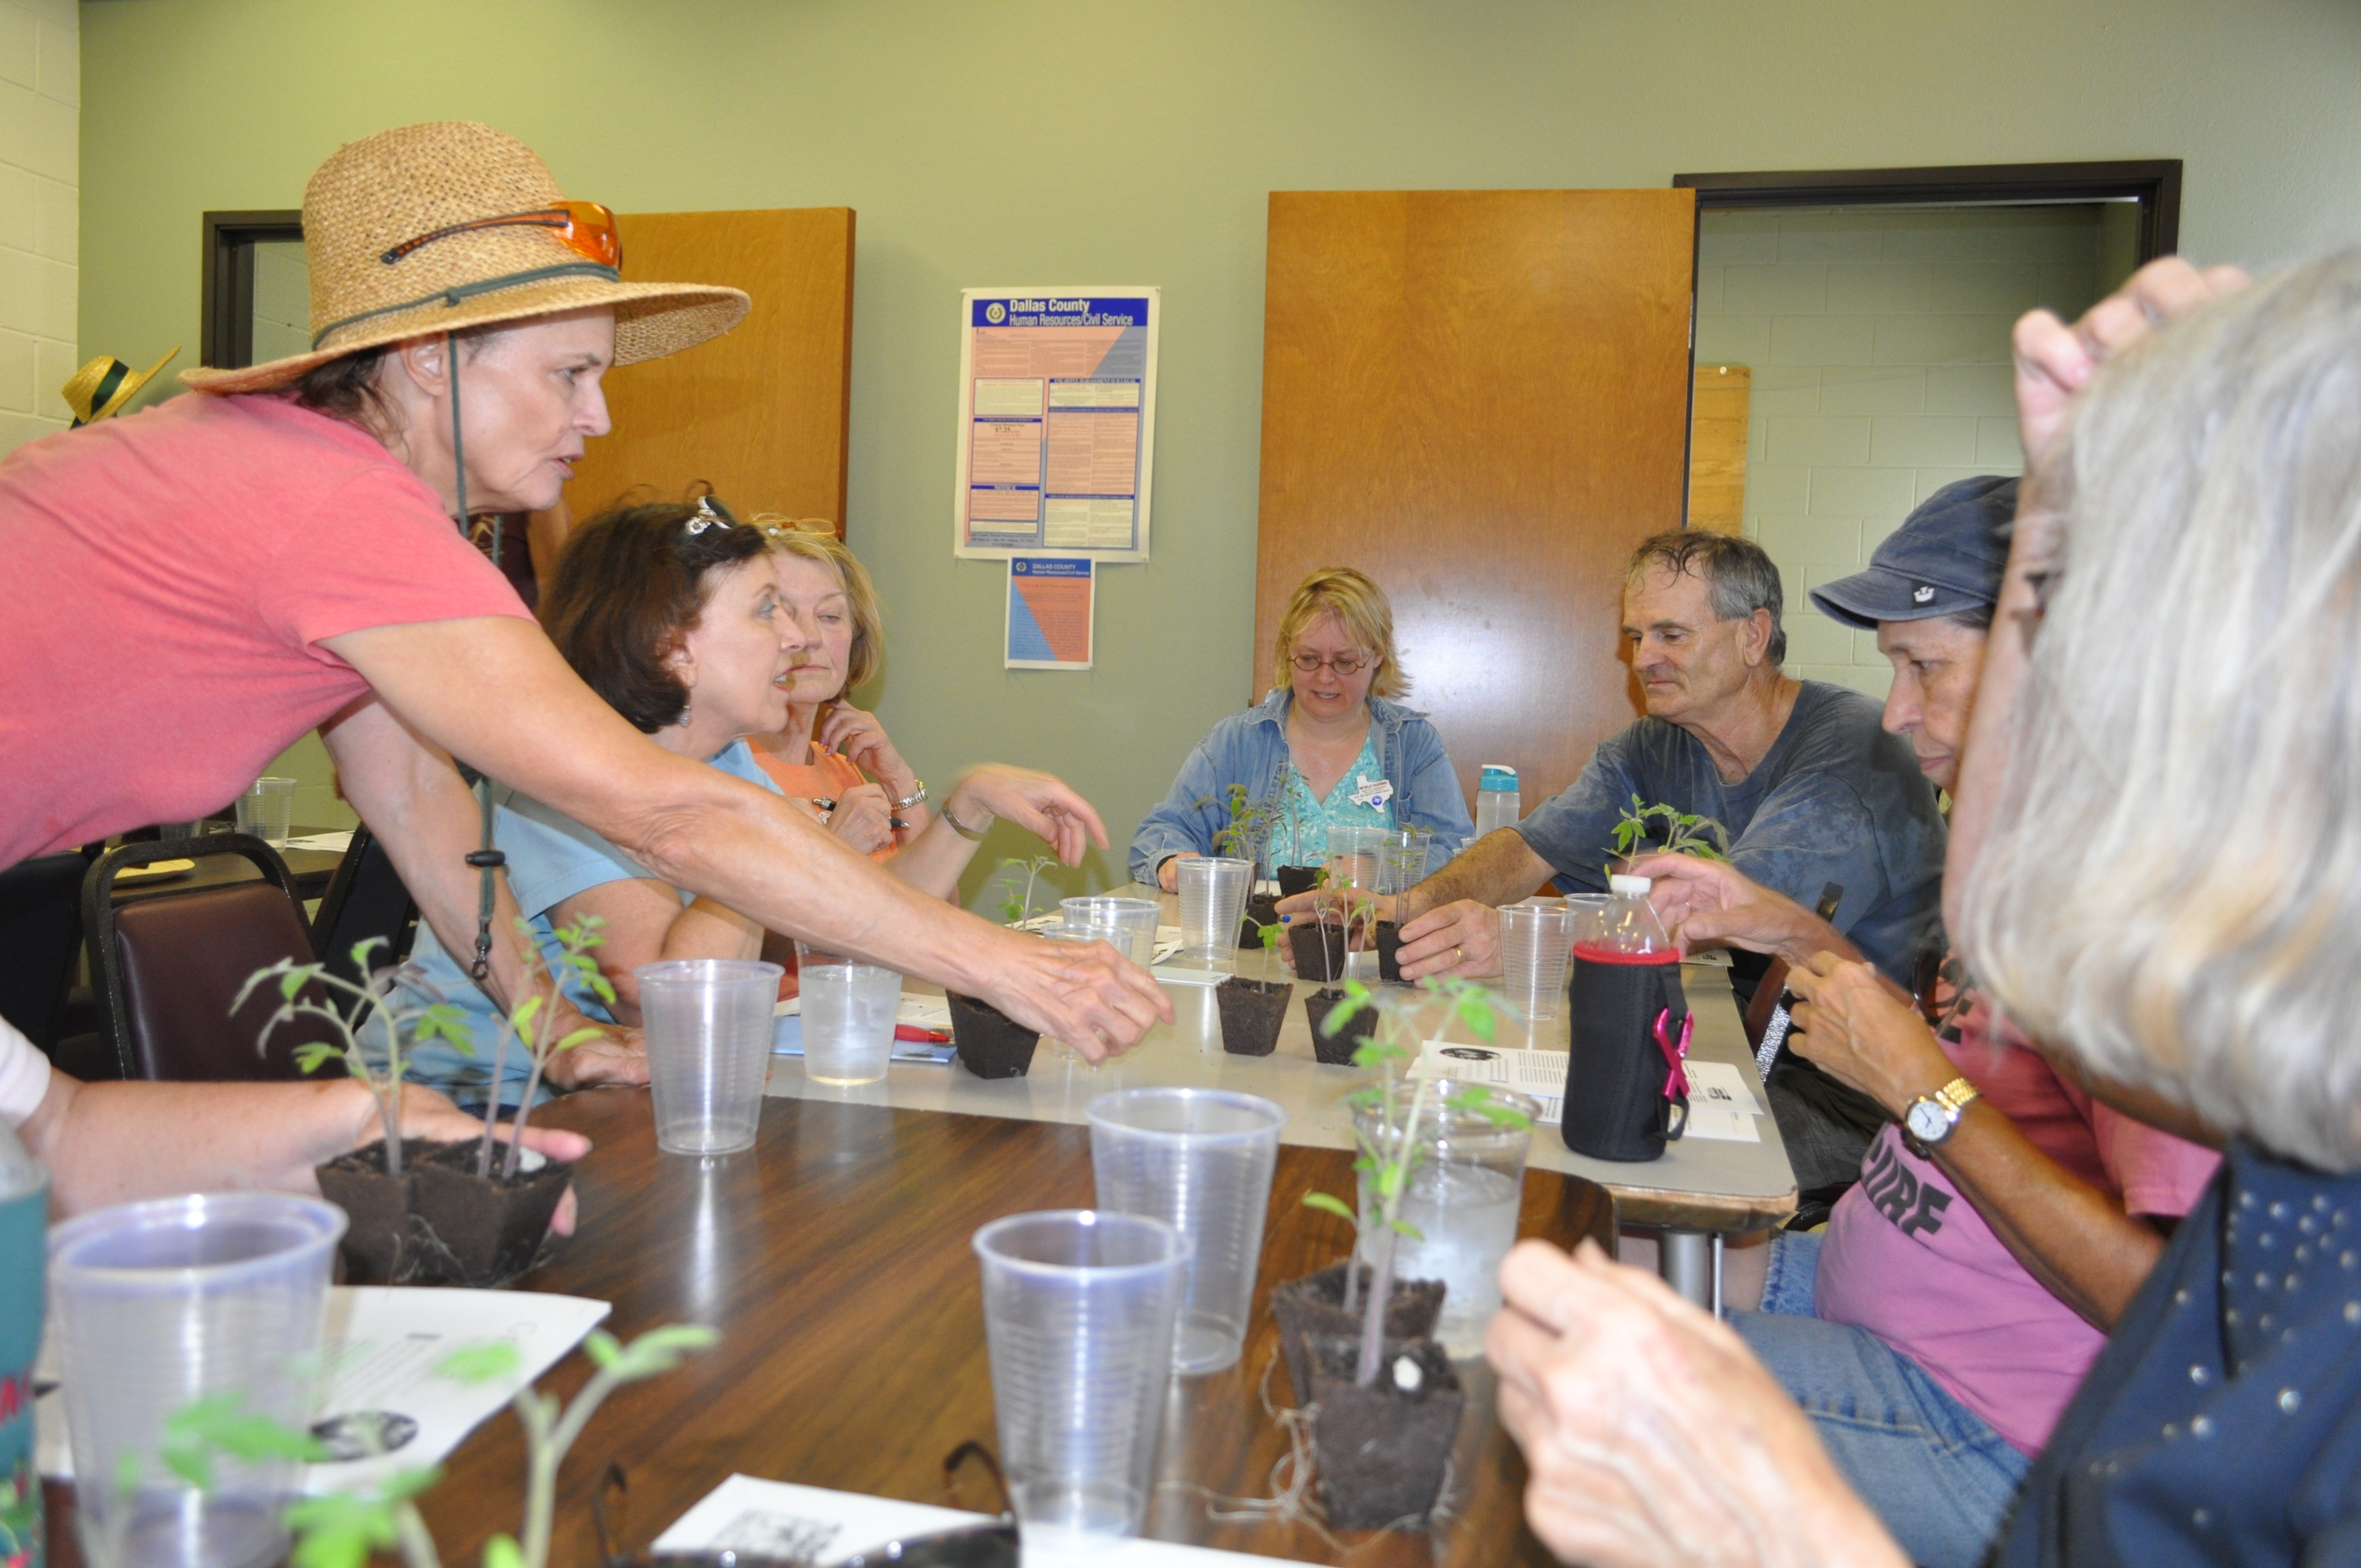
After working a few hours outside in our gardens we were treated to a  tomato grafting demonstration taught by Jim today.

Tomato Grafting Class at The Demonstration Garden

Tomorrow we will give step by step directions so you can tackle the concept of joining two different tomato varieties together to improve production in your fall garden.

Although it is hot, now is the time to think of  fall tomatoes.   For  information on fall tomato planting click here and refer back to tomato tips for more juicy tomato talk.

Soon you will be enjoying the fruits of your labor. Tomato Tart anyone?

Ann

Blackberry Class And Lunch In Our Blackberry Patch

Take the mystery out of growing blackberries. 

Come to the Earth- Kind ® WaterWise Demonstration Garden

at 2311 Joe Field Road

to hear Tim Allsup give an outdoor talk about how to grow ‘em and which varieties he likes, and how to prune ‘em! 

Date: Tuesday, June 4th                   Blackberries, Some Ripe                                                                    

Time: 11:00am-Noon

Place: 2311 Joe Field Road

Reservations: glamb@flash.net or sign up by leaving a comment on this blog.

Cost: $5.00 each person to be paid when you arrive for class 

Guests welcome, Master Gardeners will receive one hour education credit.

“Blackberry Lunch” 

Smoked Turkey, Mozzarella, and Blackberry Sandwiches 

Spinach Berry Salad with Blackberry Balsamic Vinaigrette 

Blackberry Lemonade

 Dessert Smorgasbord 

Blackberry Crumb Bars 

Fresh Blackberry Cake 

Blackberry Puffs 

Lemon Blackberry Swirl Pound Cake

Menu by Linda

Picture by Starla

Recipes will be included on our blog next week.


Spring Harvest

  Hooray for vegetable gardening  in Dallas  because it is  an all year feast  thanks to our mild winters. 

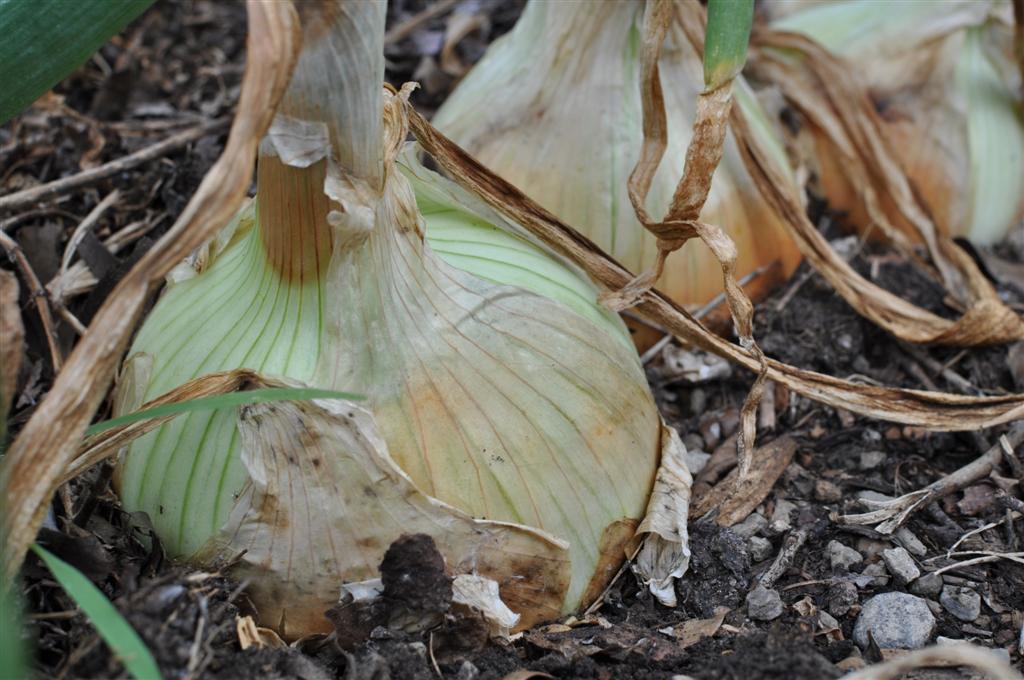
1015 Y Onions

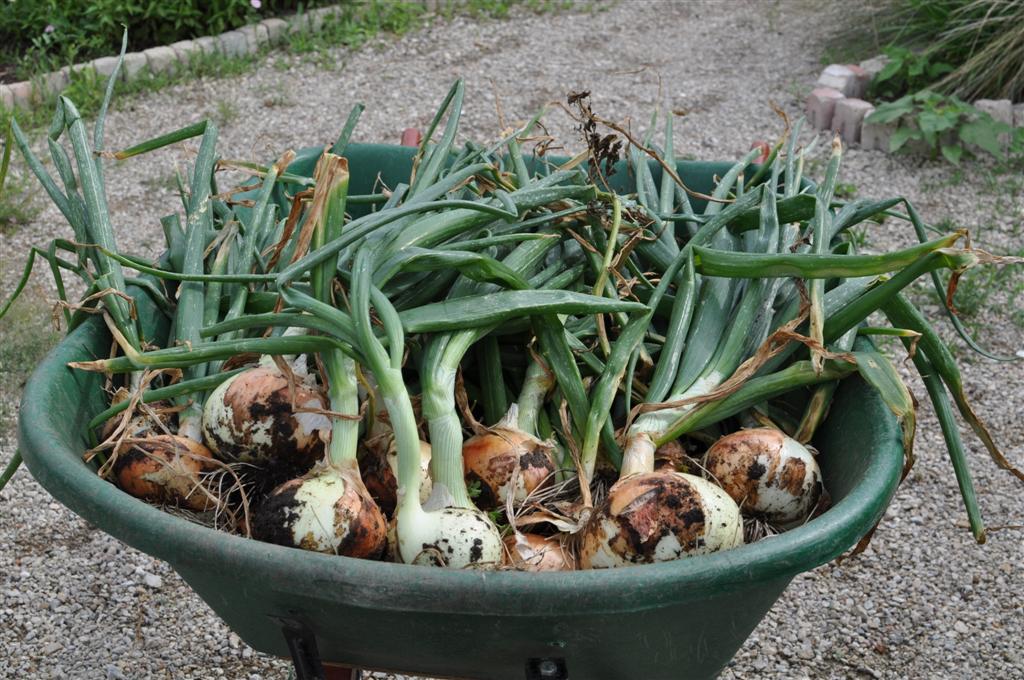
Dig back to the beginning of 2013:  in January  little onion sets, no bigger than a pencil, were planted.  Now  baseball size onions are ready for harvest

Wheelbarrow Of Onions

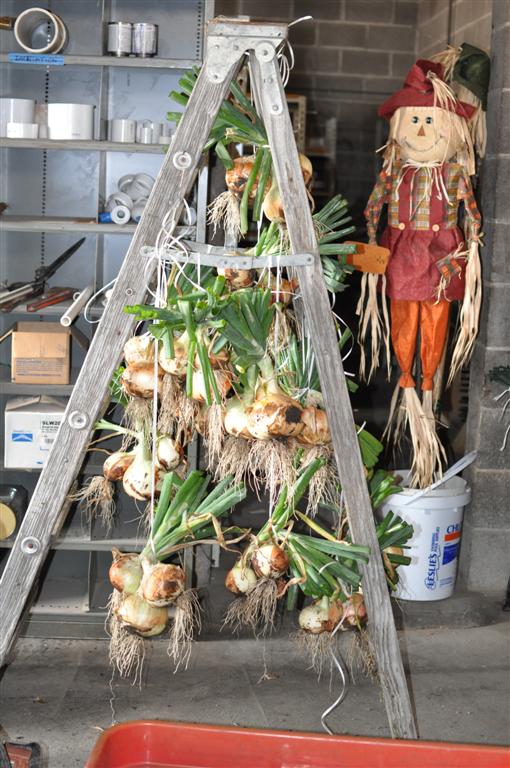
And ready for curing… and new recipes.

1015Y Onions Curing After Spring Harvest

This makes it possible to cook with each season’s bounty of homegrown vegetables all year.

 The Earth-Kind® WaterWise Demonstration Gardeners will be providing more farm to table recipes using our produce. More onion recipes are coming.

Dine with us by subscribing to our blog ! 

Ann

Learning In The Garden

Tuesday, April 7, the Denton County Master Gardener School came to Dallas to learn from the Dallas County Master Gardeners at The Earth-Kind® WaterWise Demonstration Garden on Joe Field Road.

Did you know blackberries have primocanes and  floricanes and perennial roots and biennial tops?

Tim Allsup and blackberry lessons

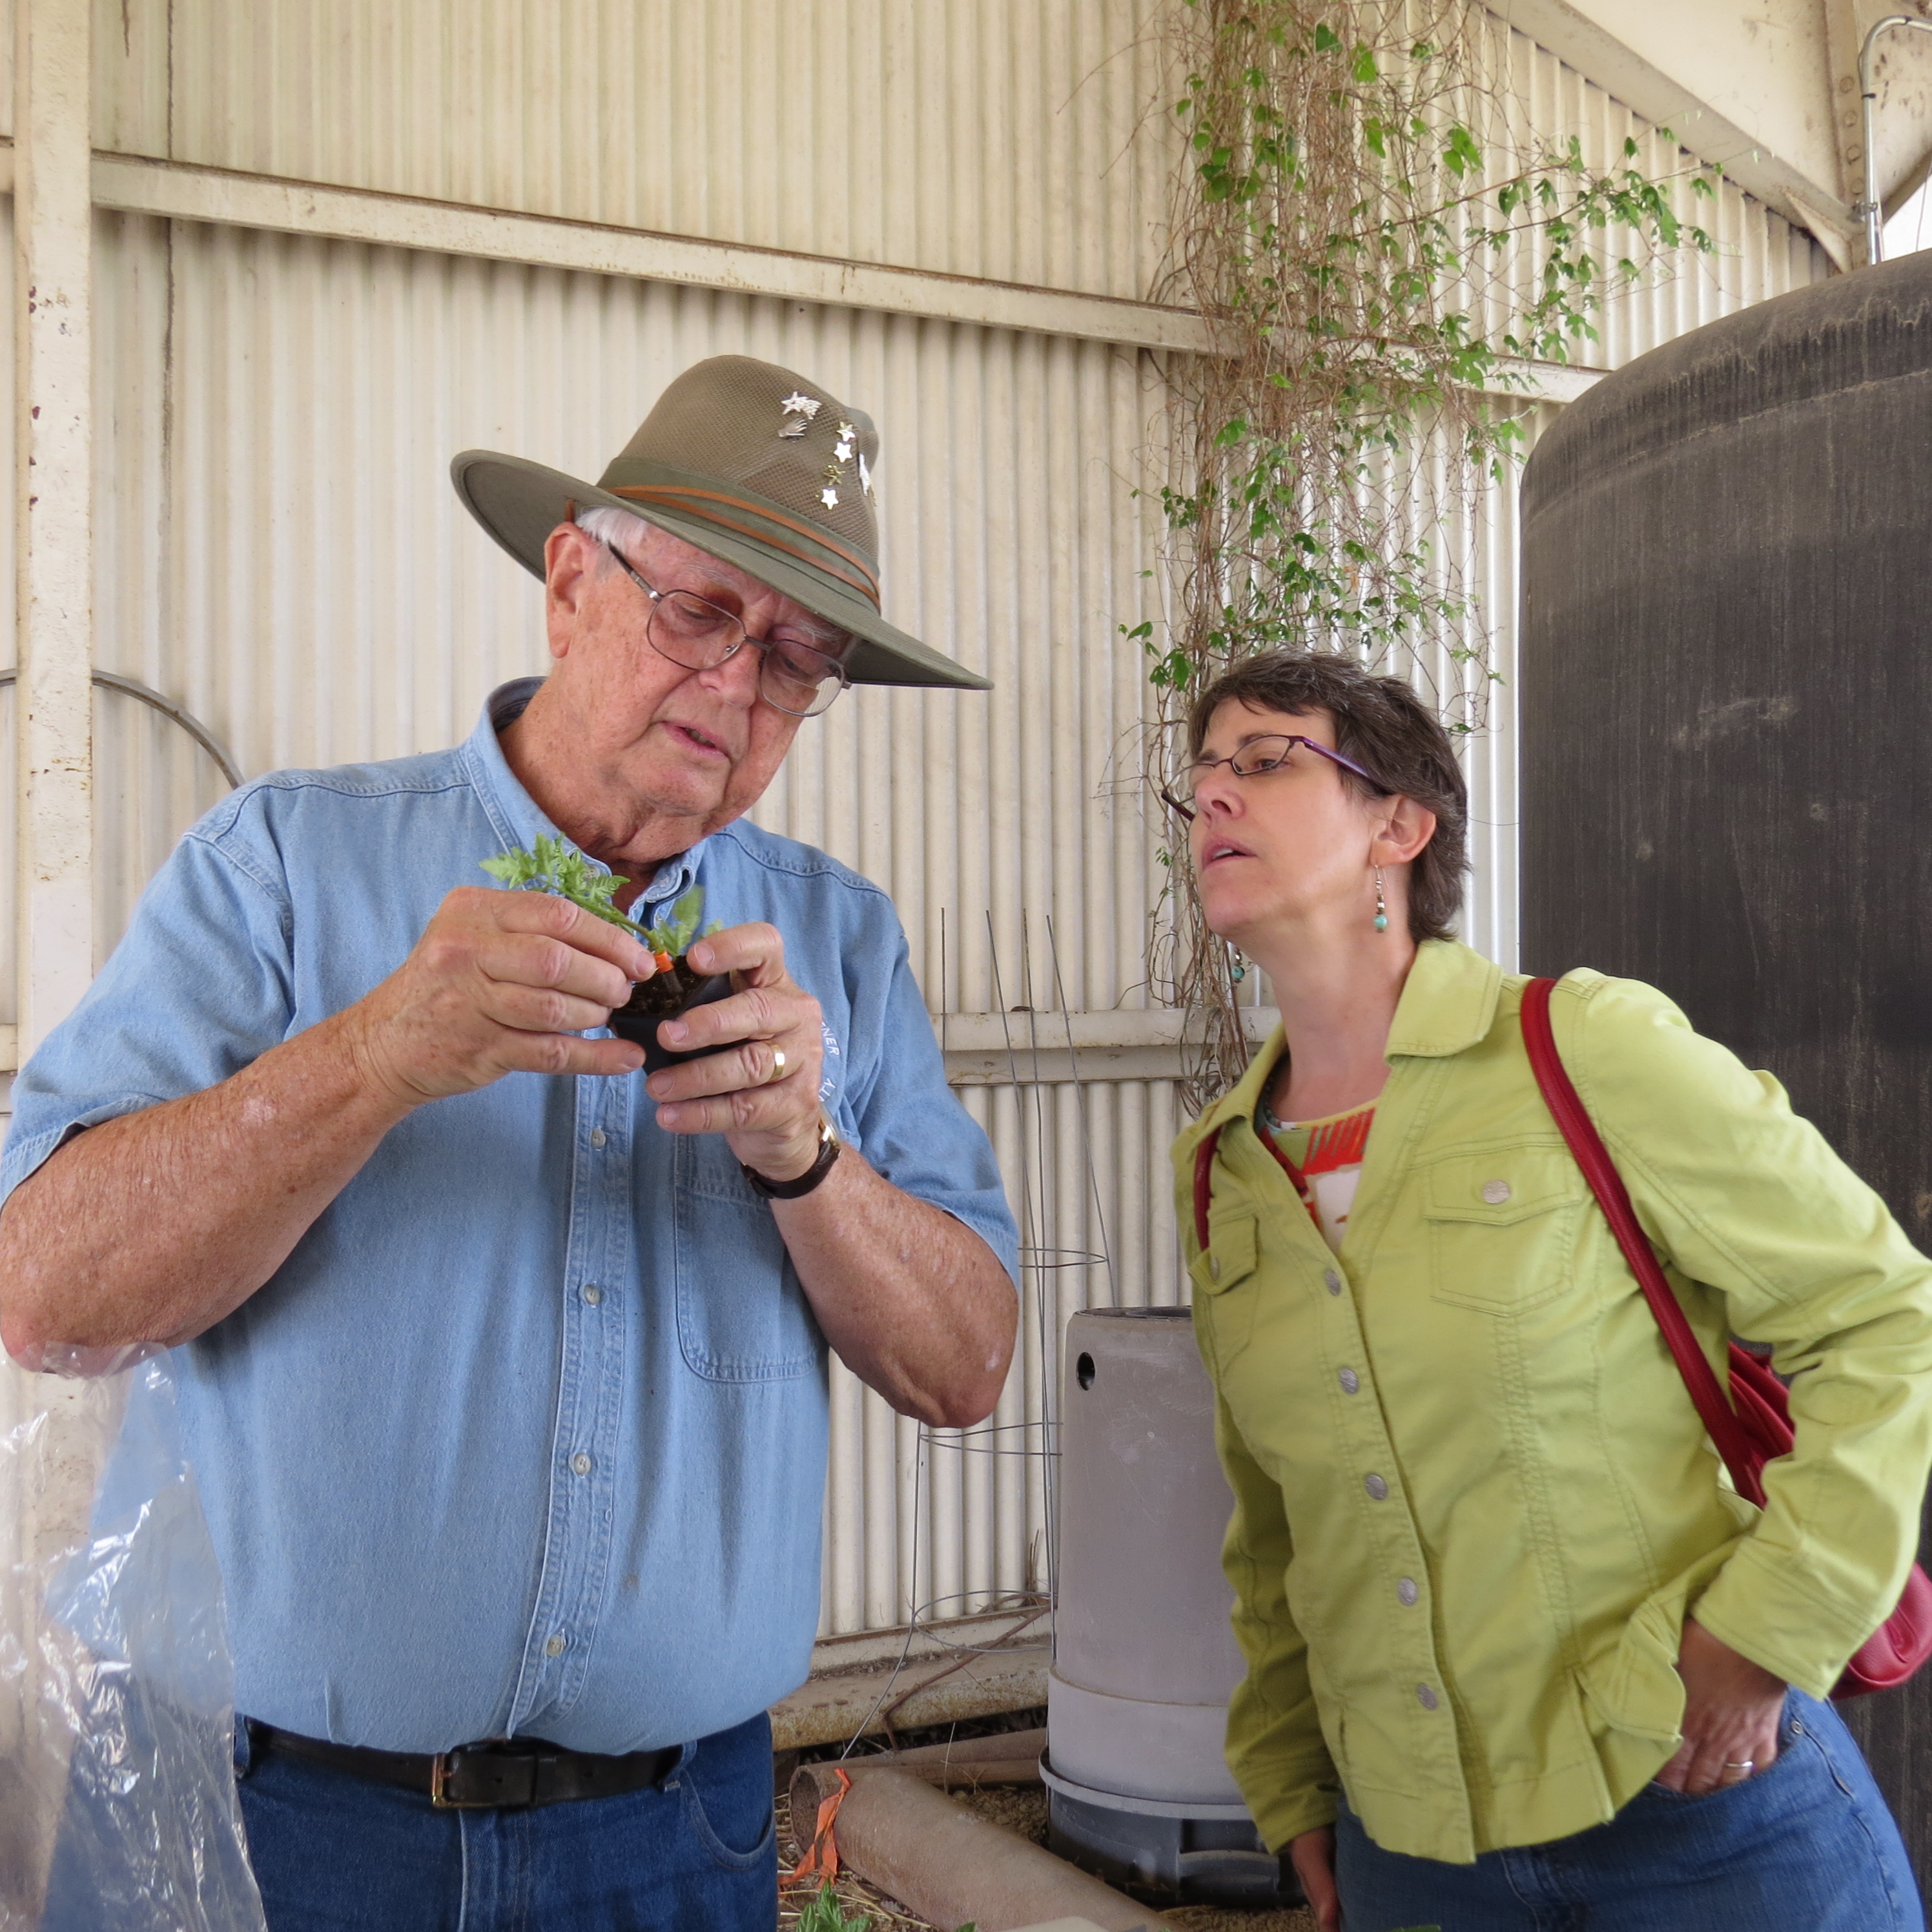
Have you ever grafted a Cherokee Purple Tomato onto a Celebrity Tomato?

Jim Teaching Tomato Grafting

Are you aware of the virtues of vermiculture?

Michele and Sue Teaching At The Dallas Demonstration Garden On Joe Field Road

We just can’t help it.  We love sharing  garden know- how with other gardeners.

Yearning to learn in the garden?  Future classes will be advertised on this blog.  Y’all come!

Ann

Pictures by Starla.

Growing Leeks In Your Dallas Garden

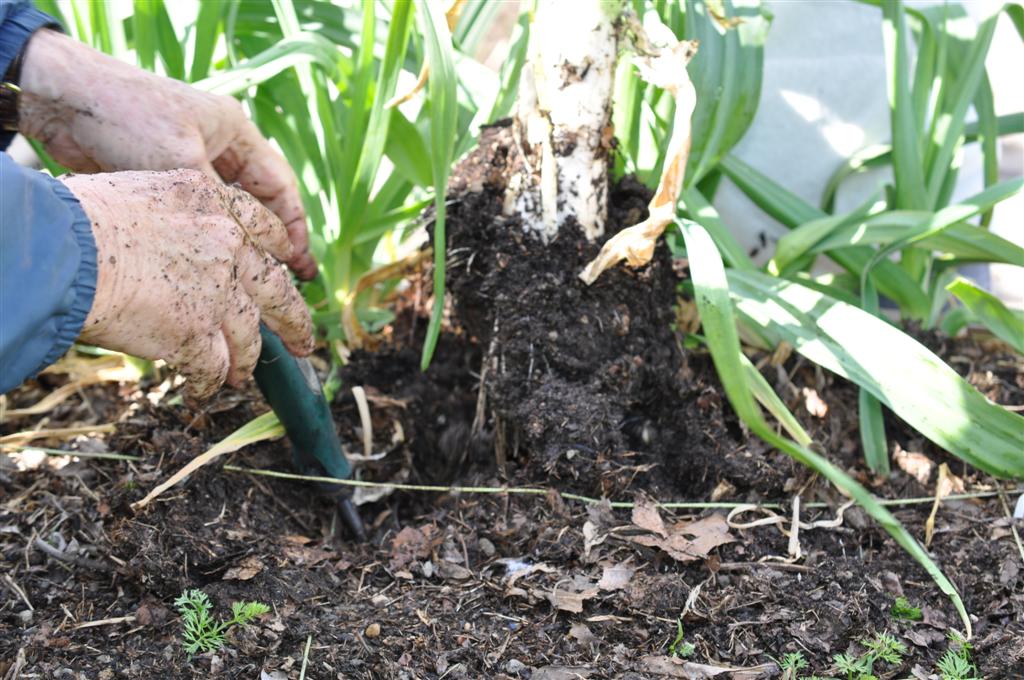
Jim wasn’t exactly sure what had been given to him when he dropped that pencil thin “slip” into the ground over 6 months ago.  This week our garden gave us the answer. Buried deep in the soil and somewhat stubborn about wanting to come out, we were finally able to get beneath the dense roots and give a hefty yank.  The game of tug-of-war had ended and our leek surrendered to an early spring harvest. 

Harvesting Leeks At The Demonstration Garden on Joe Field Road

Leeks are related to garlic and onions but have a much subtler, sweeter and more sophisticated flavor.  They can be used to enrich soups or stews and   partner well with potato and cheese to form tasty side-dishes and suppers that comfort and satisfy throughout the fall and winter. 

Leeks Harvested

History 

Leeks have been cultivated for thousands of years and are depicted in surviving tomb paintings from the time of the Ancient Egyptians.  The Romans considered the leek a superior vegetable with Emperor Nero thinking that eating leeks would improve his singing voice. 

Biology 

The leek is a member of the onion family.  It thrives in cooler climates and is tolerant of frost, hence its great popularity as a winter vegetable. 

Nutrition 

Leeks are an excellent source of vitamin C as well as iron and fiber.  They provide many of the health-giving benefits associated with garlic and onion, such as promoting the functioning of the blood and the heart. 

Preparing

Remove any damaged outer leaves.  Trim the rootlets at the base and cut off around a half to two thirds of the dark green tops.  Partially cut the leaks in half lengthwise, starting at the middle and running the knife up to the green tops.  Make a second lengthwise cut perpendicular to the first, allowing you to fan out the leaves.   Give them a good rinse to remove the dirt that can get trapped inside as the leek grows.  Enjoy these simple recipes coming your way in the next few days!

Linda

Homegrown, Veggies, Fruits and Herbs

I have a visual image of Master Gardener and nutritionist Barbara Gollman at Kroger: Red hair flying, trim figure running behind a cart, zipping down the frozen food isle flinging packs of frozen veggies into the cart for one of her wonderful soups. 

Barbara, Dallas County Master Gardener Teaches Value of Vegetables

Barbara intrigued a large group of Master Gardeners Tuesday with her talk on the nutritional benefit of vegetables, fruits, and herbs.  Turns out that Mom was correct when she urged us to eat our vegetables.  Carrots, oranges, sweet potatoes, and other fruits and vegetables are full of phytochemicals, substances in plants that have the potential to slow aging, boost immunity, prevent disease, and strengthen our hearts and circulation. 

Cabbage, Broccoli Field Road, Dallas, Texas

Barbara suggests that we eat watermelon and tomatoes, plants that are packed with lycopene, a nutrient which helps prevent macular degeneration.  Pinto beans are rich in fiber, which can prevent cancer and heart disease, and flavonoids, which can curb the oxidation of LDL cholesterol and prevent blood clotting.  Cruciferous vegetables like broccoli and cabbage are high in calcium.  Nuts are filled with Vitamin E, one of the most potent fat-soluble antioxidants. Berries, greens, winter squash—-well, you get the idea.  

Barbara said that new research has shown the health benefits of herbs. Who knew? Turns out that 1 teaspoon of oregano = ¾ cup of brussel sprouts in antioxidants.  

Barbara dries her herbs in the microwave after her husband’s reaction to using his closet as an herb drying rack. Remove the leaves from the stems of the herbs and spread on paper towels.  Put two paper towels on top of the herbs.  Pop in the microwave and zap for one minute.  (If the leaves are charred, try again and use a shorter amount of time. If the leaves aren’t crisp, microwave longer in 15-second increments.)  Remove from the microwave and air dry on the kitchen counter for a few days.  Store in a labeled glass jar.  

Are home grown vegetables better for you than those found in the grocery? Barbara says some research showed up to a 15 percent increase in nutrients in homegrown and organic vegetables.  Some other studies didn’t find an increase in nutrients. 

Many thanks go to Barbara for her research and common sense approach to healthy eating.  Let’s just put it this way: on the way home I stopped at Whole Foods and bought spinach, broccoli, and almonds for dinner.   

Elizabeth

Recipes served in the class will follow.

One Potato, Two Potato, Hopefully More

One of the joys of winter is to sit down with a cup of tea or hot chocolate and thumb through garden books and catalogues.   Visions of a riot of color from  gorgeous flowers (does it really matter that my yard is shaded by many tall trees and the descriptions say “full sun”) and bountiful vegetable harvests (surely there is a shade tolerant tomato) always seem to intoxicate me into ordering or purchasing many more seeds and products than any reasonable person needs or can use.  Of course, most of the sunny place flowers struggle, get lanky, then die a slow death in the shade of my yard; and, so far, I haven’t discovered a shade tolerant productive tomato.  Yet spring holds such promise, and occasionally I find a particular variety of full sun plant that tolerates shade, that I forget the failures of last year and try again.  After all, some experiments turn out well.

     For the past two years the Garden’s vegetable guru, Jim,  has experimented with the “trash can” method of planting potatoes.  If you are not familiar with this method there are several  YouTube videos showing literally pounds and pounds of potatoes being harvested from potato sets planted in 30 gallon trash cans.  To construct a “trash can” potato bin, a drainage hole is made in the bottom of a plastic trash can, Seed potatoes are planted at the bottom of the can in a few inches of soil, then as the potato plants grow to about eight inches tall enough soil (in the Garden’s case, the Garden’s homemade compost) is added to cover them half way up the stem.  At the end of the season, the trash can is dumped and the potatoes are harvested.  An easy way to grow potatoes?  It certainly sounds like it.  However Jim reported that in the first year’s experiment, the Garden’s trash can potatoes rotted.  Guessing that perhaps there wasn’t enough drainage, the second year Jim tried putting 2” drainage holes around the side of the can.  Once again, though the plants themselves were huge and vigorous since they were growing in all that compost, the actual potato yield was small and many of the potatoes continued to rot. 

     A failed experiment, perhaps….  however one always learns something.  Jim surmised that perhaps the problem was that the potato plants were not getting enough sun.  Potatoes need full sun and the opaque trash can shaded them unless the sun was directly overhead.    It wasn’t until months later when the plants grew over the top of the can that they were in full sun throughout the day.

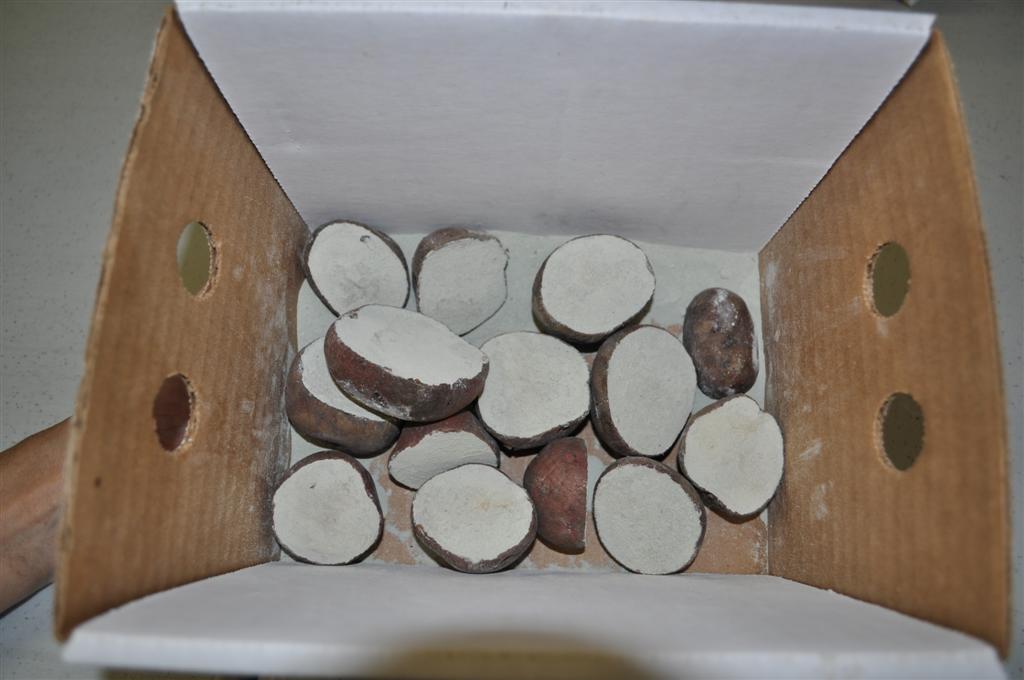
     So, this year, the Garden is trying two methods to grow potatoes.  The first, in the garden’s raised bed, is the usual “trench method” where a trough about 6”-8” deep and about 4” wide is dug.  Seed potatoes that have been cured and dusted with sulfur are planted about 12”-15” apart and covered with about 4” of soil.  As the potatoes sprout, the soil is “hilled”/backfilled around the stems since potatoes grow in the space between the seed potato and the surface of the soil.    

Red La Soda Potatoes, Dusted With Sulfur, Ready For Planting

                                                               . 

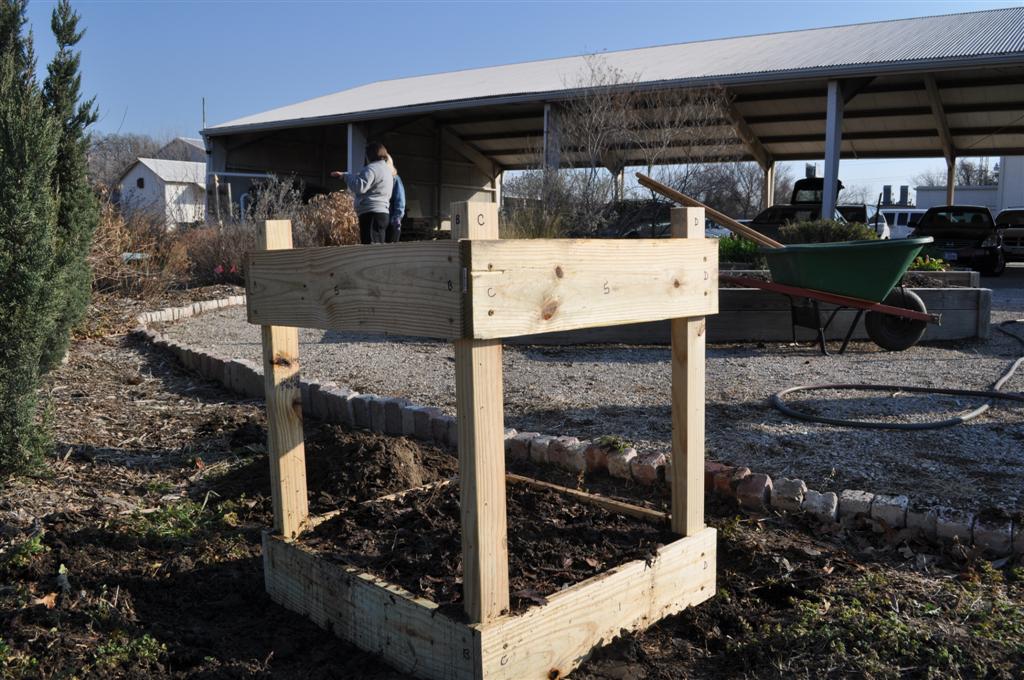
    The second experimental method being tried is Jim’s homemade 2’x2’ potato bin constructed from 1”x6” treated lumber (one can also use untreated lumber or cedar).  As the potatoes plants grow to about 12” tall, another 6” panel of lumber will be added to the bin and enough soil added to bury 1/3 of the plant. 
New Potato Bin At The Demonstration Garden

The advantage to this type of bin as opposed to the trash can method will not only be increased drainage but also the potato plants will be able to receive full sun throughout the day since more panels can be added as the potato vines grow taller.  Will this method produce a better crop of mature potatoes?  Who knows….. but that’s the fun of experimenting.

     There are many other methods (potato bags/wire bins lined with newspaper/etc) used to plant potatoes.   Do you have a favorite method for planting potatoes?   If so, let us know.  This year in my community garden plot, I plan to try “laundry basket” potatoes:  cutting out the bottom of a plastic laundry basket and using it like a cage to hold the mounded soil around my potatoes.  If it works, I’ll let you know the results.  If not, I’ve only lost several small seed potatoes plus three dollars to purchase three laundry baskets from the Dollar Store.  So tell us your method— and Happy Experimenting!!

Carolyn