Tag Archives: vegetable gardening

Caterpillar Alert, Who’s Eating Our Kale?

July 11, 2019

We’ve had an infestation of caterpillars and they have destroyed our kale in the edible garden. Here’s the before picture:

Dinosaur Kale in June at Raincatcher’s Edible Garden

And after:

Same Kale Bed in early July after the cabbage worm attack


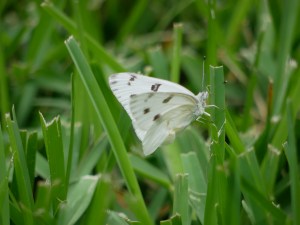
We are not happy to see cabbage white butterflies. They lay eggs which become destructive caterpillars on the underside of cole crop leaves.


Maybe we should have known and expected  hungry caterpillars to invade. After all, on our own blog Carolyn Bush wrote about cabbage white butterflies(the adult stage of the imported cabbage worm) in a very stern manner. Here’s her story.


We also have the cross-striped cabbage worm feeding on our kale.

Cross-striped cabbage worm

Some preventive methods to try to stop the attack:

Fall sanitation. Clean up and remove infested plant material after harvest to eliminate overwintering sites of the pupae. (we will do this now)

Use row covers. Position row covers or netting over plants to prevent egg laying by the butterflies. Start controls before the white cabbage butterflies are seen fluttering around the yard.

Handpick the cabbage worms off of the underside of the leaves while plants are young and then squish them!

Companion Planting.  Cabbage worms don’t like thyme-we may try this or other herbs to deter them.

What will we do with that now empty garden space?

The Edible Garden Team says let’s plant  pumpkins so we are ready for our October 22nd  Grow and Graze event: Seasonal Splendor, Pumpkins and Sweet Potatoes

Starla Willis and Ann Lamb


Class today: Thursday July 11, 2019, 10:00am-11:00am

Year Round Perennials, Janet D. Smith

All welcome! Please come!

Inside with air conditioning! Fellowship Hall, 11001 Midway Road, Dallas, Texas


Herbs of the Mediterranean Recipes


Iced Herb Gazpacho

This recipe first appeared in the Dallas County Master Gardener Association cookbook, ‘A Year on the Plate’ and on our blog in 2016. It remains our very favorite for recipe for gazpacho. The addition of 5 fresh herbs gathered from the garden give it an exciting boost of flavor.


Ingredients

6 large tomatoes, quartered (peel, if desired)

4 cloves fresh garlic, pressed

¼ teaspoon red pepper flakes

¼ cup red wine vinegar

¼ cup olive oil

½ cucumber, peeled and chopped

2 scallions, chopped

1 sorrel leaf, deveined and coarsely chopped

2 sprigs fresh basil

3 sprigs salad burnet

3 sprigs cilantro

3 sprigs parsley

Salt and fresh ground black pepper, to taste

Cucumber slices and fresh thyme sprigs for garnish

Directions

Roughly puree tomatoes, garlic, cucumber, red pepper flakes, vinegar and oil in the workbowl of a food processor.  Leave some texture to the ingredients.

Add the herbs and pulse just until chopped.  Do not “blend” or mixture will become too brown.

Refrigerate overnight to allow flavors to blend.  Serve slightly chilled or at room temperature.  Garnish with a cucumber slice and a fresh thyme sprig.

Every Herb Pesto

When selecting recipes for our cookbook, the testing committee concluded that this was the most delicious pesto they had ever tasted. A perfect combination of seven garden-fresh herbs elevates the flavor profile to superior status. (Chervil is the ‘tricky’ herb. Early to late fall, and then again in spring, is when you typically find it growing in our garden).

Ingredients:

½ cup Marcona almonds, toasted

2 cloves garlic, peeled

1 cup fresh spinach leaves

½ cup grated Parmesan cheese

½ cup fresh cilantro leaves

½ cup fresh parsley leaves

¼ cup basil leaves

¼ cup fresh tarragon leaves

⅛ cup fresh mint leaves

1 tablespoon fresh chervil leaves

2 tablespoons chopped fresh chives

Zest of lemon

Juice of 1 lemon

¾ cup canola oil

¼ cup extra-virgin olive oil

Kosher salt and freshly cracked black pepper

Garlic-rubbed crostini, optional

Heirloom tomatoes, chopped, optional

Directions:

  1. Blend the almonds and garlic in a food processor until fine. Add the spinach, cheese, herbs, lemon zest and lemon juice to the food processor.  Blend the herbs just enough so they are mixed, about 3 seconds.
  2. Add the canola oil and olive oil while the food processor is on a low setting. Season with salt and pepper. Blend to desired consistency.
  3. Transfer the pesto to a serving bowl. Place the chopped tomatoes on top of the crostini if using and top with pesto.

Yield: 2 cups

Note:  Any leftover pesto should be placed in a bowl and covered with plastic wrap.  Press the plastic wrap right on top of the pesto and refrigerate.

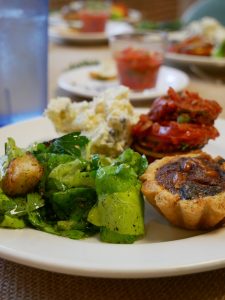
Above: Swiss Chard and Black Olive Tart

Black Olive and Swiss Chard Tart

In her beloved cookbook, ‘Pedaling Through Provence’, Sarah Leah Chase takes you on a technicolor journey through the sun-blessed cuisine of the Mediterranean. She calls this savory version of the tart, “love at first and last bite”.


Pastry Ingredients

1 ¼ cups unbleached all-purpose flour

1 ½ tablespoons minced fresh rosemary

Pinch of sea or coarse salt

8 tablespoons (1 stick) chilled unsalted butter, cut into small pieces

2 teaspoons imported Dijon mustard

2 to 3 tablespoons ice water

Filling Ingredients

1 large bunch Swiss chard (about 1 pound), washed, stems and thick center ribs removed, leaves patted dry

2 tablespoons olive oil

1 large onion, minced

3 cloves garlic, minced

½ teaspoon dried thyme

Pinch of grated nutmeg

½ cup freshly grated Gruyere cheese

2 large eggs

½ cup light cream or half-and-half

Sea or coarse salt and freshly ground black pepper, to taste

2 cups pitted Nyons or Kalamata olives

2 tablespoons pine nuts

Directions

Make the pastry: Place the flour, rosemary, salt, and butter in a food processor and pulse until the mixture resembles coarse meal. Add the mustard and enough ice water so that the dough begins to form a ball as the machine is pulsed on and off. Gather the dough into a flat disk, wrap it in plastic, and refrigerate for at least 30 minutes.

Meanwhile, make the filling. Cut the Swiss chard leaves into ½-inch-wide strips. Heat the olive oil in a large skillet over medium-high heat. Add the onion and sauté until soft and translucent, 7 to 10 minutes.  Add the chard, garlic, thyme, and nutmeg. Cook until the chard leaves have wilted and any water given off has evaporated, 5 to7 minutes. Remove from the heat and gently mix in the cheese.

Beat the eggs and cream together in a mixing bowl and then fold in the chard mixture, blending well. Season with salt and pepper and set aside.

Preheat the oven to 400˚F.

On a lightly floured surface, roll out the chilled pastry dough to form a 12- to 13-inch circle. Transfer to an 11-inch tart pan and trim and crimp the edges decoratively. Spread the chard filling evenly in the tart shell. Arrange the olives in concentric circles over the top, pressing lightly into the filling. Sprinkle the pine nuts in between the olives.

Bake the tart until the crust is golden and the filling is set, 30 to 40 minutes. Serve hot, warm or at room temperature.

Yield: Serves 6 to 8 as a luncheon or 12 to 14 as an appetizer.
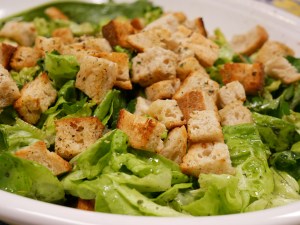
Green Herbs and Butterhead Lettuce Salad

This recipe and the  from award-winning cookbook author, Georgeanne Brennan, inspired us to get busy growing, harvesting and using herbs daily. While one delicate herb, sweet cicely, succumbed to our summer heat, plans are to include it in our fall garden. Stay posted for updates.

Ingredients

¼ cup extra-virgin olive oil

1 tablespoon chopped shallot

2 tablespoons fresh lemon juice or red wine vinegar

½ teaspoon salt

½ teaspoon freshly ground black pepper

1 head butterhead lettuce, leaves separated

1 cup fresh chervil sprigs

½ cup fresh flat-leaf parsley leaves

¼ cup small, tender fresh sorrel leaves

Directions

In the bottom of a salad bowl, combine the olive oil and shallot and stir together. Whisk in the lemon juice or vinegar. Taste for balance. Add the salt and pepper and taste again, adjusting as desired.

Tear the lettuce leaves into bite-sized pieces, and put them into the bowl along with the chervil, parsley and sorrel. When ready to serve, toss well.

Yield: Serves 3 or 4

Herb-Seasoned Croutons

Ingredients

8 slices day-old coarse country bread, each about 1 inch thick

¼ cup extra-virgin oil

2 cloves garlic, minced

½ teaspoon salt

1 tablespoon minced fresh thyme

1 tablespoon minced fresh rosemary

1 tablespoon minced fresh oregano or sweet marjoram

Directions

Without removing the crusts, cut the bread slices into 1-inch cubes. In a large skillet, heat the olive oil over medium heat. Add the garlic and sauté until translucent, 1 to 2 minutes. Add the bread cubes, reduce the heat to low and cook slowly, turning once, until golden and crusty, 4 to 5 minutes on each side.

Sprinkle the cubes with the salt, thyme, rosemary and oregano or marjoram. Turn a few times in the pan to coat evenly. Using a slotted spoon, transfer the croutons to paper towels to drain and cool. To store, put in a paper bag, fold the top over several times and keep for up to 1 week.

Yield: Makes About 32 Croutons, About 4 Cups


Raincatcher’s Garden Summer Ratatouille

There are countless recipes for Ratatouille. However, this simple and colorful version ‘wowed’ guests at our ‘Herbs of the Mediterranean’ Grow and Graze event. Don’t let summer pass without making this one!

Ingredients

3-4 baby eggplants

3-4 medium tomatoes

1 yellow zucchini squash

1 green zucchini squash

1 yellow straight-neck squash

2-3 shallots

Olive oil, to taste

Freshly ground black pepper, to taste

Endless Summer Tomato Sauce

Several sprigs of fresh oregano

Directions

Pour 1 cup of tomato sauce into the bottom of an 8- to 9-inch baking dish.

Using a mandolin, slice first six ingredients thinly and evenly approximately ¼” thick. Make mini stacks using one of each sliced vegetable. Arrange a few stacks at a time into the prepared baking dish forming concentric spirals from the outer edge to the center. Fan out slightly allowing top part of vegetables to be seen. Use any leftover slices to fill the center.

Drizzle with a small amount of olive oil and season with fresh pepper. Bake at 350˚F until vegetables are just soft to the touch but not overcooked. Check at 20 minutes.

Options: Fill center with goat cheese just as dish comes out of the oven. Spoon sauce over the top and serve with a crusty slice of bread.

Olive Oil Cake

You seldom here about this intensely moist and flavorful cake served during the dessert course. We hope to change you mind.  Restaurant owners, Jennifer and David Uygur  shared their recipe in the Dallas Morning News. Each slice was topped with a generous dollop of lavender-infused whipped cream and a sprinkling of fresh, locally grown blueberries.

Ingredients

2 cups flour

½ teaspoon baking soda

½ teaspoon baking powder

¼ teaspoon sea salt

3 large eggs

1 ½ cups sugar

1 cup fruity olive oil

1 ½ cups whole milk

3 tablespoons microplaned mixed citrus zest (lemon, orange, grapefruit)

1 teaspoon finely chopped fresh thyme leaves

Directions

Heat oven to 360˚F (this is correct) if using a 10- to 12-cup Bundt pan.

Heat oven to 350˚F if using a 10-inch cake pan with removable bottom.

Sift flour, baking soda, baking powered and salt together into a medium bowl. In a large mixing bowl, whisk the eggs with the sugar, then add the oil and mix until homogeneous.

Add the milk, zest and thyme. Gently mix in the flour and pour into a greased and floured 10- to 12-cup Bundt pan. (If using a 10-inch cake pan with removable bottom, grease, line with a parchment circle, then grease again and flour).

Bake for about 45 to 50 minutes, until a tester comes out clean (baking times vary depending on oven and pans, so keep an early eye on it). Place on a rack to cool. After 10 minutes turn cake out of the pan onto rack and let cool completely. Slice and serve on a plate. Garnish with your choice of toppings; whipped cream, whipped crème fraiche, fresh berries, sliced peaches or apricots.

Yield: Makes 12 servings.

Linda Alexander


Grow and Graze, Herbs of the Mediterranean

Herbs of the Mediterranean can and should be grown in Dallas, Texas. Embrace our hot and usually dry climate to grow the herbs of France, Greece, Italy and Spain.  Herbs like rosemary, lavender, thyme, and oregano thrive in Dallas gardens. Ounce for ounce, many herbs used to flavor foods have more antioxidant power than berries, fruits, and vegetables according to a recent agricultural study.  The herbs with the highest antioxidant activity are in the oregano family.

Last week Dallas County Master Gardener, Marian Buchanan, came to teach us about these herbs and afterwards guests enjoyed  an herb inspired lunch.


Above: Our centerpiece of fennel, sage, rosemary, lavender, sorrel, and tarragon

Some of our guests were kind enough to tell us what they thought about the day:

“I’m not a gardener at all and was afraid the presentation would be clinical or over my head. It was so much fun. There was something for everyone, details that a professional would enjoy as well as useful, interesting information for anyone. Then, the food. It was filling and flavorful and so much more interesting after having learned a bit about each of the herbs and herb combinations. I hope to come again.”Chris Bradshaw

“Thoroughly enjoyed & highly recommend Raincatcher’s gardeners’ events. Learned so much about the planting & care of herbs, many of which were on the menu of our delicious lunch. And Beverly was the best hostess when afterwards she took a small group of us on a tour of their amazing, beautiful & peaceful gardens.” A Fan


I appreciated the useful information about each herb (varieties, preservation, use in cooking) and helpful growing tips. The volunteers at Raincatcher’s did a stellar job organizing a delightful lecture and lunch.” Kateri Allen


Thank you to everyone who worked so hard clipping and snipping and tying bundles of herbs and cooking, decorating, teaching and organizing.

Above: Dallas County Master Gardeners smiling and ready to serve at the  ‘Grow and Graze’ event

In the next few days, we will share recipes and pictures. Here’s the list of herbs featured.

Linda Alexander and Ann Lamb
Picture by Starla Willis


A Walk Around The Garden

June 18, 2019

When you’ve worked in a garden, something happens to you. You begin to pay more attention to the rain, the temperature and sunshine and how it affects your plot of land.

You peer down at the soil looking for signs of life. Have your squash seeds sprouted? Are the beans going to climb up that trellis?

Some plantings have flourished and are bearing fruit, others have  peaked and need tender loving care.

What I am saying is-you are now emotionally involved with a garden plot and it makes it very hard to leave town.

That is the state I am in and so yesterday I walked through our gardens and took these pictures.

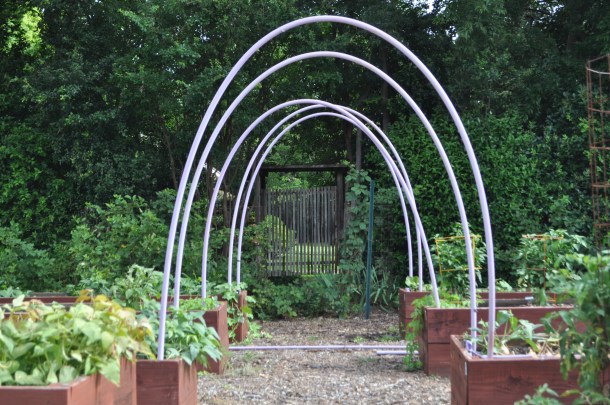
Above: Garden trellis made of irrigation tubing. Long beans will grow here and other vining crops.

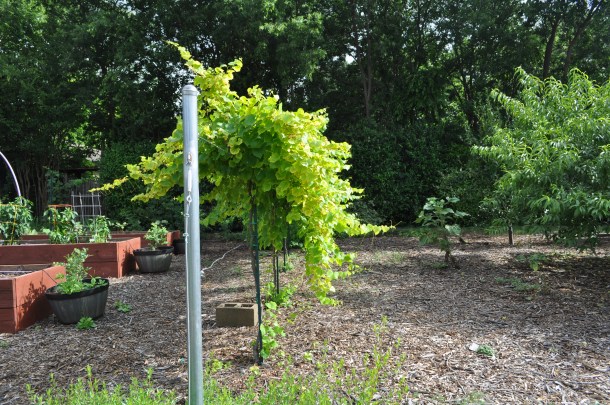
Above: the grape vines seem to be glowing

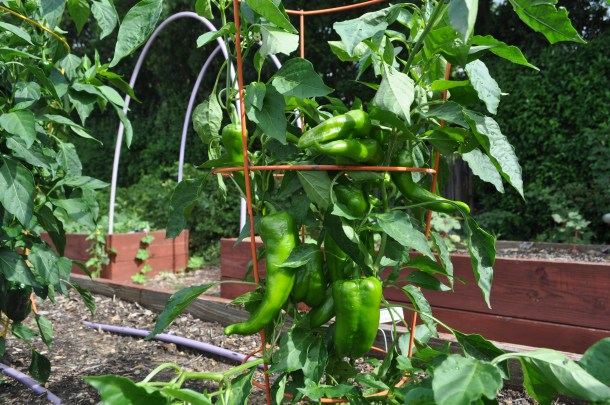
Above: Poblano Green Pepper

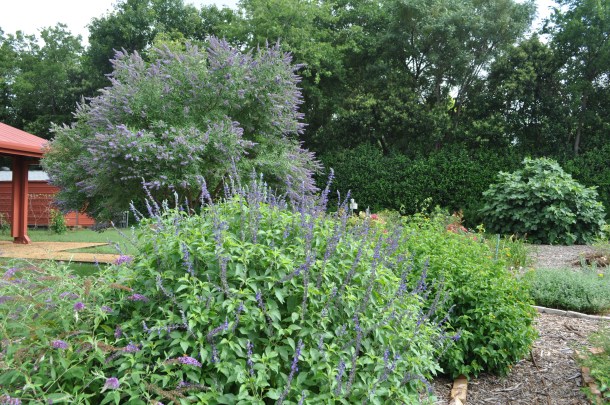
Above: Blue on blue-sage and vitex in our butterfly garden.

Above: Should be a good fig harvest this year!

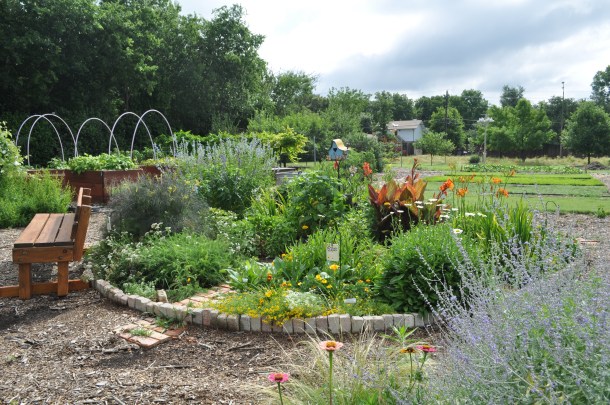
Above: The color wheel

Above: a view of our grass plots-looking mighty fine!

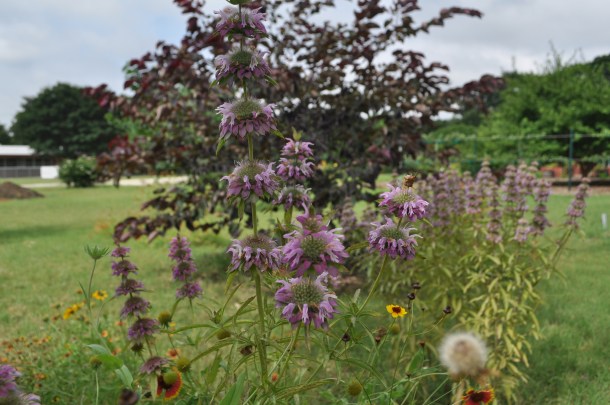
Above: Horsemint in front of our Redbud Tree

Ann Lamb

If you would like to learn more about herbs of the Mediterranean, come to our garden lecture by Marian Buchanan on Tuesday, June 25th at 10-11:00 am. Class will be held in the church sanctuary.

The lunch following the lecture has been sold out. No reservations required for the lecture. Just come! All welcome.

Location: 11001 Midway Road, Midway Hills Christian Church

(Master Gardeners earn two CEU’s)


Herbs of the Mediterranean, A Grow and Graze Event

Herbs of the Mediterranean

Herbs activate our senses. Join us for a culinary trip to the Mediterranean where we’ll explore some of the world’s best tasting food. Be inspired by this delightfully aromatic way of using fresh and dried herbs in your cooking.

Tuesday, June 25th

A “Grow and Graze” Event Hosted by

 The Raincatcher’s Garden of Midway Hills

Time:  10:00 – 11:00

Location:  11001 Midway Road Church Sanctuary

Instructor: Marian Buchanan, Dallas County Master Gardener, Herb Specialist

(Master Gardeners earn two CEU’s)

Immediately following the program, please join us at our Mediterranean Table

Lunch: 11:15 – 12:30

$15 per person, Reserved seating for 60 available starting May 20th. Deadline June 18th

https://www.eventbrite.com/e/herbs-of-the-mediterranean-tickets-60462949309

Menu

Iced Herb Gazpacho and Toasted Baguette Slices spread with Every Herb Pesto

Black Olive & Swiss Chard Tart

Green Herbs & Butterhead Lettuce Salad with Herb-Seasoned Croutons

Salad of New Potatoes with Sweet Cicely, Lovage and Green Peppercorns

Mediterranean Summer Roasted Vegetable Ratatouille

Honey-Lemon Olive Oil Cake with Whipped Crème Fraiche and Fresh Berries

Lavender Honey Ice Cream

All members of the public invited for the free lecture. To make a reservation for the lunch use the eventbrite link above.

Linda Alexander

Edible Landscape Spring and Summer Planting 2019

May 4, 2019

Ana and Linda enthusiastically took center stage last week to proclaim the spring and summer plans for the Raincatcher’s Edible Landscape. The purpose of our edible landscape is to create a stylish and appealing outdoor space using vegetable, fruit, and herb plant materials. On top of that, think partial shade and an area formerly used as a children’s playground. Add in budget constraints and the lack of an irrigation system..

Without the fervor of Ana and Linda and their band of Master Gardeners, I doubt this garden would have flourished. But with its second birthday round the corner, the edible landscape is ready to take off its training pants and mature into a beautiful and thoughtful garden full of edible delights.

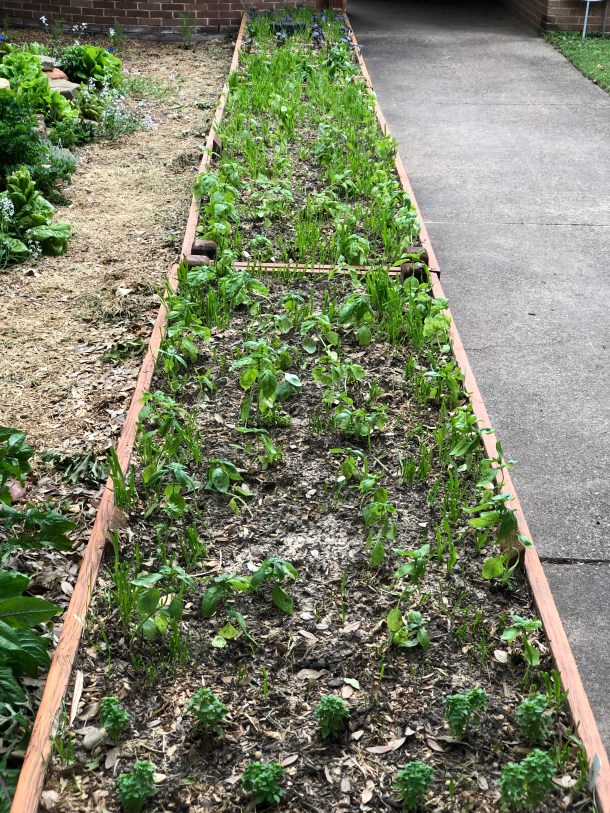
In the next few weeks, look for articles giving more detail about the 2019 design plan. The basil bed has just been planted with many different colors of basil. Hint: research the ombré look and we’ll explain later how it’s being used in the edible landscape.

South Sidewalk Raised Beds – Basil varieties/cultivars: Piccolino (Greek), Napoletano (Genovese), Eloenora (Genovese), Persian (Thai), Cardinal (Thai), Balsamic Blooms (Genovese), Red Freddy (Genovese), Amethyst Black (Genovese)

Ann Lamb

PIctures by Linda Alexander

Open this link for a list of the all the plants  and a plot plan of The Edible Landscape at The Raincatcher’s Garden.

The Edible Landscape Adds a Food Guild

April 30, 2019

The idea of a food guild or food forest is interesting because it is a less labor intensive way to grow food and more sustainable. Everyone likes the idea of low maintenance and more crops, so watch this video to see the food guild we are creating to in our Edible Landscape at The Raincatcher’s Garden.

The food guild utilizes layers of different types of plants. We are fortunate to have towering oak trees for our tall tree layer and also fortunate to have tasted acorn muffins made from acorn flour. So yes, our tall tree layer, the live oak tree is a food source. Next we will have a short tree, a vine will grow up that tree, then a shrub layer, an herb layer, ground cover and a root crop like horseradish or carrots.  As you read this, you should be getting the idea of plants growing together and utilizing each other’s strengths to create this sustainable food guild.

It’s a fascinating concept and you will get to hear of it’s successes and trials, as we watch it over the next few years.

Ana has given us a list of the plants we will be considering for The Raincatcher’s Food Guild. I’m excited about the mandarin orange tree.

Ann Lamb

video by Starla Willis

For more information about planting a food guild click here.

Planting Corn at The Raincatcher’s Garden

April 15, 2019

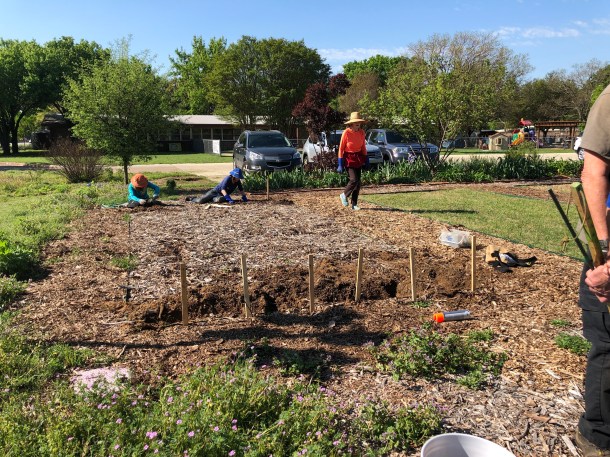
We are banking on a good crop of corn this year. After all, we have plenty of sun and warm, rich soil and dedicated gardeners staking out our new garden bed.

Let’s get those corn kernels in the ground!

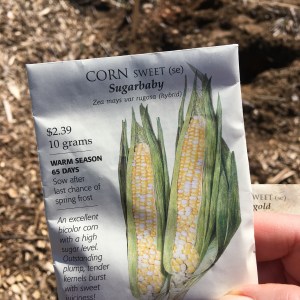
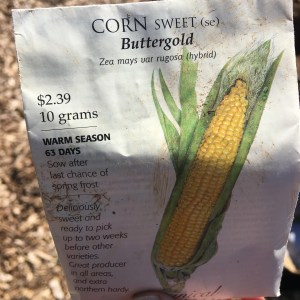
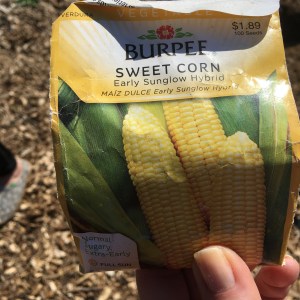
You can almost taste summer when looking at the seed packages.

Sugarbaby

Buttergold

Early Sunglow

Hwy, what do gardeners say after a corn harvest  when receiving a complement about their corn crop?

Aww shucks, thank you!

Ann Lamb

Pictures by Starla Willis


To learn about Glass Gem corn, read Christmas in July.

Dandelions are Edible

April 7, 2019

Do you consider dandelions a weed? If so, here’s some nutritional information that might encourage you to grow and harvest dandelions plants in your garden or yard.

Italiko Rosso is the variety we selected for our garden. Notice the bold red stems and midribs which contrast beautifully with the forest green leaves.

Dandelion takes it name from the French dent de lion or “tooth of the lion.” A close look at the deeply indented leaf structure tells you why.

Both dandelion flowers and leaves are a surprising source of nutrients. Dandelion greens contain vitamin C, potassium, calcium, iron, magnesium, phosphorus, thiamin, riboflavin, beta carotene and fiber. Some consider dandelions to be a nearly perfect food.

For culinary purposes, the younger the better. Fresh dandelion flowers have a sweet honeylike taste. The greens are commonly used in salads, and the root makes a cleansing and detoxifying diuretic tea.

Dandelions are by nature a very bitter green, but there are some steps to help reduce the bitterness.

First, grow a less bitter variety such as one of the more “gourmet” types: French Dandelion a.k.a Vert de Montmagny, Ameliore a Coeur Plein Dandelion, Improved Broad Leaved Dandelion or Arlington Dandelion.

Second, harvest early. Young leaves are less bitter than more mature leaves.

Third, brine leaves before steaming. This helps remove some of the bitterness. For a short demonstration on cooking dandelion leaves, see the YouTube video featuring P. Allen Smith.

Dandelions are a perennial. After you harvest the plant it will grow back the same season, year after year.

Linda Alexander

Click here to review our dandelion salad recipe. It was a featured salad, cooked to order at our last Grow and Graze luncheon.

Fresh dandelion greens can also be purchased in some grocery stores. Locally, places like Central Market, Sprouts and Whole Foods stock them on a seasonal basis.

— 

Grow and Graze Salad Garden Recipes II


See and taste The Grow and Graze Centerpiece of salad greens and to the left is our table-top appetizer featuring the peppery taste of Wasabi Arugula.

“Kick Up the Heat” Spread

Ingredients

¼ cup Wasabi Arugula, chopped

1-2 cloves garlic, finely chopped

1 cup sour cream

1 (8 ounce) package cream cheese, softened

1 teaspoon fresh grated ginger, optional

Dash of sea salt

Assorted crackers

Directions

In a medium bowl, whip all ingredients together until smooth. Spread over crackers. Serve immediately or refrigerate for a few days.

Beth cooking dandelion salad for our guests.

Dandelion Salad

Ingredients

6 ounces young dandelion leaves, tough stems and base ends removed*

2 tablespoons blanched hazelnuts (filberts), coarsely chopped (optional)

3 ounces thick-cut sliced slab bacon, cut crosswise into pieces ½ inch wide

1 ½ tablespoons sherry vinegar or red wine vinegar

2-3 tablespoons olive oil

Salt and freshly ground coarse pepper to taste

Directions

Pick over the dandelion leaves, tearing the larger ones in half. Place in a wooden salad bowl. Add the hazelnuts, if using.

In a small frying pan over high heat, fry the bacon until crisp and its fat has been rendered, about 1 minutes. Using a slotted spoon, transfer the bacon to the bowl holding the dandelions, leaving the fat in the pan.

Return the pan to high heat, add the vinegar, and swirl the pan or stir with a wooden spoon to pick up the sediment on the bottom.

Pour in as much additional oil as will be necessary to dress the salad, swirl once to heat a little, and then pour the contents of the pan over the salad. Season with salt and pepper, toss, and serve immediately.

Yield: Serves 6

*If dandelion leaves are not available, the outer dark green leaves of curly endive or spinach may be substituted.

After tasting a smorgasbord of color, flavors, shapes and textures, attendees indulged their sweet tooth with a few garden-inspired desserts:

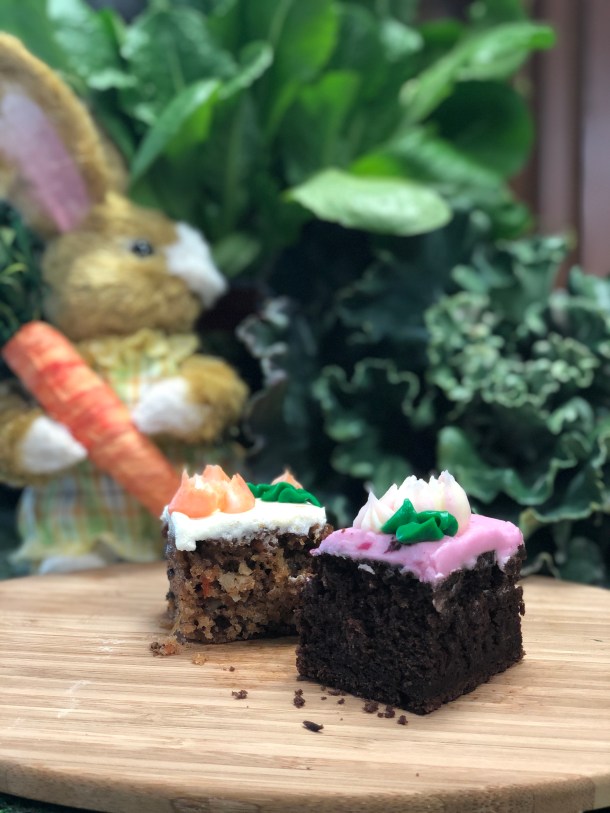
Blue Ribbon Carrot Cake and Chocolate Beet Cake with Beet Cream Cheese Frosting

Blue Ribbon Carrot Cake

Ingredients

2 cups all-purpose flour

2 teaspoons soda

½ teaspoon salt

2 teaspoons ground cinnamon

3 eggs, well beaten

¾ cup vegetable oil

¾ cup buttermilk

2 cups sugar

2 teaspoons vanilla extract

1 (8-ounce) can crushed pineapple, drained

2 cups grated carrots

1 (3 ½-ounce) can flaked coconut

1 cup chopped walnuts

Buttermilk Glaze

Orange-Cream Cheese Frosting

Directions

Combine flour, soda, salt, and cinnamon; set aside.

Combine eggs, oil, buttermilk, sugar, and vanilla; beat until smooth.  Stir in flour mixture, pineapple, carrots, coconut, and chopped walnuts.  Pour batter into 2 greased and floured 9-inch round cake pans.

Bake at 350˚F for 35 to 40 minutes or until a wooden pick inserted in center comes out clean.  Immediately spread Buttermilk Glaze evenly over layers.  Cool in pans 15 minutes; remove from pans, and let cool completely.

Spread Orange-Cream Cheese Frosting between layers and on top and side of cake.  Store cake in refrigerator.

Yield:  One 2-layer cake

Buttermilk Glaze

Ingredients

1 cup sugar

½ teaspoon soda

½ cup buttermilk

½ cup butter

1 tablespoon light corn syrup

1 teaspoon vanilla extract

Directions

Combine sugar, soda, buttermilk, butter, and corn syrup in a Dutch oven.  Bring to a boil; cook 4 minutes, stirring often.  Remove from heat, and stir in vanilla.  Yield: about 1 ½ cups.

Orange-Cream Cheese Frosting

Ingredients

½ cup butter, softened

1 (8-ounce) package cream cheese, softened

1 teaspoon vanilla extract

2 cups sifted powdered sugar

1 teaspoon grated orange rind

1 teaspoon orange juice

Directions

Combine butter and cream cheese, beating until light and fluffy.  Add vanilla, powdered sugar, rind, and juice; beat until smooth.  Yield:  enough for one 2-layer cake.

Chocolate Beet Cake with Beet Cream Cheese Frosting

Ingredients

For the cake

2 medium beets, unpeeled but trimmed of their greens

1 teaspoon vegetable oil

6 ounces (¾ cup) unsalted butter, softened, plus more for greasing the pans

1 cup packed brown sugar

¾ cup granulated sugar

2 large eggs

1 teaspoon pure vanilla extract

2 cups all-purpose flour, plus more for dusting the pans

⅔ cup unsweetened natural cocoa powder

1 teaspoon baking soda

½ teaspoon baking powder

1 teaspoon salt

1 ¼ cups buttermilk

For the frosting

1 cup (2 sticks) unsalted butter, softened

8 ounces cream cheese, softened

4 to 5 cups powdered sugar, sifted

2 tablespoons finely grated beets, mashed with a fork

1 teaspoon pure vanilla extract or scrapings of one vanilla bean pod

1-2 teaspoons milk, depending on desired consistency

½ teaspoon fresh lemon juice

Pinch of salt

Directions

Place a rack in the center and upper third of the oven.  Preheat oven to 375˚F.

Thoroughly wash beets under running water, and trim their leaves, leaving about ½ inch of stem.  Place clean beets in a piece of foil.  Drizzle with just a bit of vegetable oil.  Seal up foil.  Place on a baking sheet in the oven.  Roast until beets are tender when pierced with a knife, about 1 hour.

Remove the beets from the oven.  Open the foil and allow beets to cool completely.  Beets will be easy to peel (just using a paring knife) once completely cooled.

Using a box grater, grate the peeled beets on the finest grating plane.  Measure ¾ cup of grated beets for the cake and 2 tablespoons for the frosting.  Set aside.

Reduce the oven temperature to 350˚.  Use butter to grease two 8 or 9-inch round baking pans.  Trace a piece of parchment paper so it is the same size as the bottom of the cake pan.  Cut it out and place inside the cake pan.  Butter the parchment paper.  Add a dusting of flour to coat the pan.  Set pans aside while you prepare the cake.

In the bowl of an electric stand mixer, fitted with a paddle attachment, cream together butter and sugars.  Beat on medium speed until pale and fluffy, about 3 to 5 minutes.  Beat in eggs, one at a time, for one minute after each addition.  Stop the mixer and scrape down the sides of the bowl as necessary.  Once eggs are incorporated, beat in beets and vanilla extract until thoroughly combined.

In a medium bowl, whisk together flour, cocoa powder, baking soda, baking powder, and salt.

Add half of the dry ingredients to the butter and egg mixture.  Beating on low speed, slowly add the buttermilk.  Once just incorporated, add the other half of the dry ingredients.  Beat on medium speed until milk and dry ingredients are just incorporated.  Try not to overmix the batter.  Bowl can be removed from the mixer and mixture folded with a spatula to finish incorporating ingredients.  Cake batter will be on the thick side…not pourable.

Divide the batter between the two prepared cake pans.  Bake for 23 to 25 minutes (for a 9-inch pan) or 30 to 32 minutes (for an 8-inch pan).  Cake is done when a skewer inserted in the center comes out clean.  Remove cakes from the oven and allow to rest for 10 minutes.  Invert cakes onto a cooling rack to cool completely before frosting and assembling the cake.

To make the frosting

In the bowl of an electric stand mixer, fitted with a paddle attachment, beat cream cheese for 30 seconds, until pliable and smooth.  Add the butter and beat for another 30 seconds, until well combined.  Stop the mixer and scrape down the bowl as necessary.  Beat in the beets.  Add the powdered sugar, vanilla extract, milk, lemon juice, and salt.  Beat on medium speed until smooth and silky   Refrigerate the frosting for 30 minutes before frosting the cooled cakes.

To assemble the cake

Place one layer of cake on a cake stand or cake plate.  Top with a generous amount of pink frosting.  Spread evenly.  Place the other cake on top of the frosting.  Top with frosting.  Work frosting onto the sides of the cake.  You will have extra frosting left over.  Refrigerate for an hour before serving (it will make cake easier to slice).  Cake will last, well wrapped in the refrigerator, for up to 4 days.

Yield:  Makes one 8 or 9-inch layer cake

Linda Alexander

Pictures by Starla Willis and Linda Alexander