Tag Archives: Dallas Farm to Table

Grape Harvest at The Raincatcher’s Garden

Our Fig Luncheon on Tuesday, August 7th is sold out but we have plenty of room if you would like to join us for Jeff’s Fig Lecture.


Champanel Grapes Harvested at The Raincatcher’s Garden, summer 2018

Jim’s grape notes:
33 lbs. of grapes were picked last Tuesday, July 31st. Previous week’s harvest was 16 lbs.   The ripe grapes were juiced providing enough for 5 batches of jelly. That should make about 40- ½pints of jelly. We have been wanting grapes, well… we are getting grapes now!

Thank you, Jim Dempsey and everyone who picked the grapes!


Fig Fest Class and Luncheon

Celeste Fig Tree at Raincathcer’s

Fig Fest, Celebrating a Seasonal Delicacy

With their sweet taste and luscious texture, figs can be used in a variety of culinary dishes. From growing to harvest, we’ll give you the information needed to become a fig expert. Join us; class will be indoors and luncheon reservations are still being taken.

Instructor: Jeff Raska, Dallas County Horticulture Program Assistant, Texas A&M AgriLife Extension Service

Tuesday, August 7th – 10:00am*

Hosted by Raincatcher’s Garden of Midway Hills located at 11001 Midway Road

Master Gardeners earn one-hour education credit; class is free.

Immediately following Jeff’s presentation, you are invited to join us for lunch. Lunch is by reservation only.

$15 per person

Seating is limited to 48 guests and is by paid reservation only: http://www.eventbrite.com/e/fig-fest-tickets-48093118813

Menu

Figgy Focaccia and Grilled Figs with Thyme Honey

Fig, Arugula and Walnut Salad with Fresh Citrus Vinaigrette

Rosemary Flank Steak with Fig Salsa

Lemony Rice Pudding with Figs and Saba

Fig and Strawberry Tart topped with Fresh Fig Ice Cream

Fig Flavored Tea and Water


*All Members of the Public Invited

Class and Lunch are indoors at Midway Hills Christian Church and lunch reservation deadline has been extended to Friday, August 3rd.

Recipes from the July Master Gardener Meeting


Update on the July 24th Grape Balls of Fire event-we will be indoors, it’s too hot to be outside in our garden and reservation deadline has been extended to Sunday, July 22,2018.

https://dallasgardenbuzz.com/2018/07/16/whats-happening-at-raincatchers/

And now here are the recipes:

Bacon-Wrapped Jalapeño Poppers

Ingredients

½ cup cream cheese

½ cup shredded sharp Cheddar cheese

12 jalapeño peppers, halved lengthwise, seeds and membranes removed

12 slices bacon

Directions

Preheat oven to 400˚F.  Line a baking sheet with aluminum foil.

Mix cream cheese and Cheddar cheese together in a bowl until evenly blended.  Fill each jalapeño half with the cheese mixture.  Put halves back together and wrap each stuffed pepper with a slice of bacon.  Arrange bacon-wrapped peppers on the prepared baking sheet.

Bake in the preheated oven until bacon is crispy, about 15 minutes.

Tomato & Basil Soup

adapted from Cold Soups, by Linda Ziedrich

volume = 1.75 c

1 Tbsp + 2 Tbsp olive oil

1/4 med onion, chopped

1 pound tomatoes, cut into chunks

1/2 cup basil leaves, packed loosely

2 garlic cloves, chopped

1.5 tsp balsamic vinegar

Heat 1 Tbsp oil, add the onion, and sauté over medium heat until soft.

Add the tomatoes, and cook until the tomatoes are soft, about 15 minutes.

Put the remaining 2 Tbsp oil, basil, garlic and vinegar in blender and blend.  Add the tomato mixture to the mixture in the blender.  Blend until smooth.

Chill and serve.

*For a fun presentation, cut off the tops of a Campari tomato and scoop out the insides.  Fill with soup and garnish with a basil leaf.

Strawberry Balsamic Popsicles

adapted from Perfect Pops by Charity Ferreira

volume 1 cup

1/2 pound diced strawberries (1/2” dice) – about 1.5 c after hulling

2 T sugar (white, granulated)

1 t balsamic vinegar

black pepper

Pulse the strawberries and sugar in a food processor to get a fine chop – juicy, but chunky

Add the vinegar and a few grinds of pepper (a coarser grind gives you a more pronounced bite)

Let the mixture sit out a bit, say 30 minutes, to allow strawberry juice to accumulate

Stir, pour into molds and freeze

*Using the mini-ice cube molds (they hold 2 tsp each), the above recipe will make 24 popsicles.

Cinnamon Basil Polenta Cookies

Ingredients

½ cup yellow cornmeal, preferably stone-ground

¾ cup bleached all-purpose flour

2 tablespoons cornstarch

1 teaspoon baking powder

Pinch of coarse salt

¼ teaspoon ground cinnamon

2 tablespoons (packed) whole cinnamon basil leaves

½ cup granulated sugar

6 tablespoons unsalted butter, softened

2 tablespoons vegetable shortening

1 egg yolk

2 tablespoons half-and-half or cream

1 teaspoon vanilla extract

Confectioners’ sugar to garnish (optional)

Directions

Preheat oven to 350˚F.

Whisk together cornmeal, flour, cornstarch, baking powder, salt and cinnamon; set aside. In a food processor or blender, whiz cinnamon basil leaves and sugar until leaves are finely ground. Transfer to a medium bowl; add butter and vegetable shortening. Beat on high speed until light and fluffy. Scrape down sides with a spatula and add egg yolk, half-and-half and vanilla; beat until combined well. With mixer running, slowly add flour mixture until combined.

Scoop out heaping teaspoons of dough onto parchment paper-lined baking sheets, placing them 2 inches apart. Bake 10 to 12 minutes, until golden. Remove to racks and let cool; dust with confectioners’ sugar before serving or storing, if desired. Store in an airtight container.

Yield: 3 Dozen Cookies


Grazing Thru The Edible Landscape

The July Master Gardener meeting was a tasty success – a wonderful, informative speaker on our favorite topic – food!   …Well, to be more precise, the topic was about how to incorporate food plants into our landscapes.  Cheryl Beesley, a master gardener, horticulturalist, and landscape designer with an emphasis on edible landscapes was gracious, entertaining and educational.
Before the meeting and her talk, we gathered to graze in Raincatcher’s own edible landscape. Culinary creations from our own fruits, vegetables and herbs were offered and gobbled up.

Our culinary team showing off our tasty treats!

Through the garden gate – a glimpse of the landscape.

Starla with a photo-retrospective of our journey from old playground to new edible landscape.

Our guests enjoying the tasting; that’s the hugelkultur in the foreground.

Three of our planting scenes: our southern border lined with okra, our ‘rock garden’ with herbs, and the transformed swingset, now home to peppers and cucumbers.

Abbe sharing the chilled tomato-basil soup served in mini-tomato cups. Recipes coming!

Lisa with glazed lemon zucchini bread.

Lavender shortbread cookies – yum!

Passion fruit and tarragon truffles by Ana made with plants from our edible landscape.

Annette and Starla’s friend, Marsha Adams, enjoying a seat in the shade.

Cynthia Jones with our speaker, Cheryl Beesley and her husband, James.

Written by: The Edible Garden Team and Lisa Centala

Pictures by Starla Willis

What’s happening at Raincatcher’s?

Lazy days of summer? Not this group! Having just finished our Grazing in the Garden event, next up are two more marvelous learn and eat opportunities. Careful now, the food tickets sell quickly. Lecture is free and no reservations required.  Details below.

Goodness, Gracious, Grape Balls of Fire!

Raincatcher’s Garden of Midway Hills

Tuesday, July 24th-10am 

10:00am – 11:30am, Under the Shade Pavilion, North Garden

11001 Midway Road, Dallas

Jeff Raska, Dallas County Horticulture Program Assistant, Texas A&M AgriLife Extension Service

Growing grapes in Texas is easy to do. Learn the basic steps, and you’ll be ready to start your own grape orchard.

(Master Gardeners earn one-hour education credit)

Following Jeff’s short presentation join us for a special treat.

Toney Davrados, of Yiayia’s will demonstrate the art of making dolmas. Dolmas are thought of as a culinary legacy from the Ottoman Empire. You’ll be transported back to the 1700’s with the savory, flavorful taste of these delightful delicacies.

$10 per person, Limited seating

https://www.eventbrite.com/e/goodness-gracious-grape-balls-of-fire-tickets-48106230029

(Paid reservations required by Friday, July20th)

Menu

Dolmas

(Filled with sirloin, onion, rice, parsley and Toney’s special seasonings)

Watermelon and Radish Salad

Peach and Blueberry Parfaits featuring Yiayia’s Homemade Greek Yogurt

Mint-Infused Iced Tea


Fig Fest, Celebrating a Seasonal Delicacy

Instructor: Jeff Raska, Dallas County Horticulture Program Assistant, Texas A&M AgriLife Extension Service.

With their sweet taste and luscious texture, figs can be used in a variety of culinary dishes. From growing to harvest, we’ll give you the information needed to become a fig expert. Join us!

Tuesday, August 7th – 10:00am*

Hosted by Raincatcher’s Garden of Midway Hills * 11001 Midway Road

(Master Gardeners earn one-hour education credit)

Immediately following Jeff’s presentation, you are invited to join us for lunch.

$15 per person

Seating is limited to 48 guests and is by paid reservation only: http://www.eventbrite.com/e/fig-fest-tickets-48093118813

Reservation deadline-August 3rd

Menu

Figgy Focaccia and Grilled Figs with Thyme Honey

Fig, Arugula and Walnut Salad with Fresh Citrus Vinaigrette

Rosemary Flank Steak with Fig Salsa

Lemony Rice Pudding with Figs and Saba

Fig and Strawberry Tart topped with Fresh Fig Ice Cream

Fig Flavored Tea and Water

*Public Invited to both events!

Questions? Call the help desk- 214 904 3053 or drop us a line in the comment section.


April Box Lunches

Hungering for the what was in the box lunches at the April Master Gardener meeting?

April Box Lunches Prepared by Master Gardeners

Here’s our menu:

Three finger sandwiches made with jalapeno pimento cheese, salad burnet spread  and almond chicken salad,* marinated vegetables and *snicker doodle cookies and *apricot bars.


Marinated Vegetables

Trio of garnished finger sandwiches!

Almond Chicken Salad

6 cups cooked chicken breast, cut into ½ inch cubes

2 cups celery, thinly sliced, about ¼ inch

1 cup red onions, finely chopped

3 green onions, finely chopped

4 garlic cloves, minced

1 cup mayonnaise (good quality prepared)

¾ cup sour cream

Mexican Mint Marigold, garden view!

1 tablespoon fresh Mexican Mint Marigold, finely chopped

2 teaspoons salt

1 teaspoon pepper, freshly ground

¾ cup golden raisins

1½ cups sliced almonds, toasted

Place all ingredients in a mixing bowl. Toss lightly until combined. Refrigerate until ready to serve.


Yield: Makes 12 cups

Linda Alexander

*Marinated vegetables, Grandmother’s favorite snicker doodle cookies, and apricot bar recipes are available by asking Linda or leaving a comment and she will contact you.


Harvest It and They Will (be) Come(ly)

One of the concerns about edible landscaping is that if you eat your edibles, you’ll lose your landscape!  That’s a valid concern.  So here at the Edible Landscape of Raincatcher’s garden, we have pictorial proof to poof away your fears!  We planted our circle of greens in our shade bed about two months ago from 6-inch transplants.  The bunnies in our neighborhood really liked the swiss chard, so we added a little fence to discourage their visits.

Our bed of greens this morning when we arrived.  Full and lush and beautiful.  Can’t you see that gracing your front yard?

Our bed of greens this morning when we arrived.  No, wait!  This is After we harvested from it.  Can you tell the difference?  Maybe it looks even a little more neat and tidy.  I guess maybe we didn’t harvest too much from it.

Our harvest.  Really!  How many people could you feed with all these lovely greens?  We’ve got kale, mustard greens, French sorrel,  parsley and spinach and we can use them raw in a salad or steamed, tossed in a little cream sauce over pasta, or chopped up and thrown into a soup.  If you like a little challenge, how about juicing them and using the juice to make a green pasta?  Or chopping  and mixing with bread dough for rolls?  If this was in your yard, you could harvest a little every day and no one would know you’ve been eating your landscape.

There’s going to be a talk on Edible Landscaping at 11001 Midway Road on Thursday, June 28 at the June Master Gardener meeting. Lecture starts at noon.  Come join us and see our edible landscape in person.  Or stop by any Tuesday morning, we’ll be out there, harvesting our greens.

“This post comes from The  Edible Landscape team at Raincatcher’s,
Lisa Centala
Pictures by Starla Willis

Recipes From The Glorious Greens Lecture and Lunch

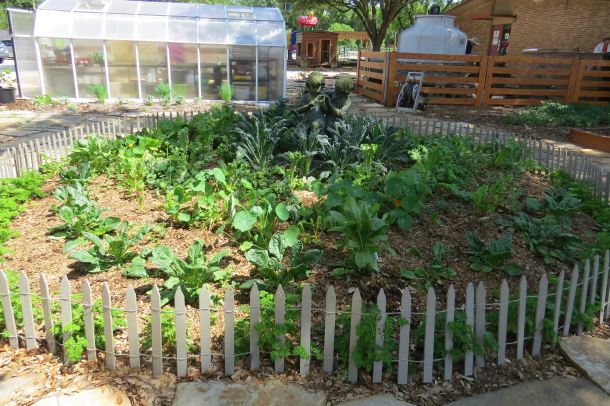
Our new edible garden, where it all began. More classes to be coming from this garden to you. Subscribe to Dallas Garden Buzz for more info.

Creamy Cauliflower Soup with Greens

Ingredients

1 tablespoon extra-virgin oil, plus more for drizzling

1 medium onion, chopped (about 1 cup)

4 cloves garlic, chopped

Sea salt

1 medium head cauliflower (about 3 pounds), florets and stems cut into 1-inch pieces (8 to 9 cups)

4 ½ cups filtered water

¼ cup chopped fresh dill, plus more for garnish

5 large kale or collard leaves, or a combination, tough ends removed and leaves roughly chopped

Freshly ground black pepper

Directions

Heat oil in a large pot over medium heat; cook onion, covered, until soft, 4 to 5 minutes. Add garlic and a pinch of salt, and cook for 3 minutes more.  Add cauliflower, and pour in filtered water until it reaches just below the top of the cauliflower

Bring to a boil over high heat. Add 2 tablespoons dill. Reduce heat to low, and simmer until cauliflower is just tender, about 10 minutes. Stir in greens, and simmer for 3 minutes.

Let sit for 5 minutes to cool slightly. Stir in remaining 2 tablespoons dill.  Puree soup in batches in a blender until very smooth, adding more water (about ½ cup) if it’s too thick. Return to pot and reheat. Season with salt and pepper. Garnish with dill, black pepper, a drizzle of oil, and pinch of sea salt.

Yield: Makes 8 cups

Evelyn and Susan, pesto making!

Spicy Mustard Green Pesto

Ingredients

3 cups fresh mustard greens, stem removed, washed and rough chopped

2 teaspoons fresh chopped garlic

1 teaspoon fresh lemon juice

3 tablespoons pine nuts, toasted 7-8 minutes at 350˚F

⅛ cup shredded Parmesan cheese

3 tablespoons olive oil

2 teaspoons Kosher salt

1 teaspoon ground pepper (white or black)

Directions

Blanch greens in lightly salted boiling hot water for 15 seconds. Drain thoroughly.

Place all ingredients in a food processor and blend thoroughly to combine. Adjust seasoning as necessary. Refrigerate at 40˚F if not used immediately.

Yield: Makes 2 cups

Dedicated to our greens, note the green nail polish!

The Ultimate Classic Collards

3 (1-lb.) packages fresh collard greens or use fresh from your garden

12 smoked bacon slices, chopped

2 medium-size yellow onions, chopped

3 garlic cloves, minced

3 cups reduced-sodium chicken broth

¼ cup apple cider vinegar

2 Tablespoons honey

1 (12- to 16-ounce) smoked ham hock

Kosher salt

Freshly ground black pepper

Remove and chop collard stems. Chop collard leaves. Cook bacon in a large Dutch oven over medium heat, stirring occasionally, 12 to 15 minutes or until almost crisp.  Add onion, and sauté 8 minutes or until onion is tender. Add garlic, and sauté 1 minute.

Stir in chick broth and next 2 ingredients; add ham hock. Increase heat to high and bring to a boil. Add collards in batches. Reduce heat to medium-low; cover and cook 2 hours or until desired tenderness.

Remove meat from ham hock; chop meat, and discard bone. Stir chopped meat into collards. Season with salt and freshly ground pepper.

Yield: Makes 6 to 8 servings

Ready to plate! Thanks Evelyn, Patty, Abbe, Sarah, Ann, Linda, and other Master Gardeners!

Spring Quiche with Leeks and French Sorrel

For the Crust:

1 ¼ cups all-purpose flour

¼ teaspoon salt

8 tablespoons (1 stick) unsalted butter, chilled and cut into cubes

3-5 tablespoons ice water

1 tablespoon apple cider vinegar

For the Filling:

1 large egg white

2 tablespoons extra virgin olive oil

1 large leek (white and light green parts only), cleaned and sliced into ½-inch pieces (should yield about ½ cup)

3 large eggs

¼ cup grated Parmesan cheese

½ cup 2% milk

½ cup half and half

¼ cup part-skim ricotta

1 teaspoon Kosher salt

½ teaspoon freshly ground black pepper

2 tablespoons chopped dill (fresh or dried)

1 tablespoon chopped rosemary (fresh or dried)

2 cups fresh French sorrel, washed and dried well

Make the Dough:

In a food processor, pulse together the flour and salt a few times to combine. Add the cubes of butter and pulse continuously until the mixtures starts to look like tiny pebbles. With the food processor running, drizzle in the apple cider vinegar, followed by the ice water, stopping when the mixture just begins to come together. Working quickly, form the dough into a flat disk, wrap it in plastic and refrigerate for 1 hour or up to 2 days.

Prepare the Crust:

Preheat the oven to 375˚F. On a large floured surface, roll the dough into an approximately 12-inch circle. Gently press into a 9-inch tart or pie pan, trimming any overhang. Line the dough with aluminum foil and dried beans (or pie weights) and bake for 20 minutes.

Remove the pan from the oven and take out the foil and beans. Brush the crust with the egg white and prick the bottom with a knife or a fork to allow air to release and prevent bubbling. Place back in oven and bake for an additional 5 minutes

Make the Filling:

In a medium-sized pan over medium heat, heat the olive oil and add the leeks. Stir until they are coated in oil, then turn down the heat to medium-low and cover the pan. Cook the leeks until golden brown and caramelized, about 20-25 minutes. Check their progress after 15 minutes to ensure you don’t burn them (depending on what kind of pan you’re using; the cook time can vary slightly).

Meanwhile, whisk together the eggs, Parmesan cheese, milk, half and half, ricotta, salt pepper, dill and rosemary.

When the leeks are done cooling, lay them out on top of the pre-baked crust. Place the pan on top of a cookie sheet for easy transport. Pour the filling on top of the leeks and place the quiche in the oven. Bake for 30 minutes, or until the top of the quiche has puffed and is set in the middle and just slightly golden.

Allow the quiche to cool slightly, about 12 minutes. If you put the sorrel on while the quiche is piping hot, the delicate greens will brown. Sprinkle the sorrel on top, slice and serve. Quiche is best served room temperature the day it is made although it will keep just fine covered in the refrigerator for up to 2 days (the sorrel is just going to get a bit wilty).

Yield: One 9-inch Quiche (Serves 6 as an entrée or 8 smaller slices)

Glorious greens ready to eat. Plates garnished with mustard greens, of course! Both soups delish!

Minestrone Soup

Ingredients:

⅔ cup small pasta, cooked according to package directions, drained and set aside

3 tablespoons olive oil, divided

1 ½ pounds ground beef

1 large onion, chopped

3 large carrots, peeled and cut into ¼ inch rounds

3 large celery stalks, cut into ¼ inch slices

2 garlic cloves, pressed

1 pound fresh Swiss chard, center vein removed, chopped

1 large turnip, peeled and cut into small cubes

1 large baking potato, peeled and cut into small cubes

1 (28-ounce) can crushed tomatoes

2 (16-ounce) cans beef broth

2 (15-ounce) cans cannellini beans

1 (32-ounce) box good beef stock

1-inch piece of Parmesan cheese

½ cup grated Parmesan cheese

3 tablespoons fresh parsley, chopped

Salt and pepper

Directions:

Preheat 1 tablespoon oil in a large pan over medium heat.  Add ground beef and cook, breaking it up, until it is no longer pink.  Season with salt and pepper.  Set aside.

In a large stock pot, add 2 tablespoons olive oil. Add onions, salt and pepper to taste and cook over medium heat until translucent, about 4 minutes.

Add carrots and celery to the pot.  Cook for 10 minutes.  Add garlic and cook for 1 minute more.

Add Swiss chard, turnip and potato to the pan.  Cook for 4 minutes or until the chard begins to wilt.

Add the crushed tomatoes and the 2 cans of beef broth to the pot and simmer for 15 minutes or until the chard breaks down.

Meanwhile, combine half of the drained cannellini beans with ½ cup of beef stock in a blender.  Blend until smooth.

Add the blended cannellini beans, remaining drained beans, remaining beef stock, the 1-inch piece of Parmesan, reserved ground beef, cooked pasta and the handful of Parmesan cheese to the pot.  Stir to mix and simmer for 25 minutes.  Stir occasionally.  Vegetables should be fork tender.

Season with salt and pepper, to taste.  Add fresh parsley and serve.

Yield: 8-10 servings

Linda Alexander

Our thanks to Jeff Raska for the garden education.

Save the date for our next education/lunch event-Peach Fever.

Date: Tuesday, June 26th, reservation information to follow

Chinese Long Beans—Green Beans for Summer—Even Here

Have you ever read or been told that green beans will produce all summer?  This is advice that must be met with a kind smile.  Bless their hearts, it’s totally untrue.   Obviously cannot be blamed for this mistake, they are just not from around here.  Anyone who gardens in North Texas knows green beans will not make it in summer’s heat.

Does that mean no more fresh beans? No, not if you plant Chinese long beans.  This delicious vegetable goes by many names: snake bean, yard long bean even asparagus bean.  A red variety called red noodle is also available.  Properly they are called Vigna Unguiculata.  As its “real name” makes clear, they are actually related to cowpeas or blackeyed peas and not ordinary garden green beans.  The important point is they grow in the heat of summer, in fact they require heat to do well.  Which wouldn’t matter if they didn’t taste good, but they do with flavor much like green beans and a touch of blacked pea.

Are you convinced? Plant the seeds as directed on the package.  It is essential to provide a sturdy support as these are vines not bushes.  Large tomato cages work well. The vines would probably like something ten feet tall to grown on but vines don’t always get what they want.  Compromise is key between you and the vines.  Give the vines plenty of room so  they can grow up and over supports but keep them within bounds so you can  pick the beans. Remember the vines will try to grab any innocent plant that gets in their way; be alert.

Trellised Vines of the Chinese Long Bean

Garden soil with compost is ideal.  Apply organic fertilizer when planting. As with any rapidly growing plant, regular watering is essential.

Once the production starts, check the vines every day. The beans grow amazingly fast and will need regular picking, pick them about twelve inches long  while they are still firm and dark green.

Chinese Long Beans, Ready to Eat!

When they are picked like this they are even good raw in salad. They are delicious prepared in many ways: simmered as green beans would be or fried as they are in many traditional Chinese recipes.

Try them and you will see for yourself!!

Susan Thornbury

Tomatoes For Dessert!

Green Tomato Brown Betty

Green Tomato Brown Betty

Ingredients:

2 cups crumbs (graham cracker, whole wheat cracker or cookie crumbs)

1 stick unsalted butter, melted

3 pounds (approximately 3½ cups) unripe green tomatoes, thinly sliced

¾ cup raisins

Juice of 1 lemon

1¼ cups light brown sugar

1 tablespoon cinnamon

1 teaspoon ground allspice

½ cup apple juice

Directions:

  1. Preheat the oven to 350˚.
  2. In a small bowl, combine the crumbs and melted butter. Set aside. In a medium bowl, mix the tomatoes, raisins, lemon juice, sugar and spices together.
  3. Butter a 2-quart baking dish. Spread a third of the crumb mixture evenly over the bottom. Spread half of the tomato mixture on top of the crumbs. Sprinkle with half the apple juice. Cover with another third of the crumb mixture, followed by the remaining tomatoes. Sprinkle with the rest of the apple juice. Finish by covering the tomatoes with the remaining crumb mixture.
  4. Cover and bake for approximately 45 minutes or until the tomatoes are soft. Remove the cover. Raise the heat to 400˚ and bake for another 10 minutes or until browned on top. Serve warm with a scoop of vanilla ice cream.

Serves 8

Adapted from TOMATOES: A Country Garden Cookbook by Jesse Cool


Tomato Ginger Upside-Down Cake

Ingredients:

1 stick unsalted butter, melted

1 tablespoon grated fresh ginger

6 tablespoons light brown sugar

2 to 3 ripe tomatoes (or enough to cover the bottom of the pan as you would a pineapple upside-down cake), skinned, seeded and sliced ¼ inch thick

1 stick unsalted butter, softened

1½ cups brown sugar

½ cup molasses

2½ cups unbleached white flour

2 teaspoons baking powder

1 tablespoon ground ginger

½ teaspoon ground cloves

1 cup buttermilk

Directions:

  1. Preheat the oven to 350˚.
  2. Combine the melted butter with the ginger and sugar and spread evenly on the bottom of a parchment paper-lined 10×14-inch pan. Cover with tomato slices.
  3. In a mixer, cream the butter with the brown sugar and molasses. In another bowl, sift together the flour, baking powder and spices. Add the flour mixture alternately with the buttermilk to the creamed butter and sugar. Pour batter over tomatoes in baking pan.
  4. Bake for approximately 40 minutes or until a toothpick comes out clean when testing the center of the cake. Remove from the oven, loosen outer edges with a knife and invert onto a platter larger than the baking pan. Let stand at least 5 minutes before trying to remove the pan. Carefully peel back the parchment paper. Serve warm with whipped cream or vanilla ice cream.

Serves 8 or more

Adapted from TOMATOES, A Country Garden Cookbook by Jesse Cool

Recipes and Picture by Linda Alexander

Editing-Lisa Centala