Soups And Cornbread With Veggies

Broccoli Cornbread

Broccoli Veggie Cornbread 

½ stick butter or margarine, melted

2 eggs, slightly beaten

1 pkg Jiffy Cornbread Mix

½ pkg (10 oz) frozen chopped broccoli, cooked (about 1 cup)

½ cup small curd cottage cheese

½ cup canned creamed corn

Grated onion or chopped green onion, if desired 

Preheat oven to 350 degrees. Chop cooked broccoli a bit smaller. In a large bowl melt butter in microwave. Add chopped broccoli, cottage cheese, corn, onion and beaten eggs. Mix till combined. Stir in cornbread mix.

Pour into greased 8 x 8 Pyrex for thicker squares or 7 x 11 Pyrex for less thick squares. Bake about 35 minutes or until toothpick in center comes out clean. 

Patti,Dallas County Master Gardener Class 2012

 Spicy Refried Bean Soup

1 can (15oz) fat-free, spicy refried beans

1 can (15 oz) whole kernel corn, drained

1 can (15 oz) black beans, rinsed and drained

1 can (14.5 oz) vegetable broth

2 cans (10oz) Rotel tomatoes with green chilies

1 cup water

Mix all ingredients in a large pan.  Heat on medium until it comes to a boil.

 Reduce heat and simmer 8-10 minutes.  Serve with tortilla chips.

Makes 2 quarts.  Less than 120 calories per 8oz. serving.

“Heat” can be adjusted by using less Rotel tomatoes

Sarah, 2006

Mediterranean Lentil Ragoût

Olive oil cooking spray

1 large onion, finely chopped

5 cloves garlic finely minced

1 jalapeño pepper, finely minced

1 large fennel bulb, sliced thin

1 (28 ounce) can diced tomatoes

1 1/2 cups orange juice

1 1/3 cups lentils, picked over and rinsed

1 Tablespoon dried basil

1 Tablespoon dried oregano

1/4 cup tomato paste

1/3 cup mint leaves, chopped, divided use

6 cups cooked rice, quinoa or bulgur

Parmesan cheese (optional)

1. spray a heavy skillet with cooking spray; place over low heat and sauté onion, garlic, jalapeño and fennel, stirring occasionally, until soft, about 5 minutes. (if vegetables start to stick or brown, cover skillet.)

2. Add tomatoes, orange juice, lentils, basil, oregano and tomato paste. Increase heat and bring to a boil.  Reduce heat, cover and simmer for 40 to 50 minutes, or until lentils are tender. (add up to 1/2 cup water or orange juice if ragout gets too thick.)

3. Stir in mint leaves, reserving 2 tablespoons for garnish.  Serve lentil stew over rice, quinoa or bulgur. Garnish with Parmesan cheese, if using, and remaining chopped mint.

Serves 6, approximately 449 calories per serving

Recipe from The Phytopia Cookbook by Barbara Gollman and Kim Pierce


Homegrown, Veggies, Fruits and Herbs

I have a visual image of Master Gardener and nutritionist Barbara Gollman at Kroger: Red hair flying, trim figure running behind a cart, zipping down the frozen food isle flinging packs of frozen veggies into the cart for one of her wonderful soups. 

Barbara, Dallas County Master Gardener Teaches Value of Vegetables

Barbara intrigued a large group of Master Gardeners Tuesday with her talk on the nutritional benefit of vegetables, fruits, and herbs.  Turns out that Mom was correct when she urged us to eat our vegetables.  Carrots, oranges, sweet potatoes, and other fruits and vegetables are full of phytochemicals, substances in plants that have the potential to slow aging, boost immunity, prevent disease, and strengthen our hearts and circulation. 

Cabbage, Broccoli Field Road, Dallas, Texas

Barbara suggests that we eat watermelon and tomatoes, plants that are packed with lycopene, a nutrient which helps prevent macular degeneration.  Pinto beans are rich in fiber, which can prevent cancer and heart disease, and flavonoids, which can curb the oxidation of LDL cholesterol and prevent blood clotting.  Cruciferous vegetables like broccoli and cabbage are high in calcium.  Nuts are filled with Vitamin E, one of the most potent fat-soluble antioxidants. Berries, greens, winter squash—-well, you get the idea.  

Barbara said that new research has shown the health benefits of herbs. Who knew? Turns out that 1 teaspoon of oregano = ¾ cup of brussel sprouts in antioxidants.  

Barbara dries her herbs in the microwave after her husband’s reaction to using his closet as an herb drying rack. Remove the leaves from the stems of the herbs and spread on paper towels.  Put two paper towels on top of the herbs.  Pop in the microwave and zap for one minute.  (If the leaves are charred, try again and use a shorter amount of time. If the leaves aren’t crisp, microwave longer in 15-second increments.)  Remove from the microwave and air dry on the kitchen counter for a few days.  Store in a labeled glass jar.  

Are home grown vegetables better for you than those found in the grocery? Barbara says some research showed up to a 15 percent increase in nutrients in homegrown and organic vegetables.  Some other studies didn’t find an increase in nutrients. 

Many thanks go to Barbara for her research and common sense approach to healthy eating.  Let’s just put it this way: on the way home I stopped at Whole Foods and bought spinach, broccoli, and almonds for dinner.   

Elizabeth

Recipes served in the class will follow.

One Potato, Two Potato, Hopefully More

One of the joys of winter is to sit down with a cup of tea or hot chocolate and thumb through garden books and catalogues.   Visions of a riot of color from  gorgeous flowers (does it really matter that my yard is shaded by many tall trees and the descriptions say “full sun”) and bountiful vegetable harvests (surely there is a shade tolerant tomato) always seem to intoxicate me into ordering or purchasing many more seeds and products than any reasonable person needs or can use.  Of course, most of the sunny place flowers struggle, get lanky, then die a slow death in the shade of my yard; and, so far, I haven’t discovered a shade tolerant productive tomato.  Yet spring holds such promise, and occasionally I find a particular variety of full sun plant that tolerates shade, that I forget the failures of last year and try again.  After all, some experiments turn out well.

     For the past two years the Garden’s vegetable guru, Jim,  has experimented with the “trash can” method of planting potatoes.  If you are not familiar with this method there are several  YouTube videos showing literally pounds and pounds of potatoes being harvested from potato sets planted in 30 gallon trash cans.  To construct a “trash can” potato bin, a drainage hole is made in the bottom of a plastic trash can, Seed potatoes are planted at the bottom of the can in a few inches of soil, then as the potato plants grow to about eight inches tall enough soil (in the Garden’s case, the Garden’s homemade compost) is added to cover them half way up the stem.  At the end of the season, the trash can is dumped and the potatoes are harvested.  An easy way to grow potatoes?  It certainly sounds like it.  However Jim reported that in the first year’s experiment, the Garden’s trash can potatoes rotted.  Guessing that perhaps there wasn’t enough drainage, the second year Jim tried putting 2” drainage holes around the side of the can.  Once again, though the plants themselves were huge and vigorous since they were growing in all that compost, the actual potato yield was small and many of the potatoes continued to rot. 

     A failed experiment, perhaps….  however one always learns something.  Jim surmised that perhaps the problem was that the potato plants were not getting enough sun.  Potatoes need full sun and the opaque trash can shaded them unless the sun was directly overhead.    It wasn’t until months later when the plants grew over the top of the can that they were in full sun throughout the day.

     So, this year, the Garden is trying two methods to grow potatoes.  The first, in the garden’s raised bed, is the usual “trench method” where a trough about 6”-8” deep and about 4” wide is dug.  Seed potatoes that have been cured and dusted with sulfur are planted about 12”-15” apart and covered with about 4” of soil.  As the potatoes sprout, the soil is “hilled”/backfilled around the stems since potatoes grow in the space between the seed potato and the surface of the soil.    

Red La Soda Potatoes, Dusted With Sulfur, Ready For Planting

                                                               . 

    The second experimental method being tried is Jim’s homemade 2’x2’ potato bin constructed from 1”x6” treated lumber (one can also use untreated lumber or cedar).  As the potatoes plants grow to about 12” tall, another 6” panel of lumber will be added to the bin and enough soil added to bury 1/3 of the plant. 

New Potato Bin At The Demonstration Garden

The advantage to this type of bin as opposed to the trash can method will not only be increased drainage but also the potato plants will be able to receive full sun throughout the day since more panels can be added as the potato vines grow taller.  Will this method produce a better crop of mature potatoes?  Who knows….. but that’s the fun of experimenting.

     There are many other methods (potato bags/wire bins lined with newspaper/etc) used to plant potatoes.   Do you have a favorite method for planting potatoes?   If so, let us know.  This year in my community garden plot, I plan to try “laundry basket” potatoes:  cutting out the bottom of a plastic laundry basket and using it like a cage to hold the mounded soil around my potatoes.  If it works, I’ll let you know the results.  If not, I’ve only lost several small seed potatoes plus three dollars to purchase three laundry baskets from the Dollar Store.  So tell us your method— and Happy Experimenting!!

Carolyn

Arugula-Pear-Blue Cheese Salad

Arugula, Pears, Pecans, Blue Cheese For Salad

1/4 cup plus 2 Tbsp peach or pear preserves

1/2 cup Champagne vinegar

1 shallot, sliced

2 tsp. Dijon mustard

1/2 tsp salt

1/4 tsp freshly ground pepper 

1/2 cup olive oil 

8 cups loosely packed arugula

2 Bartlett pears, cut into 6 wedges each

4 oz. blue cheese, crumbled

1/4 cup chopped toasted walnuts or pecans 

Process 1/4 cup preserves and next 5 ingredients in a food processor 30 seconds to 1 minute or until smooth.  With processor running, pour oil through food chute in a slow steady stream, processing until smooth.  Transfer to a 2-cup measuring cup or small bowl, and stir in remaining 2 Tbsp peach preserves. 

Place arugula in a large serving bowl.  Top with pears, blue cheese, and pecans.  Drizzle with vinaigrette. 

Elizabeth  From Southern Living Magazine 

Arugula

Wild Arugula, Upper Left Corner

Some Herbs behave and have benign reputations.  Others like Arugula, are said to be  pushy, narcissistic  snobs.  Pushy, yes, if you don’t like bold peppery flavor, don’t try Arugula on your sandwich or in your salad. There’s a reason Arugula is also known as Rocket or Roquette!  And Arugula likes itself enough to fling its seeds all over the garden so maybe it is narcissistic.  Like much in life, though, the snob label isn’t fair. Arugula is pricey at approximately $6 a pound in the grocery store and it is true that it’s peppery leaves are appreciated by the white wine crowd, but any gardener can  plant arugula easily in a sunny spot and enjoy it in all the recipes we are going to provide. 

Transplants can be bought now and planted in your Dallas area gardens.Wait a few weeks to plant by seed.  I asked some of my favorite Dallas County Master Gardeners about Arugula and here is what they said. Ann
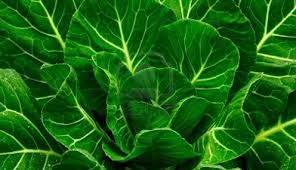
 Arugula

It’s pronounced ah-ROO-guh-lah!

SALADS

mmmm I like it so much I have trouble getting it to the kitchen uneaten.  With pears, I’d say Bosc pears and pear flavored white balsamic vinegar for dressing. Deirdre

We enjoyed an Arugula-Pear-Blue Cheese Salad as part of Christmas dinner.  Place arugula in a large serving bowl.  Top with Bartlett pears, cut in six wedges, crumbles of a good blue cheese, and toasted pecans or walnuts. Drizzle with a vinaigrette made with olive oil, Champagne vinegar, a shallot, and Dijon mustard. Elizabeth  

Here is an Arugula Salad that I have been making for many years.  Makes a fresh and flavorful addition to almost any meal. 

Arugula, Tomato and Avocado Salad 

8 cups loosely packed arugula, torn into bite-size pieces

16 ounces plum tomatoes, chopped

4 stalks canned hearts of palm, sliced

2 avocados, peeled, pitted and chopped

5 tablespoons extra-virgin olive oil

3 tablespoons fresh lemon juice

Salt and Pepper to taste

1 (12-ounce) wedge Parmesan cheese

1/4 cup pine nuts, toasted 

Combine the arugula, tomatoes, hearts of palm and avocados in a large bowl.  Whisk the olive oil and lemon juice in a small bowl.  Season with salt and pepper.  Add to the salad and toss to coat.  Shave strips of the Parmesan cheese over the salad using a vegetable peeler.  Sprinkle with the pine nuts.  

Yield: 4 servings, or more  Linda 

Wild Arugula Left, Regular Arugula Right

SANDWICHES

Arugula is something everyone should grow. There are two kinds: the regular that goes in the cool times and the rustic or wild arugula that loves the heat.  Both are aggressive in self seeding so people need to be aware, but well worth it.  Using it in sandwiches alone is worth growing–no need to have the most expensive mustard anymore–arugula has a complex mustardy nutty taste that elevates a sandwich. The cool season, regular arugula has such lovely flowers–completely edible and bees love them too.  I was just outside and my arugula is starting to bloom and it was covered in honey bees. Susan 

Prosciutto Wrapped Greens: Whisk 3 Tablespoons olive oil, 2 teaspoons red wine vinegar, 2 teaspoons fresh lemon juice, ½ teaspoon Dijon mustard in a bowl and season with salt and pepper, add 2 tablespoons freshly grated Parmigiano-Reggiano cheese and toss with arugula to coat the greens lightly. Squeeze the greens together. Cover with thin slices of prosciutto and roll into a log.  Cut the log into 2 inch pieces on the diagonal. Delish! Martha 

PESTO

Arugula pesto is a tangy twist. Make it just as you would a regular basil pesto.  You can substitute toasted walnuts or pecans for the pine nuts. Annette 

ANYTHING

I mostly eat it raw in salads, but when I have an abundance I do it much like Kale or Swiss Chard and put it literally in most anything: a stir fry, stuffed peppers, in any sauce, in soups. We LOVE arugula, especially the heirloom kind that reseeds itself. Steve 

My sentiments on arugula echo those you already have—I love it, too (but my husband doesn’t, so I have to sneak a bit into milder salad greens.)  From a gardening standpoint, it’s one of the easiest greens to grow—I think its germination rate must be 110%, so it’s great for gardeners without much experience growing plants from seed.  The younger tender leaves have the best flavor for fresh use.  As the plant begins to bloom, the larger leaves can be tough.  However, the edible flowers are delightful in salads, dips, and spread or sprinkled on creamy soups.  And toss a handful of leaves into Tuscan bean soup—divine!  Ditto the pear salad idea.  We’re having a family celebration tonight with a composed salad starter of roasted pears with blue cheese, walnuts, and craisins on a bed of arugula with a light lemon scented vinaigrette.  Marian 

I have used Arugula and cooked with it instead of spinach!  It worked fine and had a good taste.  We just have to be creative! Andria 

NUTRITION

I don’t usually grow arugula because it’s high in vitamin K and I cannot eat it.  I have grown it for my daughter; she loves it juiced and raw in salads. Paula 

Arugula is a popular aromatic green with a mild nutty flavor and slight peppery bite. It is delicious in salads and may also be used in soups, pasta and vegetarian dishes.
Wild Arugula, also known as Rocket, is more peppery and adds a nice spicy flavor to salads. Wild arugula leaves are more serrated and peppery than regular arugula.
Arugula has more vitamin C, calcium and beta carotene than most other salad greens. foodreference.com

Vegetable Planting in January

1015Y  Texas SuperSweet Onions planted January 8, At The Demonstration Garden

Brrr…it has been cold in Dallas, Texas since our snowy Christmas day.  My thoughts have not been about digging  in the garden.  Sitting by the fireplace with a hot cup of tea and garden catalogs spread at my feet seem right for January.

The gardening calendar has other thoughts.   Potatoes and onions are ready to be planted now!  Jim and Hans  planted our onion sets last week.  Jim likes to get an early start on onions and plants them just as soon as he can find them in Dallas garden centers. 

 To grow fist size onions, you need to select the right variety, plant between January 1st and February 15th, and maintain optimum moisture and fertility. We like the  famous 1015Y  Texas SuperSweet.  Other recommendations from Texas A&M include :  Bermuda, Southern Belle, White Granex, Yellow Granex and Burgundy.

Plant your onion sets about 4 inches apart in raised furrows.  Keep them moist not wet.  At the Demonstration Garden we  add  compost to provide the nutrients onions crave. 

And what’s the payoff for getting outside in January  to plant onions?   Remember the sweet and savory onion tarts we made last May! 

Ann

Next week we will be plant potatoes, and seeds of beets, lettuce, carrots, and radishes.

Eat Your Greens!

Collard GreensAfter my transplant from Connecticut to the Dallas area twenty-eight years ago, I’ve tip-toed around the Southern idea of cooked “greens”, but other than cooking kale occasionally never really developed an interest.  However, in a recent search for a non-dairy source of calcium for aging bones, I found that greens such as collards are a great source of this mineral as well as other complementary vitamins K and A.  Collards are one of the cruciferous vegetables in addition to the better known and more consumed broccoli, kale, and cabbage.  These greens have great cholesterol-lowering, anti-cancer, antioxidant, and anti-inflammatory benefits. 

Good for your heart, good for your bones, now how to make them good to eat!  I found a great cookbook called Greens Glorious Greens! by Johnna Albi and Catherine Walthers with great information, specific preparation and cooking directions, and great recipes for over thirty of these leafy greens—from arugula to wild greens such as chicory and dandelion.

These authors, as well as Whole Foods website, the world’s healthiest foods ,call collards a nutritional goldmine.  But one more obstacle before plunging into my exploration of greens—my Dallas-born husband who dislikes cooked greens.  So with a promise of corn muffins and BBQ chicken, I made the following recipe, which is adapted from Greens Glorious Greens! 

Collard Greens and Caramelized Onions 

12 ounces Collard greens (about 6-7 cups chopped)

1 Tablespoon extra virgin olive oil

1 large onion, thinly sliced

3 cloves garlic, minced

1-1/2 teaspoon agave nectar (or 2 tsp of sugar), for caramelizing the onions

salt to taste 

Chopped GreensWash collards, remove stalks, and cut leaves in half.  Stack 5 to 6 leaves together and slice into ¼ inch strips.  Set aside. 

In large, deep skillet (or cast-iron pan) heat olive oil, add onions, and sauté for 15 minutes.  Add agave (or sugar) to onion and continue to stir for 2 to 3 minute.  Add garlic and sauté for another 2-3 minutes. 

While the onions are cooking, bring 3 cups of water to a boil in a 12-inch skillet with a lid.  Add collards, cover, and cook at a good boil for 8 to 10 minutes, stirring occasionally.  The greens are bright green, but tender, when ready.  Drain in colander. 

Stir greens into onions and garlic.  Season with salt and cook for 2 to 3 minutes until heated through, Serves 3 to 4.

Adapted from Greens Glorious Greens, page 118. 

A great new vegetable recipe to add to my collection, and—yes—my husband did eat all his greens. 

Jean

Imagine A World…

“Imagine a world, in which all children grow up with a deep understanding of the  life all around them.  Where obesity is reduced through nature play. Where anti-depressants and pharmaceuticals are prescribed less and nature prescribed  more.  Where every school has a  natural play space. Where children learn of the joy of being in nature, before they experience its loss. Where they can lie on the grass on a hillside for hours and watch clouds become the faces of the future. Where every child and every adult has a human right to the connection to the natural world and  shares the responsbility for caring for it.”

Richard Low, author of Last Child in the Woods.

“Nature Deficit Disorder”

Happy New Year from

The Earth-Kind® WaterWise Demonstration Garden

 on Joe Field Road. 

We hope you will take steps in 2013 to cure Nature Deficit Order.

 Book a trip our garden!

Excerpts from the Great American Campout website and American Academy of Pediatrics: 

  • An “indoor childhood” hurts bodies & spirits.
  • Today’s kids are more likely to “tag” a friend on Facebook than outdoors in a game of “freeze tag.”
  • Kids today run from school to activities to sports w/ barely a minute to catch their breath.  Loss of free time can contribute to stress, anxiety, & depression in children. (American Academy of Pediatrics)
  • Studies show being outdoors is the perfect anecdote.  Time in green spaces reduces children’s tension levels & enhances their social interactions, helping them to feel more connected to self and others. 

Learning in the Garden 

Sources cited:

  • Growing Food LiFE Curriculum Series
  •  Botany on Your Plate (Univ. of CA & NGA)
  •  Math in the Garden (Univ. of CA & NGA)

A Grace Academy Student Enjoying Learning and Nature At The Demonstration Garden

Using a garden helps teach the core concepts to diverse learners in an untraditional setting and grow into a relevant teaching tool. 

Simple truths about working w/ students in a garden setting: 

  • Students can better understand their environment by exploring it and hone their knowledge and skills while doing so.
  • An “outdoor learning center/classroom” creates a destination, a reason to outdoors.
  • Enhancing the outdoor learning center creates a schoolyard habitat: “If you build it, they will come.”
  • Students become stewards, stakeholders, creators by having a stake in planning and sustaining a school garden.
  • Gardening fosters teamwork, builds community, encourages sharing and understanding which in turn, creates decision-makers and problem-solvers.
  • Gardens are multi-sensory environments; students can use all of their senses to observe, predict, and understand how the world works.
  • Connections are created w/ the natural world & our region’s uniqueness.
  • Interdisciplinary learning is possible – connects Math, History, Language Arts (journaling, botanical names/Latin roots), Creative Arts, Social Sciences (bio-diversity and interdependence in plant and animal communities as in human communities), Life Sciences (nutrition, healthy choices, life skills). 

A garden setting is ripe for inquiry learning, doing & thinking rather than learning a set of predetermined facts by rote.  Einstein said the most important thing is to never stop asking questions.  Knowing how to find answers to those questions is every bit as important as knowing the answers.  

Since the early 1970s, research on how students learn Science stressed the importance of starting instruction based upon student perceptions & experiences.  In other words, you start w/ what they know or perceive to know and make meaningful connections between new knowledge and existing knowledge.  What teachers need to remember is children build their ideas over many years of explorations.  They tend to hold onto these ideas/beliefs tenaciously.  Time and countless repetitions (in large groups, small groups, or individually) are needed for them to examine new evidence, new explanations and new ideas and draw meaningful connections w/ their preexisting knowledge.  For new concepts to take root, they must make sense and fit into the students’ experiences that have been created outside the classroom. 

Unfortunately, Science is taught by “rote learning.”  No consideration is given to what science ideas students might bring to the classroom.  To cultivate meaningful learning of real world concepts, we need to draw upon their experiences, whether the experiences are misconceptions or incomplete learning, & connect the content currently being taught to their world. 

Science in the Garden can encompass the following concepts:

Humans rely upon a world of complex systems – the Earth, its ecosystems, its food systems.  Human activities impact our natural world for better or worse.  In a garden, students can grow food while maintaining a living lab.  They can investigate & monitor weather changes & the impact on a garden ecosystem.  Or, they might study decomposition, observe life cycles (seed to food, egg to butterfly), or see how matter and energy flow through ecosystems (the process of food production and the release of energy). 

Math in the Garden: allows students to hone their mathematics knowledge and skills to carry out investigations in the garden environment.  This is an untapped source of patterns, comparisons, problem-solving, measurement, number operations, Algebra, Geometry, and data analysis. 

At the base of all of this is Journaling, keeping an account of the natural world around you. Your Journal will be a guide, developed over a period of time, of noticing and noting changes, monthly and seasonally, of life cycle events.

Annette

Creamy Polenta With Sage and Roasted Wild Mushrooms

Sage In Snow

On a crisp, cold night this dish will really warm you up.

Polenta:

  • 1 3/4 cups water
  • 1 3/4 cups chicken broth
  • 1 teaspoon minced garlic
  • 3/4 cup polenta
  • 2/3 cup creme frache or sour cream
  • 1 ounce Monterey jack cheese shredded, (1/4 cup)
  • 1 ounce Parmesan cheese, freshly grated (1/4 cup)
  • 3 Tablespoons unsalted butter, melted
  • 1/4 teaspoon salt
  • 1/4 teaspoon freshly grated pepper
  • Roasted Wild Mushrooms

Preheat oven to 350 degrees. Bring water, broth, and garlic to a boil in a large oven proof saucepan over medium high heat.  Slowly mix in polenta.  Reduce heat to medium.  Cook 5 minutes, stirring constantly.  cover and place in oven.  Bake until thick, but still creamy, stirring occasionally, about 45 minutes. (add more water if mixture appears dry.)

Sage Leaves

Sage:  

  • 1/2 cup extra virgin olive oil
  • 1/3 cup fresh sage leaves
  • salt

Heat oil in a small skillet over medium high heat.  Add sage leaves. Fry until crisp, about 10 seconds.  Drain on paper towels. Season with salt. Set aside.

Combine polenta, creme fraiche, Monterey Jack, Parmesan, butter, salt, and pepper. Spoon polenta onto serving plates.  Top with roasted wild mushrooms. Garnish with sage leaves. Seve Immediately.

Roasted Wild Mushrooms:

  • 8 gloves garlic, thinly sliced
  • 3 tablespoons olive oil
  • 3 tablespoons balsamic or red wine vinegar
  • 3 sprigs fresh rosemary chopped
  • 3 sprigs fresh thyme, chopped
  • 1 pound large fresh wild mushrooms (shitake, oyster, or cremini)
  • 1/4 teaspoon salt
  • 1/8 teaspoon freshly ground pepper

Creamy Polenta With Sage

Preheat oven to 425 degrees. Line 2 baking sheets with foil. combine garlic, olive oil, vinegar, rosemary, and thyme in a large bowl. Add mushrooms and toss to coat.  Season with salt and pepper. Arrange mushrooms in a single layer on prepared baking sheets.  Roast until mushrooms are tender and slightly crisp on edges, about 25 minutes.  Serve immediately.

Linda