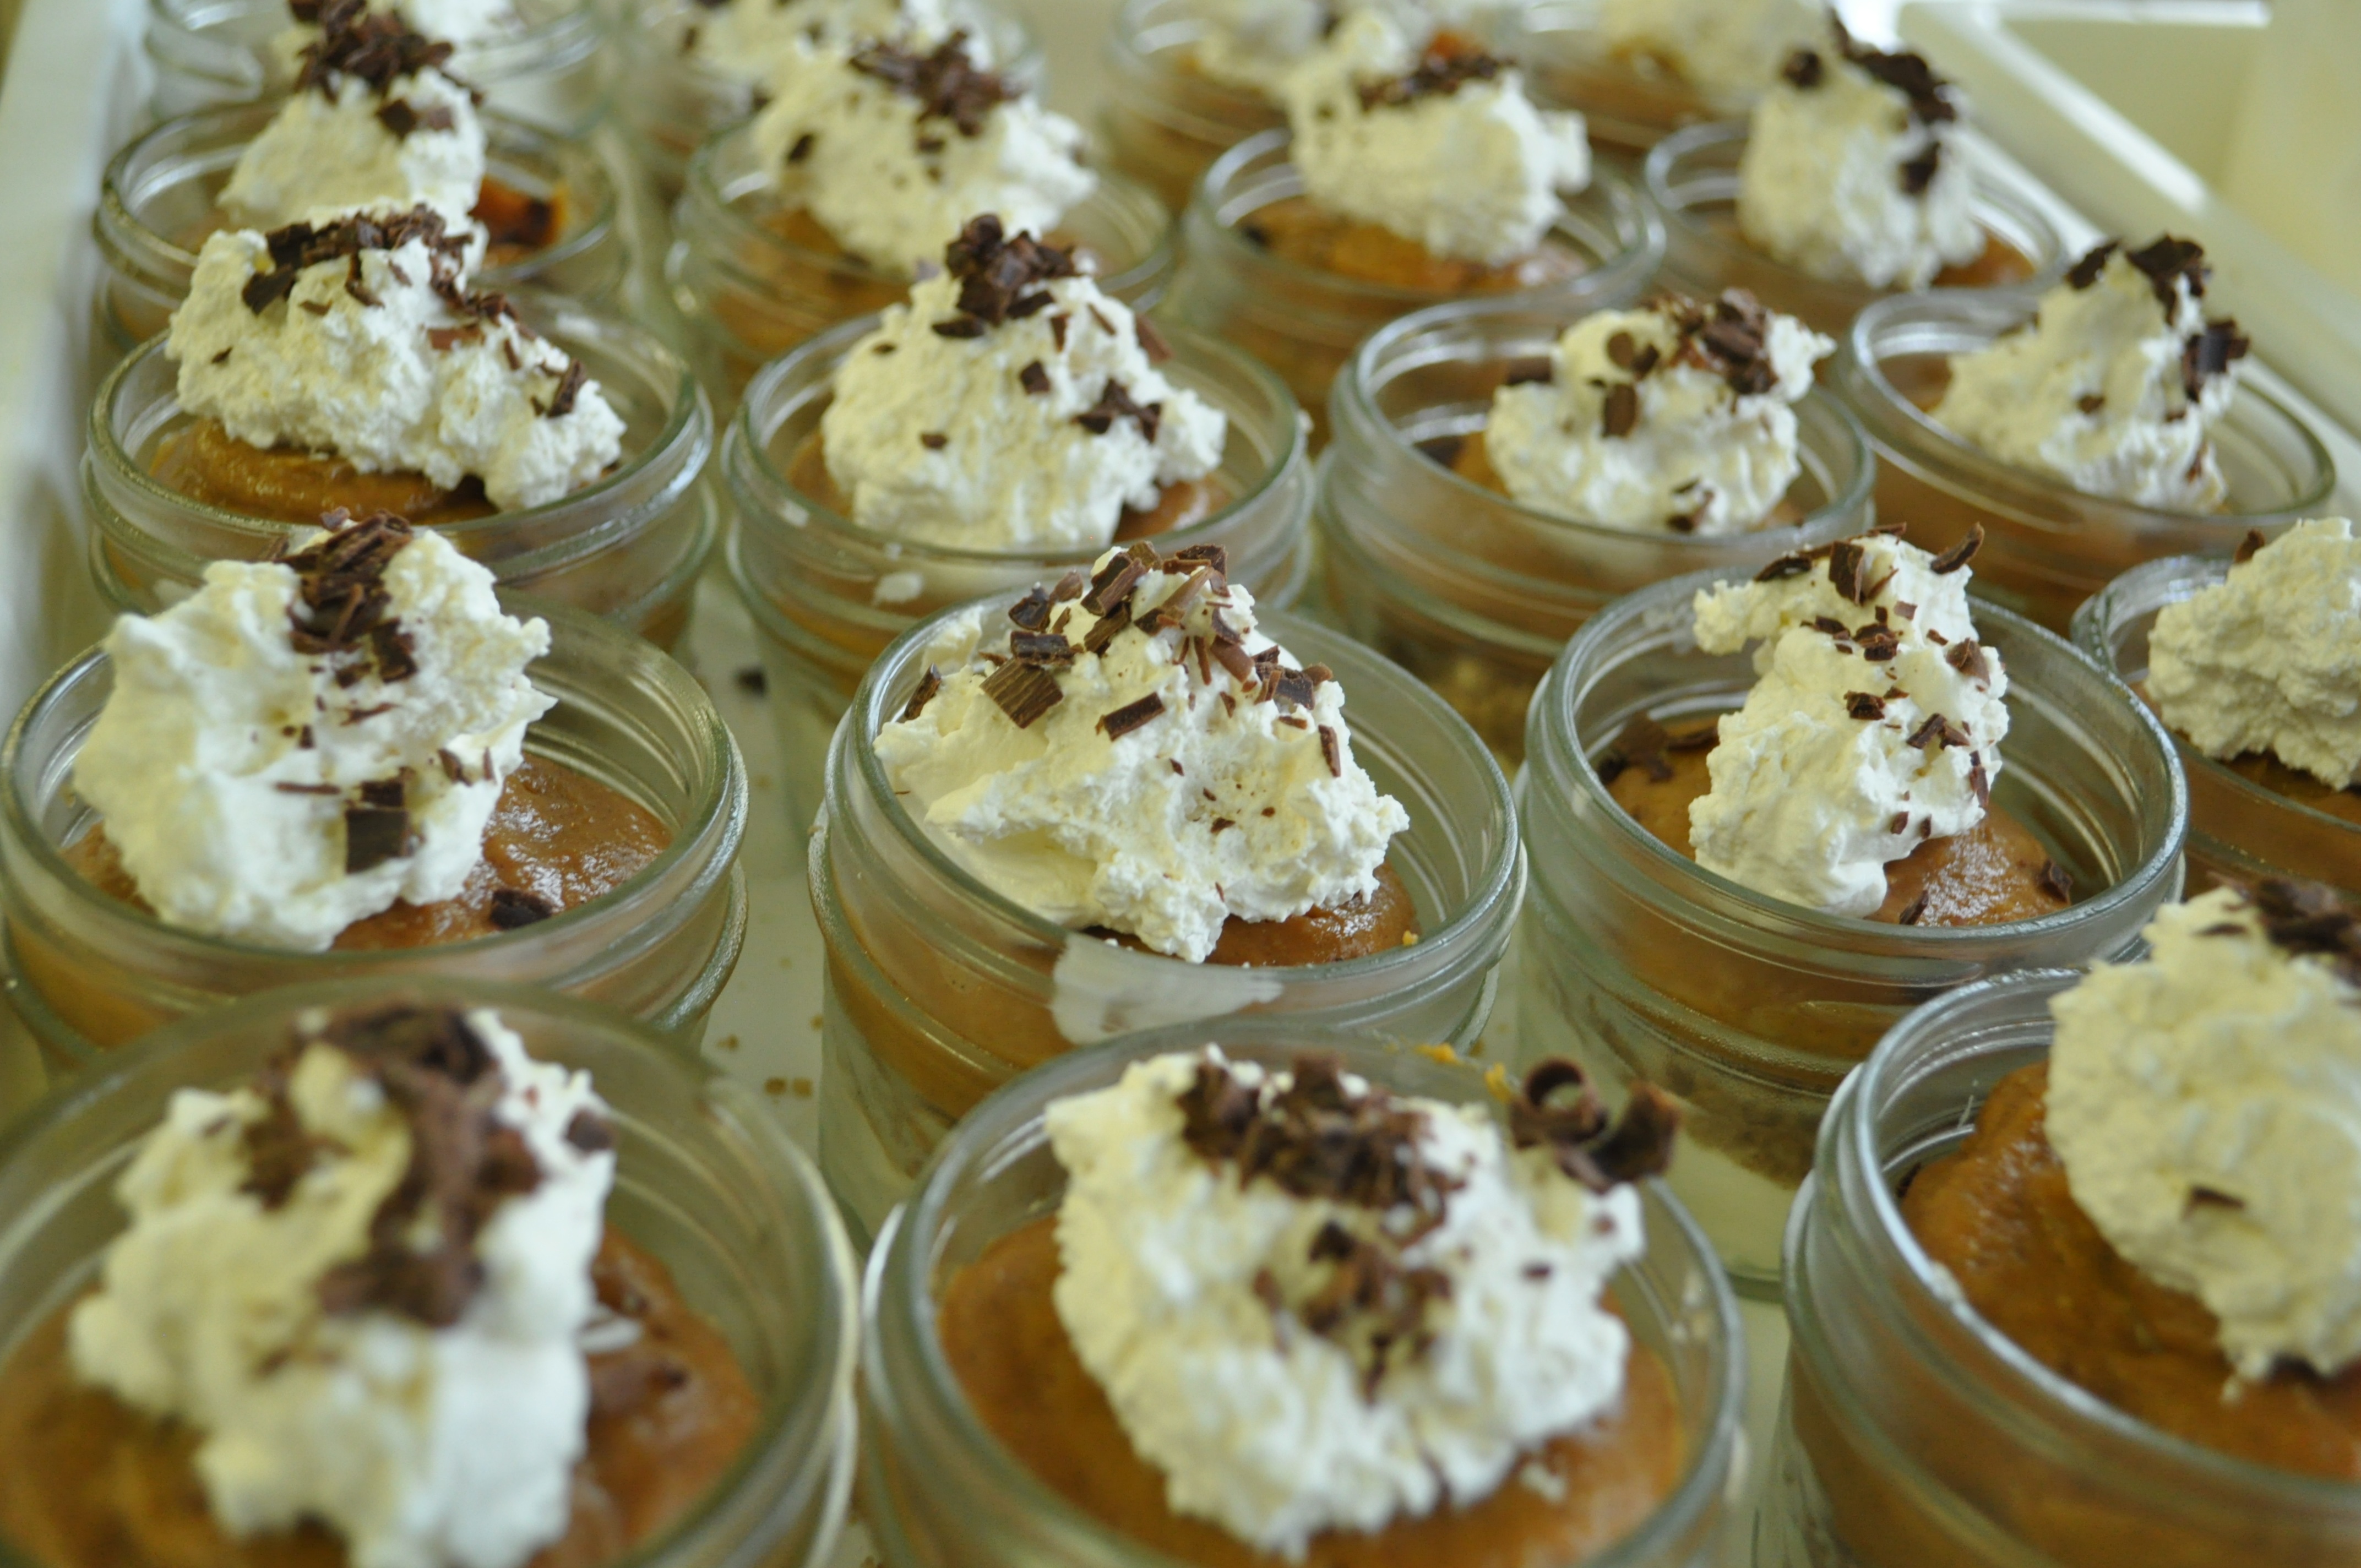
Layered Pumpkin Pie in a Jar
Ingredients:
For the graham cracker crust layer:
1 ½ cups graham cracker crumbs
3 tablespoons brown sugar
½ teaspoon cinnamon
½ teaspoon salt
4 tablespoons unsalted butter, melted and slightly cooled
For the whippy cream cheese layer and finishing dollop of sweetened whipped cream:
2 cups heavy whipping cream
1 ½ cups sifted powdered sugar
8 ounces cream cheese, at room temperature
2 teaspoons pure vanilla extract
For the pumpkin layer:
1 cup milk
1 (15-ounce) can pumpkin puree (not pre-spiced pumpkin pie filling)
2 packages (4-serving size) Jell-O vanilla flavor instant pudding and pie filling
1 ½ teaspoons cinnamon
¼ teaspoon ginger
1/8 teaspoon cloves
Optional: semi-sweet chocolate shavings to sprinkle over the top  Directions:
1. Preheat oven to 350 degrees. Place the mixing bowl and beaters for beating the cream into the freezer to chill.
For the graham cracker crust layer:
1. Stir together the graham cracker crumbs, sugar, cinnamon, and salt. Then add the melted butter and stir until evenly moistened. Spread mixture in a 9” x 13” pan and bake for 5 minutes. Stir and bake for another minute or two, or until crumbs are fragrant and nicely browned. Be careful not to burn. Remove from oven and let cool completely while you prepare the other pie layers.
For the whippy cream cheese layer and finishing dollop of sweetened cream: 1. Using your chilled bowl and beater, whip the cream until stiff. Add the powdered sugar and beat just to combine. Remove sweetened whipped cream to another bowl and set it in the refrigerator. Add the cream cheese to the same chilled bowl and cream until very smooth, about 1 to 2 minutes. Blend in vanilla. Now add half of the sweetened whipped cream back into the chilled bowl with the cream cheese, gently folding to thoroughly combine. Place the bowl of whippy cream cheese and the remaining half of the sweetened whipped cream back into the refrigerator to stay chilled.
For the pumpkin layer:
1. Pour the milk into a large bowl. Add the pumpkin, pudding mixes, and spices. Beat with a wire whisk for 2 minutes, or until very well blended. The mixture should be quite thick.
2. Fill a pastry bag fitted with a large plain round tip (ex. Ateco No. 808) with the whippy cream cheese mixture. Pipe a layer of this mixture onto the bottom of a jar, starting at the perimeter of the jar and working to the center. Lightly tap the jar on a towel (so jar doesn’t break) on the counter, to settle the mixture in. Repeat this step with the rest of the jars.
3. Sprinkle the whippy cream cheese layer with 2 tablespoons of baked graham cracker crumbs. Lightly tap the jar again to even out the crumbs. Repeat with the rest of the jars.
4. Using the same large plain round tip, fill another pastry bag with the pumpkin pudding mixture. Pipe this mixture onto graham cracker crust layer, in the same manner as the first whippy cream cheese layer. Lightly tap again and repeat with the rest of the jars.
5. Add a dollop of the reserved sweetened whippy cream (without the added cream cheese) to the top of each pie with a spoon, or pipe a more refined swirl using the same large plain round tip. Finish with a sprinkling of graham cracker crust and chocolate shavings, if desired.  *If transporting jars with their lids screwed on, allow for whipping cream not to get smashed when lid is added.
*These jars of pie can easily be made the day prior to serving. Better if chilled overnight.
Yield: 10 to 12 jars of pie
Linda