Grow Now!

Dallas County Master Gardener volunteers at the Raincatcher’s Research, Education and Demonstration Garden of Midway Hills share your concern for eating healthy during these uncertain times. We’ve put together a short list of ways that you can start growing and harvesting seasonal crops over the next few weeks and months. Here are some gardening (and recipe) suggestions to help supplement your meals with freshly harvested herbs and vegetables.

 If you do not already have a designated vegetable garden, try one of these options:

1) Find an open place in your flower bed that receives around 6 to 8 hours of sun, preferably from morning until mid or late afternoon. Give your soil a boost by adding compost. Good quality compost can be purchased at most local garden centers. Make sure you have a water source close by, and position the garden where you can keep a daily watch to head off any potential pests and weeds that could create problems if left unchecked.

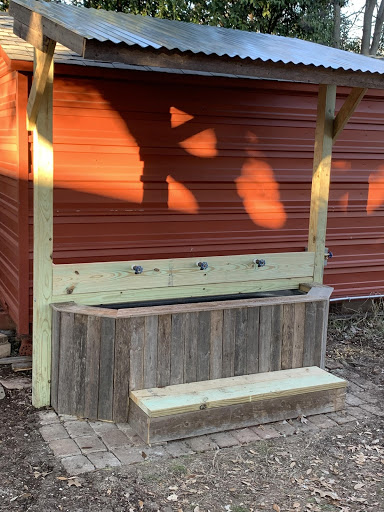
2) Create a simplified version of a raised bed using cinder blocks. Place cardboard directly over a grassy spot in your yard that receives ample sunlight, then place cinderblocks in a rectangular shape around the cardboard, starting with 5 on each side and 3 at each end. Fill the enclosed space about 6 inches above the bed border with a commercial raised bed mix, and water thoroughly to let the soil settle. Space plants or seeds according to directions. Water as needed to maintain even moisture within the bed.

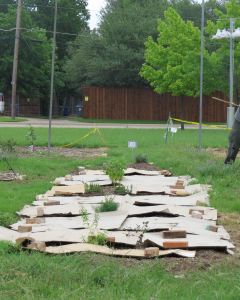
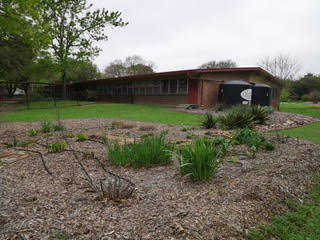
The cardboard method, a good way to smother weeds

A large cinder block garden bed

Start with 4” to 6” edible plants spaced according to label directions. Seasonal plants, including cucumbers, peppers, and tomatoes, are currently in stock at many local garden centers, but don’t stop there.

Try the following options in your new raised bed or in your existing landscape as borders and ground covers, or plant a bay laurel to grow as a shrub or small tree. 

Arugula (Eat fresh in salads, or use in dips.)

Spinach (Eat fresh in salads, sauté with scrambled eggs, or use in omelets, quiches and vegetable dishes.)

Kale (Eat fresh in salads; sauté for kale chips.)

Lettuce (Many different varieties provide texture and color in the landscape.)

Radish (Eat fresh in salads; slice thinly and serve on buttered bread for sandwiches.)

Carrot (Eat fresh in salads, roasted, or in soups and souffles. Use carrot tops to make pesto.)

Beet (Serve roasted, or grate for a cake.)

Swiss Chard (Eat fresh in salads, use leaves as a “wrap” for fresh chopped vegetables, sauté for turnovers, or add to soups.) 

Dill (Leaves can be added to salads, potatoes, meat and fish at the end of cooking.)

Fennel (All parts of the plant are edible – leaves and stalk make a wonderful flavoring for fish.)

French Sorrel (Can be cooked or used fresh like lettuce. Makes a good soup; adds zip to salads. Great on roast beef sandwiches.)

Nasturtiums (Harvest the leaves, buds and flowers anytime, and use fresh. Excellent in salads. Leaves make a great pesto.)

Artichokes (Excellent vegetable served roasted, sautéed or steamed—a beautiful and majestic plant for your garden.)

Thyme (Strip small leaves from stems and use to enhance the flavor of baked or broiled fish dishes or fish sauces. Thyme Cheese Roll: Combine 8 ounces softened cream cheese, 1 tablespoon chopped thyme, 1 tablespoon chopped parsley, ½ teaspoon minced garlic. Roll into a log and refrigerate. Serve with toast or crackers for a quick and easy snack.)

Sage (Flowers and leaves are edible; flowers are nice in salads and for making tea, and the leaves are great for cooking and making herb butters.)

Rosemary (Use with foods rich in fat such as roasted meats, poultry and fish. Add to soups and stew. Use stripped branches as skewers for your favorite grilled meats and veggies.)

Chives (Snip the leaves at ground level when harvesting. Chop and serve with salad, potatoes, pasta and cabbage.)

Oregano (Sprinkle on fresh tomatoes or use to make a sauce; adds flavor to stews and soups.)

Marjoram (Rub leaves on all kinds of meat, chop into egg dishes, stir into soups and sprinkle it over vegetables)

Basil (Plant mid to late April. Use leaves for salads, pesto and sauces. Combines well with zucchini, beans and mushrooms.)

Watercress (Harvest and use fresh in salads, soups and sandwiches.)

Purslane (Use in early spring salads. Leaves can be cooked like spinach.)

Sweet Bay/Bay Laurel (Use the leaves of this evergreen plant in soups, stews and other simmered dishes. Cook a leaf or two with dried beans.)

We hope you will be inspired to start gardening with your family and experience the joy of bringing fresh, flavorful food to your table. 

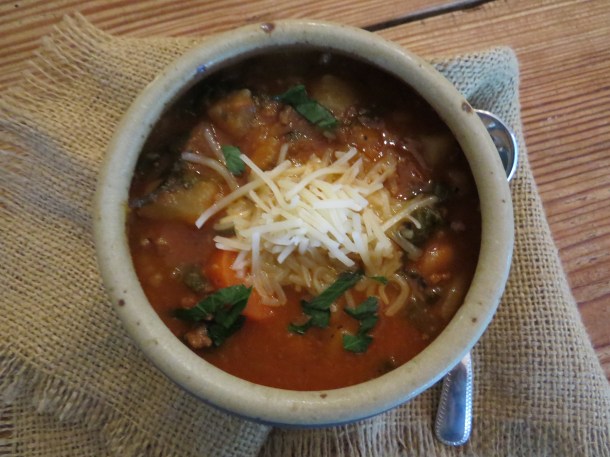
How about a healthy robust minestrone soup using fresh garden ingredients. Picture by Linda

Click here for the recipe. 

Linda Alexander and Lisa Centala with comments by Jeff Raska, Horticulture Assistant, Dallas County

Follow these planting guides: TAMU Vegetable Planting Guide

Northaven Garden Spring Planting Guide

New to gardening? Read this pamphlet, pages 13-15 have specific recommendations for veggie gardening.

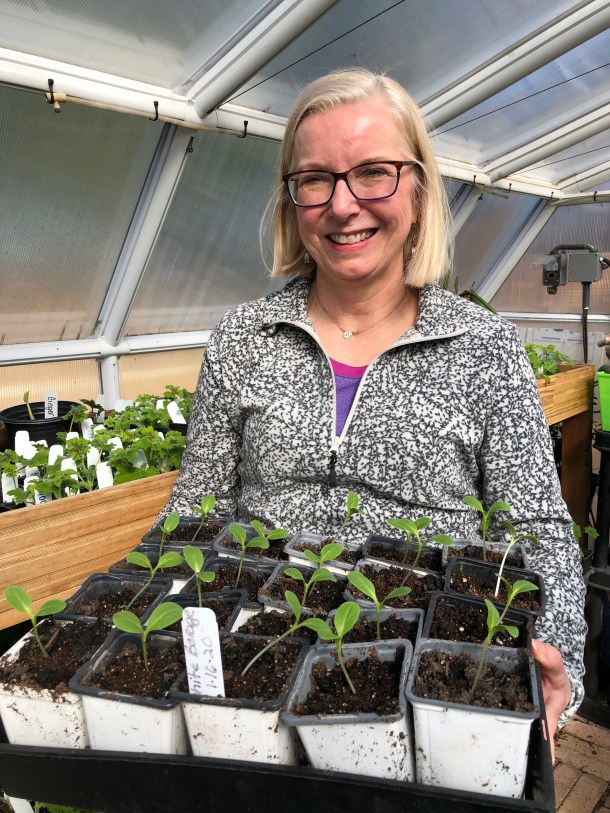
Pictures by Starla Willis


Calendulas in My Garden

Above: Calendula in Linda’s garden

There’s a new herbal flower growing in my garden that makes my heart happy. Calendula, sometimes known as pot marigold, signifies sacred affections, joy, grief and remembrance. With such a wide range of emotions, there are countless reasons to include it in your garden landscape design. 

 With hues from golden to apricot, deep yellow and bright orange, calendula flowers are eye-catching in any setting. An early morning walk in the garden will tempt you to take a handful of clippings for a lovely bouquet or gather up the flowers for some edible delicacies. 

Growing calendulas is quite simple. Plant seeds in good garden soil, keeping the ground moist until the plants appear. If planted in late summer or early fall, there’s a good chance that they will produce flowers from spring into summer. Some years it might flower almost year-round.

My calendula plants were put in the ground in mid fall, started blooming in February and are continuing to produce new buds weekly. The flowers are harvested often to use in cut arrangements and for ingredients in butter, cookies, cornbread, quiche and a scrumptious calendula cake. They can also be sprinkled on soups, pasta, rice dishes and salads. The Raincatcher’s volunteers recently sampled calendula quiche. The recipe is given below.

Above: Petals to be eaten!

In the vegetable or herb garden, calendulas encourage pollinators and other beneficial insects. If you’re looking for a plant that flourishes in cooler weather, blooms often and is easy to maintain, give this versatile herb a sunny location in your garden. 


Calendula Quiche

Above: Calendula Quiche surrounded by Calendula Flowers at Raincatcher’s Garden

Ingredients

3 cups loosely packed fresh spinach

1 tablespoon extra-virgin olive oil

4 eggs

1 cup heavy cream

¼ cup (6 ounces) soft goat cheese, crumbled

½ cup calendula petals (from about 20 flowers)

½ teaspoon salt

Directions

Preheat oven to 375˚F. Liberally butter a 9-inch pie pan. 

In a skillet over medium heat, cook spinach in olive oil until the leaves are fully wilted, about 3 minutes. Drain. 

Whisk eggs and cream together. Add goat cheese, calendula petals and salt and whisk again. 

Arrange spinach in the bottom of the prepared pie plate and pour egg mixture over the top. Bake for about 25 minutes, or until the custard is set in the center and the top is golden brown.

*Option: If you prefer, follow directions for the ingredients but pour into a prebaked pie crust.

Yield: One 9-inch Quiche

As in true Texas style, we suggest a few drops of Tabasco sauce on each slice for extra zing.

Linda Alexander

Photos by Linda and Starla Willis

Click here to learn how to pronounce Calendula correctly.

Hellebores, Helleborus x hybridus

Above: 10 Hellebores were planted here 20 years ago

Twenty years ago a California couple bought a house in a heavily wooded area of Dallas because of the beautiful Cedar Elm trees.

As they set about landscaping the shady lot, Hellebores were chosen being easy-care perennials that brighten winter landscapes and prefer partial shade. We will read later about the other good qualities of Hellebores also known as Lenten Roses.

From a few Hellebores came many. Over the years they have self-seeded and now carpet the south side of the property. Linda Alexander and I had the pleasure of walking through this garden recently with the homeowners.

Above: Hellebores under Cedar Elms

Above: A view of the Hellebore garden from the street

Above: A shady bed of Hellebores, Cast Iron Plant and Ophiopogon

These are the seedlings beneath the large leaves, it takes 3 years for these to become blooming plants.

Hellebore seedlings

Husband and wife say they mulch and leave the rest up to nature. In the last few years, husband has sprayed Miracle-Gro on the Hellebores in the spring. Every year they add mulch. Wife adds this has been their most successful gardening project.

Hellebore blooms dazzle in a variety of colors including green, white, yellow, red, black, and many variations of pink and purple. They bloom in this garden from January-March.

Pink Hellebore

More about Hellebores

  • Timing-it’s  nice to have  winter flowers and blooms that last so long
  • Beauty-nodding, cup shaped flowers, with enchanting colors
  •  Reproduction-Hellebores are self-sowing and will naturalize to make large clumps. The offspring are not always like the parent; surprises welcome!
  •  Location-Dappled shade is preferred but they can survive in full shade or with some sun. They grow in almost any kind of soil except except the extremes of overly dry soil or poorly drained wet soil.
  • Evergreen-glossy dark green multi-lobed leaves with a serrated edge and leathery texture. You may want to remove the tattered leaves during fall clean-up.

Ann Lamb

Fine Gardening gives excellent advice on growing Hellebores. Good advice: to get what you want, buy them in bloom.

If you would like to use Hellebores as a cut flower, read this article from Gardenista.


A Trip to Sanderson, Texas

Sanderson, West Texas—a beauty and a danger all its own.  Let’s take a walk through a dry stream bed on a large ranch located in the Trans-Pecos region of Texas.

It’s dry now but with heavy rains there are flash floods that race through the stream bed causing the water to quickly rise.   My nephew, Daniel, witnessed one such flash flood and cautioned, “Aunt Ann, if you had to get across you would be killed.”

Ranch property in Sanderson, Texas

In spite of the rugged conditions, unusual desert plants courageously endure. The wildflower, Apache Plume, provides a bit of softness. To see Apache Plume in bloom, click here.

Apache Plume

Texas Sotol finds it’s niche in solid rock.

Green Sotol

And even honey bees find a place to start a hive.

Bee hive in rock above a stream bed

Creosote bush, one of the most drought tolerant plants in North America, survives and even thrives in the region’s adversity. To cope with lack of water, the leaves drop off and the bush can live for two years without a drop of rain.  Creosote leaves have a pungent, oily smell. The oil has been used for centuries to create hand salve. And of course, dry hands and West Texas go hand in hand!

Cresosote Bush

Sanderson was designated the “Cactus Capital of Texas” by the state legislature in 1999 for its abundance and variety of desert dwelling plants such as the claret cup, horse crippler, fish hook, barrel and prickly pear cactus.

Prickly Pear Cactus

Goodbye for now to a land of diverse plants and topography. This Sanderson sunset punctuated by faded Sotol spikes ushers in the night.

Sanderson at sunset


Ann Lamb

More Seed Starting Tips

Gail Cook has been a Master Gardener since 2003. She has worked at The Raincatcher’s Garden for many years and now has a new job with us. She is planting herb, flower and vegetable seeds. It’s a perfect job for her; she a nurturer. 

Gail, I heard you are doing a wonderful job with seed starting for the edible landscape. In December, I had the privilege of hearing from Jim about his seed starting methods.
I was wondering what equipment you use. Seed starting mats? Grow lights?Any tips you want to give our blog readers about seed starting. Do you mind letting me know of the potting mix you use? Do you purchase or make your own?

Hi Ann, How nice to hear from you!

Honestly, I’m in one of my happy places starting seeds and, with everyone’s help, we’re doing well with the seedlings. I don’t even have a back yard these days, just a long narrow brick patio with a bit of sun and a small utility deck with a 4-shelf zip-up greenhouse.

I have one warming mat and it does speed things up. To save time ( I can plant 72 seeds in minutes this way)and space, I’ve been starting most seeds in 72-count plug trays from amazon in clearance and seed starting mix from Walmart. There are 300 plugs germinating on my upstairs bathroom counter now. Then I pot them up in 4” pots right after germination.

I’m still working on mixing potting soil with perlite and/or vermiculite to get a lightweight soil because I haven’t found a brand I love yet. Northaven Gardens has a recommendation in a recent email that I plan to try when I can look it up. Some seeds go straight to the greenhouse once planted, depending on weather. It can be tricky to keep the soil at the just right level of moisture but we haven’t had a problem with damping off, even though they stay fairly wet with almost daily misting.

I’m also experimenting with diluted organic liquid  fertilizer after the 2nd set of leaves appear to get them to transplant size as quickly as possible. This requires patience. 

 The Raincatcher’s greenhouse is a huge help during colder weather, as are the other edible garden volunteers who check on the seedlings. I’ll come back to you on soil mixes. Don’t hesitate to remind me. Busy time at work just kicked in, another reason I enjoy the seeds.

Best, Gail

Gail Cook bringing borage seedlings to the Raincatcher’s greenhouse.

Gail writes again:

A couple more tips: Peat moss can be difficult to moisten so add water to the seed starting mix before filling pots. A bucket and your trowel are useful for mixing. 

When using a heat mat indoors or a greenhouse on warm days, monitor closely, preferably twice a day. The soil dries out very quickly and seedlings will fail to germinate or grow. Seedlings should be removed immediately from the heat map as they germinate, as they no longer need the warmer temperatures.

Gail’s Greenhouse


This little greenhouse is from Tuesday Morning  and is on it’s 4th winter. It is in a protected area and doesn’t get much direct sun. There are a few patches over tiny holes but it still works. I’ll probably buy another next year.

 My husband has started referring to the seedlings as our children because they are taking up so much of my time.                                                        


If you are feeling overwhelmed with all the information and purchase recommendations, Gail suggests starting with easy lettuce and greens for the first season. Simple can be better for beginners. Have fun!

Thank you, Gail.

Ann Lamb


Seed Starting Indoors

Jim Dempsey has been starting seeds indoors at Jim and Martha’s house for about 25 years.  Martha indulgently clears space, putting away her craft tables, so Jim can have room for this project every year. He grows tomatoes and peppers and several varieties of flowers from seed to get ahead of Mother Nature and have sturdy seedlings ready to transplant into the spring garden before it gets too hot.

And there’s also the issue of variety. Jim says you’ve never seen so many choices. He likes to order tomato seeds from Tomato Growers and flower seeds from Park Seed and Burpee. Along with Celebrity tomatoes, he selects a few heirloom tomatoes, cherry tomatoes and seeds of early varieties( those that mature within 52 days). Last year one of his successful selections, a yellow pear tomato, was so productive; he just got tired of picking them.

Jim with knitting needle for planting seeds, and journal and plant containers

Materials Needed:

Journal: Jim suggests keeping a journal so you have some idea of what works.  For instance, He realized he was starting seed too early and has now set his start date as February 1st for seeds for the spring garden.

Containers and seed tray

Seed Starting Mix: Jim uses Miracle-Gro potting soil which contains fertilizer. You can mix your own potting soil with a 50-50 combination of fine sphagnum peat moss and vermiculite and fertilize with  fertilizer diluted to 1/2 strength.

Seeds

Plastic wrap or plastic cover

Plant Labels-Always label your pots as you plant the seeds

Grow Light

Heated Seed Mat-Jim did not use a seed mat until 4 years ago when Dorothy, another Master Gardener, gave hers to him. He says it helps his tomato and pepper seeds germinate.

Getting Started:

Fill the cells or pots with moist germinating mix to about an inch below the top.  The soil mix should be moist not soggy.

Jim uses one of Martha’s knitting needles to make the holes for the seeds. Follow seed package directions for planting depth. He uses the blunt end of the knitting needle to tamp the seed down. Seed to soil contact is important.

He suggests one seed per cell when using fresh seeds. 3 seeds per cell for older seeds.

Cover the seed tray or flat with saran wrap or a plastic cover. This keeps the soil mix from drying out. Check it every day and add water to the plant tray from the bottom if the soil begins to change color which means it needs water.

Place the seed tray near a bright, sunny window and/or use a grow light.

The grow light should be placed close to the top of the cover or plastic wrap.

Jim’s seed flats with grow lights

It usually takes 7-10 days for the seeds to germinate. Take the plastic wrap off when the seedlings emerge.

Seeds germinate at varying temperatures.  Plan to use a seedling heat mat if needed.

Seedling Heat Mat

Transplant seedlings into 4 inch pots when you have your first two sets of true leaves.

Before placing your new seedlings in the garden they must be hardened off. Start by putting the new plants outside for a few hours in the shade. Then let them stay outside overnight and then for a few nights. The night temperature should be in the 50° range.


Thank you, Jim, for giving us your time tested instructions and personal tips for starting seeds indoors. You have inspired me to start tomatoes on my window sill!

In the next few days, Gail Cook who is starting seeds for the edible landscape will share with us.

Ann Lamb

Blood Orange Cake with Cardamom and Sugared Rosemary

Have you “sugared” your rosemary this year?

Neither had I. Until we went to our nephew’s wedding last weekend in Tucson, Arizona, sugaring rosemary wasn’t on my list of things to accomplish for the new year. But then, everything changed.

The morning of his wedding was one of those sun-drenched, crystal clear days so typical of winter in southern Arizona. It was a wonderful day to be outdoors. After a mid-morning breakfast, we took a short drive to see the charming 1929 casita he and his bride-to-be had purchased only a few weeks prior to the wedding. Driving down a tree lined, winding road we caught a glimpse of the property.

As is common in the desert, his one-half acre yard was missing the lush lawn and greenery that is found in Dallas. Instead, pebbles and stones provided the foundation for a lovely display of cactus and willows. Citrus trees dotted the landscape with their yellow, orange and lime green polka dot affect. Walking along the enchanting pathways, we felt the serenity and peacefulness of this quaint desert setting.

But it was the blood orange trees that called my name. They were putting on a spectacular show with colorful hues of red and orange. Branches were drooping with the weight of a plentiful crop. It was time for harvesting and I was ready to take on the task. With clippers in hand and a 6’ 4” husband by my side, we harvested our way through every blood orange tree on the property. It was a delightful experience.


Once back in Dallas, and thanks to a sister who drove out for the wedding then delivered our blood oranges a few days later, we are enjoying our bushel basket full of my favorite citrus fruit.

Linda and the blood orange tree.

Art harvesting blood oranges.


Anxious to try a recipe that I stumbled across right before Christmas, our Arizona trip gave me the main ingredient; blood oranges. After a little experimenting, I finally settled on the combination of two similar recipes and prepared Blood Orange and Cardamom Cake for my husband’s birthday this weekend. If you’ve never made a blood orange cake accented with the fragrance of ground cardamom, be prepared for a flavorful and moist treat.

Linda’s Blood Orange Cake with Cardamon and Sugared Rosemary

*Note: Many local groceries are currently hosting citrus-fests, etc. Now is a good time to use those sassy little blood oranges in your favorite recipe. Or, search the internet for a blood orange cake recipe. There are some fun ones to choose from. Just don’t forget the “sugared rosemary” for a nice Texas finish!

Linda Alexander

To Make Sugared Rosemary:
Dip fresh rosemary sprigs into a cup with water. Drip off excess and set on a parchment lined baking sheet. Generously sprinkle the wet rosemary sprigs with sugar, flip them over and repeat. Allow to dry for about an hour or more.

If you would like the blood orange cake recipe, please let us know in the comment section.

Giant Red Mustard, Ornamental and Edible

The Dallas Arboretum chose Giant Red Mustard as a signature plant this year. It’s an ideal choice because it fits in with the aesthetics of the garden and the mantra of the Arboretum’s edible landscape, called A Tasteful Place. You see, Giant Red Mustard is an ornamental edible mustard.

The  maroon leaves blended perfectly with plantings of lorapetalum and palms, pansies and cardoon at the entrance to the Arboretum.

All over the grounds, pots were planted with the mustard as an accent. This planting below was especially beautiful with the sabal palm fronds framing it and the frilly chartreuse leaves of Mustard “Mizuna” at the base.

In the Arboretum’s edible garden, a long lane of mustard led your eye to the Dallas skyline. Do you see some of our downtown buildings in the distance?

It wouldn’t have been right to taste the leaves while strolling through the Arboretum; but now that I have bought some of these plants for my garden, I can vouch for their spicy taste.

Here is what Park Seeds says about this Giant Red Mustard:

“At last, a Mustard Green so showy it just may do for this nutritious family what Bright Lights did for Swiss Chard — put it in every garden and on every table of gardeners who love bold colors and fresh flavor in their veggies! Red Giant is a brilliant maroon with deep green midribs, so showy you may just have to plant two crops — one in the veggie patch and one along the walkway or in your annual border!

These leaves are slightly textured for a better bite and good holding power. The flavor is zesty and full, with a good bite that you just can’t find in store-bought mustard greens. Imagine Red Giant flanking your Pansies and cheery Mums in the fall garden, or nestling beside bold Ornamental Cabbage and Kale. Or put it in bright containers for an unforgettable patio or porch display!

And because you pick this mustard leaf by leaf for eating (instead of uprooting the entire plant, as you do for head lettuce), you can enjoy the fine display of color for many weeks! Frost just improves the flavor and color.

Sow seed outdoors in early spring or, for fall crops, 6 to 8 weeks before first fall frost. Space seedlings 1 to 2 inches apart in rows 15 inches apart.”

Giant Red Mustard will be in my garden next year. Will it be in yours?

Ann Lamb

Read about Raincatcher’s edible landscape:

Edible Landscaping, Here’s What You Plant

Orphaned No More-Our Incredible Edible Landscape Project

Learning To Plant Outside The Lines

and don’t forget to plan a trip to the Arboretum for Dallas Blooms February 29-April 12, 2020.

Merry Christmas From The Raincatcher’s Family!

December 21, 2019

Christmas Cactus and National Poinsettia Day

Today being National Poinsettia Day reminded me of  other Christmas flowers, like Christmas cactus and a very good writing by our dear Carolyn Bush.

She is no longer with us but her writings live on! Enjoy!

They may go by many names, but whether you call them Weihnachtskaktus (German), Cactus de Noël (French), Cacto de Navidad  (Spanish), Thanksgiving Cactus (American), Holiday Cactus (US) or even Crab Cactus (referring to the clawed ends of the stem), you can’t go to any garden center or grocery store this time of year without being tempted to buy a Christmas Cactus (Europe/US/Canada).   But just how do you keep them healthy—and, as importantly, get them to bloom again next year.  Like poinsettias, another holiday flower, there’s a trick to that.

What do You Know-This is Actually a Thanksgiving Cactus

What do You Know-This is Actually a Thanksgiving Cactus

According to Clemson Cooperative Extension, Thanksgiving cactus (Schlumbergera truncata) and Christmas cactus (Schlumbergera bridgesii) are popular, fall- and winter-flowering houseplants native to Brazil, where they grow as epiphytes on tree branches in shady rain forests.  Their flowers are available in a wide variety of colors including red, rose, purple, lavender, peach, orange, cream, and white.

Strangely enough, what we call “Christmas cactus” and find most often in stores starting around November is most likely the Thanksgiving cactus  (Schlumbergera truncata), as it blooms almost a month before Schlumbergera bridgesii.  If you really want to impress your friends with your horticultural knowledge, the way to tell the two apart, according to the Clemson website, is to “look at the shape of the flattened stem segments, which are botanically called phylloclades.  On the Thanksgiving cactus, these stem segments each have 2 to 4 saw-toothed serrations or projections along the margins. The stem margins on the Christmas cactus are more rounded.

A second method to distinguish between these two Schlumbergera species is based on the color of the pollen bearing anthers. The anthers of the Thanksgiving cactus are yellow, whereas the anthers on the Christmas cactus are purplish-brown.”

Since Holiday cactus originated in shady rain forests, it is best to grow them in light shade.  The secret to good repeat flower production involves temperature regulation (do not let the temperature go over 90 degrees once the flower buds appear) and photoperiod (length of day and night) control.  Fourteen hours or more of continuous darkness each day for at least six weeks is required for complete bud set to occur.  Street lights, car lights or indoor lightening can disrupt the required dark period.  My mother, who once grew a Christmas cactus so large and with so many buds that she donated it to a horticultural center when she moved, would put her Christmas cactus in a dark closet every night for six weeks starting in September.

Watering and fertilizing the Christmas cactus is fairly easy.  Though Holiday cactus can tolerate being somewhat under-watered during the summer, once buds appear the soil should remain slightly moist or the buds may drop.  Clemson recommends fertilizing once monthly with a dilute 20-20-20 fertilizer from the time new growth starts in the early spring.  As Holiday cactus have a higher requirement for magnesium, Epsom salts (one teaspoon per gallon of water) can be used also, but not applied at the same time as the other fertilizer.  The plants do best grown in well-drained soil and like being somewhat pot bound.  The most common problem is over-watering which produces root rot.

Christmas cactus is easily propagated by cuttings, so if you are looking for a present to give to your gardening friends, you might try growing them yourself.  However, whether you want to go to all the trouble of getting them to bloom or whether you just want to consider your Christmas cactus as a “holiday annual plant,” go ahead and purchase that beautiful Christmas cactus at the store.  After all, what says “Holiday” to a gardener more than poinsettias and Christmas cactus.

Carolyn Bush

Picture by Starla