 Iced Herb Gazpacho
This recipe first appeared in the Dallas County Master Gardener Association cookbook, ‘A Year on the Plate’ and on our blog in 2016. It remains our very favorite for recipe for gazpacho. The addition of 5 fresh herbs gathered from the garden give it an exciting boost of flavor.
Ingredients
6 large tomatoes, quartered (peel, if desired)
4 cloves fresh garlic, pressed
¼ teaspoon red pepper flakes
¼ cup red wine vinegar
¼ cup olive oil
½ cucumber, peeled and chopped
2 scallions, chopped
1 sorrel leaf, deveined and coarsely chopped
2 sprigs fresh basil
3 sprigs salad burnet
3 sprigs cilantro
3 sprigs parsley
Salt and fresh ground black pepper, to taste
Cucumber slices and fresh thyme sprigs for garnish
Directions
Roughly puree tomatoes, garlic, cucumber, red pepper flakes, vinegar and oil in the workbowl of a food processor. Leave some texture to the ingredients.
Add the herbs and pulse just until chopped. Do not “blend” or mixture will become too brown.
Refrigerate overnight to allow flavors to blend. Serve slightly chilled or at room temperature. Garnish with a cucumber slice and a fresh thyme sprig.
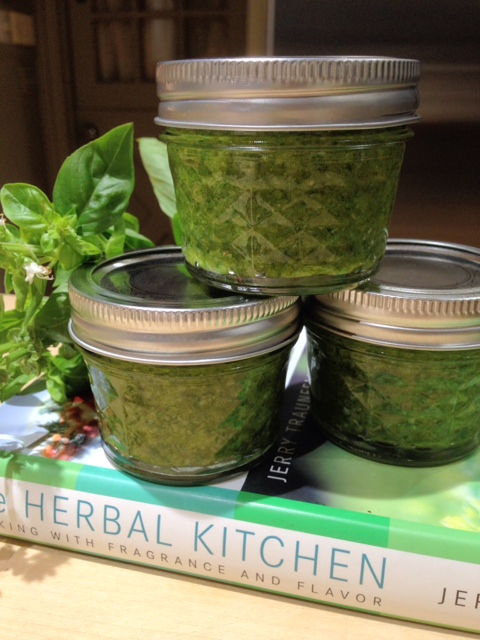
Every Herb Pesto
When selecting recipes for our cookbook, the testing committee concluded that this was the most delicious pesto they had ever tasted. A perfect combination of seven garden-fresh herbs elevates the flavor profile to superior status. (Chervil is the ‘tricky’ herb. Early to late fall, and then again in spring, is when you typically find it growing in our garden).
Ingredients:
½ cup Marcona almonds, toasted
2 cloves garlic, peeled
1 cup fresh spinach leaves
½ cup grated Parmesan cheese
½ cup fresh cilantro leaves
½ cup fresh parsley leaves
¼ cup basil leaves
¼ cup fresh tarragon leaves
⅛ cup fresh mint leaves
1 tablespoon fresh chervil leaves
2 tablespoons chopped fresh chives
Zest of lemon
Juice of 1 lemon
¾ cup canola oil
¼ cup extra-virgin olive oil
Kosher salt and freshly cracked black pepper
Garlic-rubbed crostini, optional
Heirloom tomatoes, chopped, optional
Directions:
- Blend the almonds and garlic in a food processor until fine. Add the spinach, cheese, herbs, lemon zest and lemon juice to the food processor. Blend the herbs just enough so they are mixed, about 3 seconds.
- Add the canola oil and olive oil while the food processor is on a low setting. Season with salt and pepper. Blend to desired consistency.
- Transfer the pesto to a serving bowl. Place the chopped tomatoes on top of the crostini if using and top with pesto.
Yield: 2 cups
Note: Any leftover pesto should be placed in a bowl and covered with plastic wrap. Press the plastic wrap right on top of the pesto and refrigerate.

Above: Swiss Chard and Black Olive Tart
Black Olive and Swiss Chard Tart
In her beloved cookbook, ‘Pedaling Through Provence’, Sarah Leah Chase takes you on a technicolor journey through the sun-blessed cuisine of the Mediterranean. She calls this savory version of the tart, “love at first and last bite”.
Pastry Ingredients
1 ¼ cups unbleached all-purpose flour
1 ½ tablespoons minced fresh rosemary
Pinch of sea or coarse salt
8 tablespoons (1 stick) chilled unsalted butter, cut into small pieces
2 teaspoons imported Dijon mustard
2 to 3 tablespoons ice water
Filling Ingredients
1 large bunch Swiss chard (about 1 pound), washed, stems and thick center ribs removed, leaves patted dry
2 tablespoons olive oil
1 large onion, minced
3 cloves garlic, minced
½ teaspoon dried thyme
Pinch of grated nutmeg
½ cup freshly grated Gruyere cheese
2 large eggs
½ cup light cream or half-and-half
Sea or coarse salt and freshly ground black pepper, to taste
2 cups pitted Nyons or Kalamata olives
2 tablespoons pine nuts
Directions
Make the pastry: Place the flour, rosemary, salt, and butter in a food processor and pulse until the mixture resembles coarse meal. Add the mustard and enough ice water so that the dough begins to form a ball as the machine is pulsed on and off. Gather the dough into a flat disk, wrap it in plastic, and refrigerate for at least 30 minutes.
Meanwhile, make the filling. Cut the Swiss chard leaves into ½-inch-wide strips. Heat the olive oil in a large skillet over medium-high heat. Add the onion and sauté until soft and translucent, 7 to 10 minutes. Add the chard, garlic, thyme, and nutmeg. Cook until the chard leaves have wilted and any water given off has evaporated, 5 to7 minutes. Remove from the heat and gently mix in the cheese.
Beat the eggs and cream together in a mixing bowl and then fold in the chard mixture, blending well. Season with salt and pepper and set aside.
Preheat the oven to 400˚F.
On a lightly floured surface, roll out the chilled pastry dough to form a 12- to 13-inch circle. Transfer to an 11-inch tart pan and trim and crimp the edges decoratively. Spread the chard filling evenly in the tart shell. Arrange the olives in concentric circles over the top, pressing lightly into the filling. Sprinkle the pine nuts in between the olives.
Bake the tart until the crust is golden and the filling is set, 30 to 40 minutes. Serve hot, warm or at room temperature.
Yield: Serves 6 to 8 as a luncheon or 12 to 14 as an appetizer.
 Green Herbs and Butterhead Lettuce Salad
This recipe and the from award-winning cookbook author, Georgeanne Brennan, inspired us to get busy growing, harvesting and using herbs daily. While one delicate herb, sweet cicely, succumbed to our summer heat, plans are to include it in our fall garden. Stay posted for updates.
Ingredients
¼ cup extra-virgin olive oil
1 tablespoon chopped shallot
2 tablespoons fresh lemon juice or red wine vinegar
½ teaspoon salt
½ teaspoon freshly ground black pepper
1 head butterhead lettuce, leaves separated
1 cup fresh chervil sprigs
½ cup fresh flat-leaf parsley leaves
¼ cup small, tender fresh sorrel leaves
Directions
In the bottom of a salad bowl, combine the olive oil and shallot and stir together. Whisk in the lemon juice or vinegar. Taste for balance. Add the salt and pepper and taste again, adjusting as desired.
Tear the lettuce leaves into bite-sized pieces, and put them into the bowl along with the chervil, parsley and sorrel. When ready to serve, toss well.
Yield: Serves 3 or 4
Herb-Seasoned Croutons
Ingredients
8 slices day-old coarse country bread, each about 1 inch thick
¼ cup extra-virgin oil
2 cloves garlic, minced
½ teaspoon salt
1 tablespoon minced fresh thyme
1 tablespoon minced fresh rosemary
1 tablespoon minced fresh oregano or sweet marjoram
Directions
Without removing the crusts, cut the bread slices into 1-inch cubes. In a large skillet, heat the olive oil over medium heat. Add the garlic and sauté until translucent, 1 to 2 minutes. Add the bread cubes, reduce the heat to low and cook slowly, turning once, until golden and crusty, 4 to 5 minutes on each side.
Sprinkle the cubes with the salt, thyme, rosemary and oregano or marjoram. Turn a few times in the pan to coat evenly. Using a slotted spoon, transfer the croutons to paper towels to drain and cool. To store, put in a paper bag, fold the top over several times and keep for up to 1 week.
Yield: Makes About 32 Croutons, About 4 Cups
 Raincatcher’s Garden Summer Ratatouille
There are countless recipes for Ratatouille. However, this simple and colorful version ‘wowed’ guests at our ‘Herbs of the Mediterranean’ Grow and Graze event. Don’t let summer pass without making this one!
Ingredients
3-4 baby eggplants
3-4 medium tomatoes
1 yellow zucchini squash
1 green zucchini squash
1 yellow straight-neck squash
2-3 shallots
Olive oil, to taste
Freshly ground black pepper, to taste
Endless Summer Tomato Sauce
Several sprigs of fresh oregano
Directions
Pour 1 cup of tomato sauce into the bottom of an 8- to 9-inch baking dish.
Using a mandolin, slice first six ingredients thinly and evenly approximately ¼” thick. Make mini stacks using one of each sliced vegetable. Arrange a few stacks at a time into the prepared baking dish forming concentric spirals from the outer edge to the center. Fan out slightly allowing top part of vegetables to be seen. Use any leftover slices to fill the center.
Drizzle with a small amount of olive oil and season with fresh pepper. Bake at 350˚F until vegetables are just soft to the touch but not overcooked. Check at 20 minutes.
Options: Fill center with goat cheese just as dish comes out of the oven. Spoon sauce over the top and serve with a crusty slice of bread.
 Olive Oil Cake
You seldom here about this intensely moist and flavorful cake served during the dessert course. We hope to change you mind. Restaurant owners, Jennifer and David Uygur shared their recipe in the Dallas Morning News. Each slice was topped with a generous dollop of lavender-infused whipped cream and a sprinkling of fresh, locally grown blueberries.
Ingredients
2 cups flour
½ teaspoon baking soda
½ teaspoon baking powder
¼ teaspoon sea salt
3 large eggs
1 ½ cups sugar
1 cup fruity olive oil
1 ½ cups whole milk
3 tablespoons microplaned mixed citrus zest (lemon, orange, grapefruit)
1 teaspoon finely chopped fresh thyme leaves
Directions
Heat oven to 360˚F (this is correct) if using a 10- to 12-cup Bundt pan.
Heat oven to 350˚F if using a 10-inch cake pan with removable bottom.
Sift flour, baking soda, baking powered and salt together into a medium bowl. In a large mixing bowl, whisk the eggs with the sugar, then add the oil and mix until homogeneous.
Add the milk, zest and thyme. Gently mix in the flour and pour into a greased and floured 10- to 12-cup Bundt pan. (If using a 10-inch cake pan with removable bottom, grease, line with a parchment circle, then grease again and flour).
Bake for about 45 to 50 minutes, until a tester comes out clean (baking times vary depending on oven and pans, so keep an early eye on it). Place on a rack to cool. After 10 minutes turn cake out of the pan onto rack and let cool completely. Slice and serve on a plate. Garnish with your choice of toppings; whipped cream, whipped crème fraiche, fresh berries, sliced peaches or apricots.
Yield: Makes 12 servings.
Linda Alexander


